Site Data
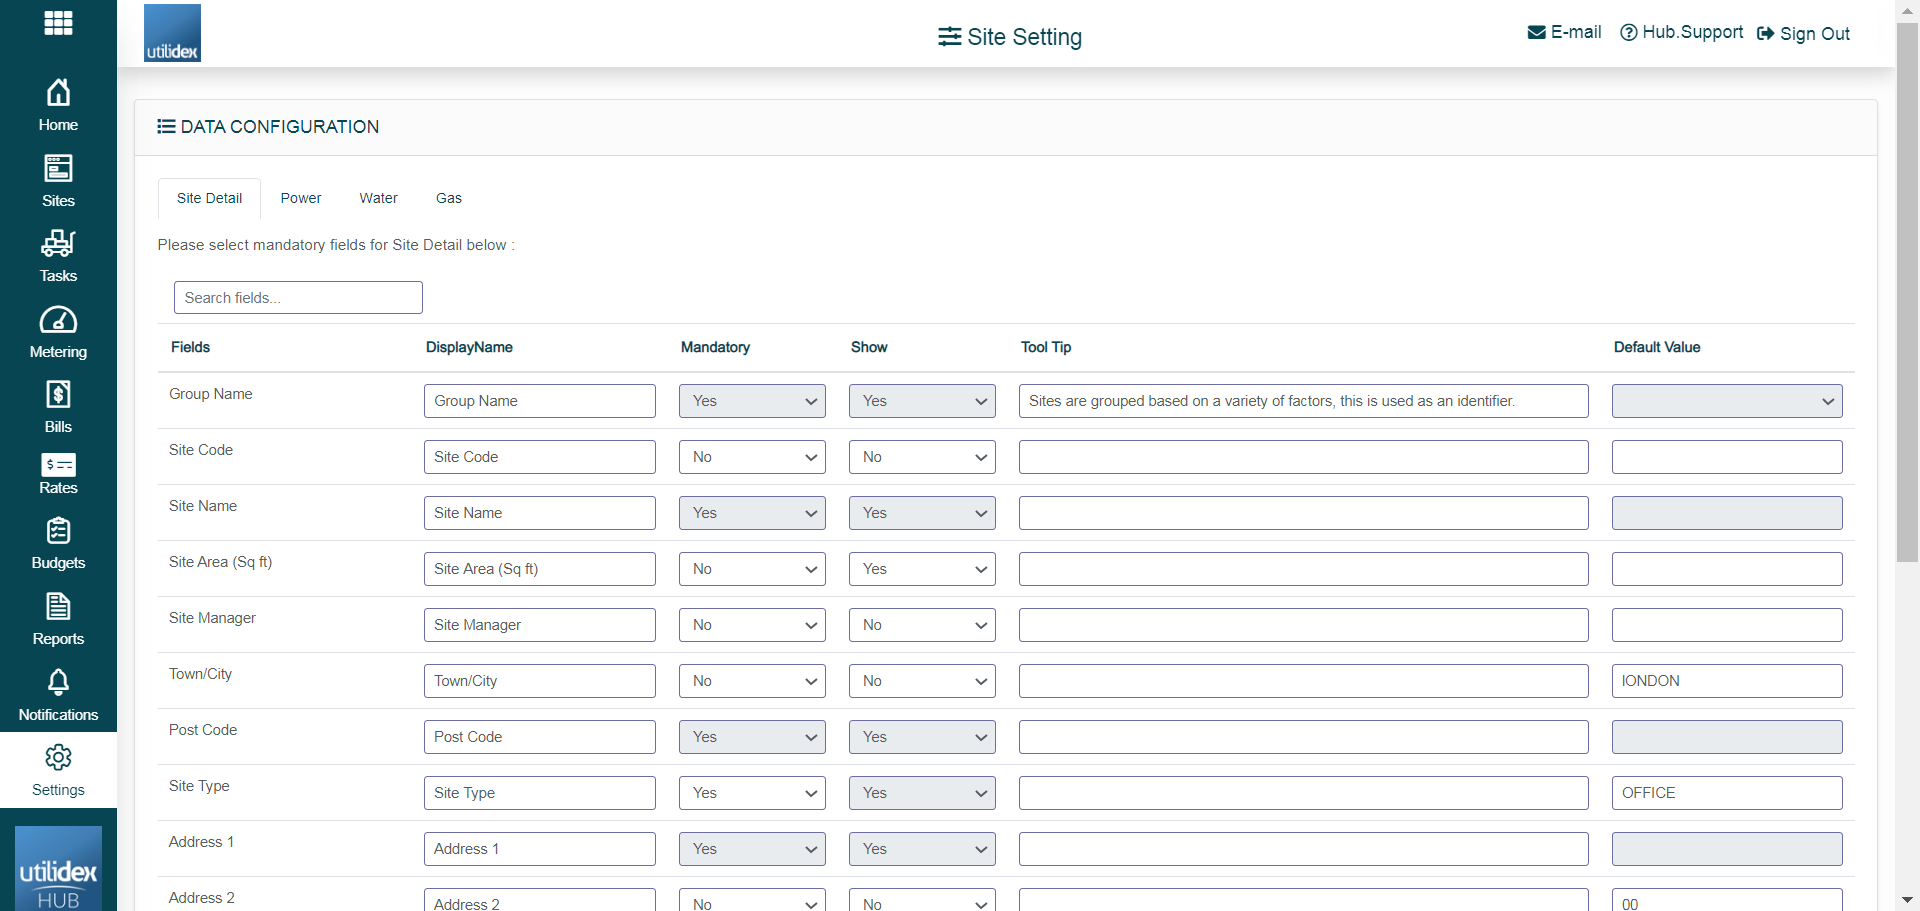
The site data configuration screen is where users (usually Admin), set the preferred mandatory fields for Site details, Power, Gas and Water. This will affect what is required (mandatory) when uploading new sites to the Energy Hub.
Please navigate to Settings >> Data Settings >> Site Data and select either the Site Detail, Power or Gas tab.
For each of the fields, you could chose the following:
- Display Name: This is the name with which the field will show in the site data templates (Multiple site entry, Portfolio List) and in the Site CRM
- Mandatory: You can decide if the specific field will be mandatory for the upload/change of the site data
- Show: You can decide to enable a specific field in the site data templates (Multiple site entry, Portfolio List) and in the Site CRM. Please note that when a field is set as mandatory, then it will default to “Show”.
- Tooltip: You can decide to add a tooltip to provide an explanation or description of the specific field.
- Default Value: You can decide to have a specific default value for all of the fields. When this is not populated in the data templates, the value will default to the default one.
Please note that in the “Site Detail” tab, you can find the fields common for Power and Gas, while in the “Power” and “Gas” tabs, you set the fields specific to the two commodities.
Groups
Groups allow you to separate your sites data into categories, this helps you restrict access to the different type of users, e.g. Admin, Customer, Customer Plus, Suppliers, etc.
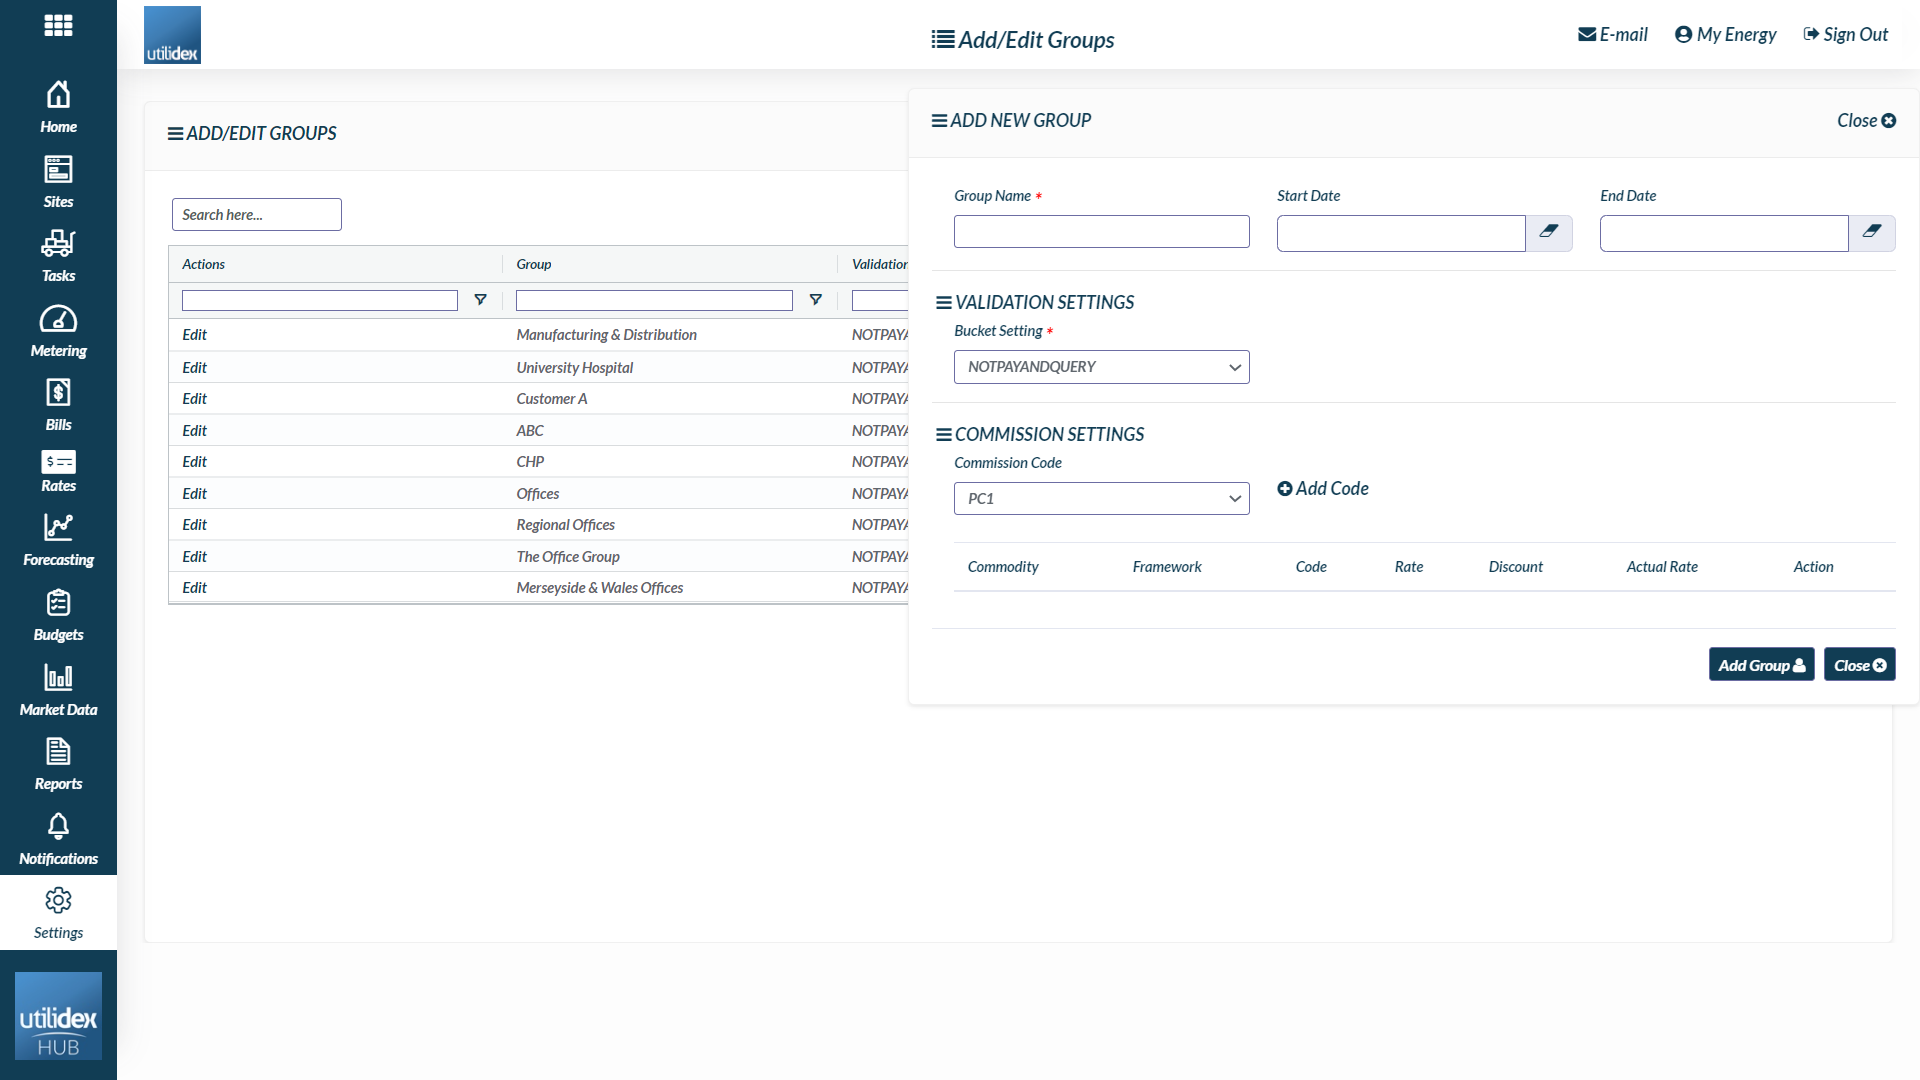
Navigate to Settings >> Data settings >> Groups, here you will see all groups that were created. To add new groups, navigate to Actions >> Add new group >> enter the Group name and Validation bucket allocation setting (if applicable). You will then need to map the group to the users that need access to it.
Within the table you can move columns to your preference and add or remove specified fields. To do this, navigate to available columns. You can also download the data grid by navigating to actions and download data grid.
To edit your existing groups, select edit under the actions column and update the details and select save.
Suppliers
You can locate your list of suppliers by navigating to Settings >> Data settings >> Suppliers.
Here you can view the commodity of the suppliers and the Price Per Unit (PPU). If you need to add more suppliers to your Energy.hub, please contact the Utilidex support team.

Basket
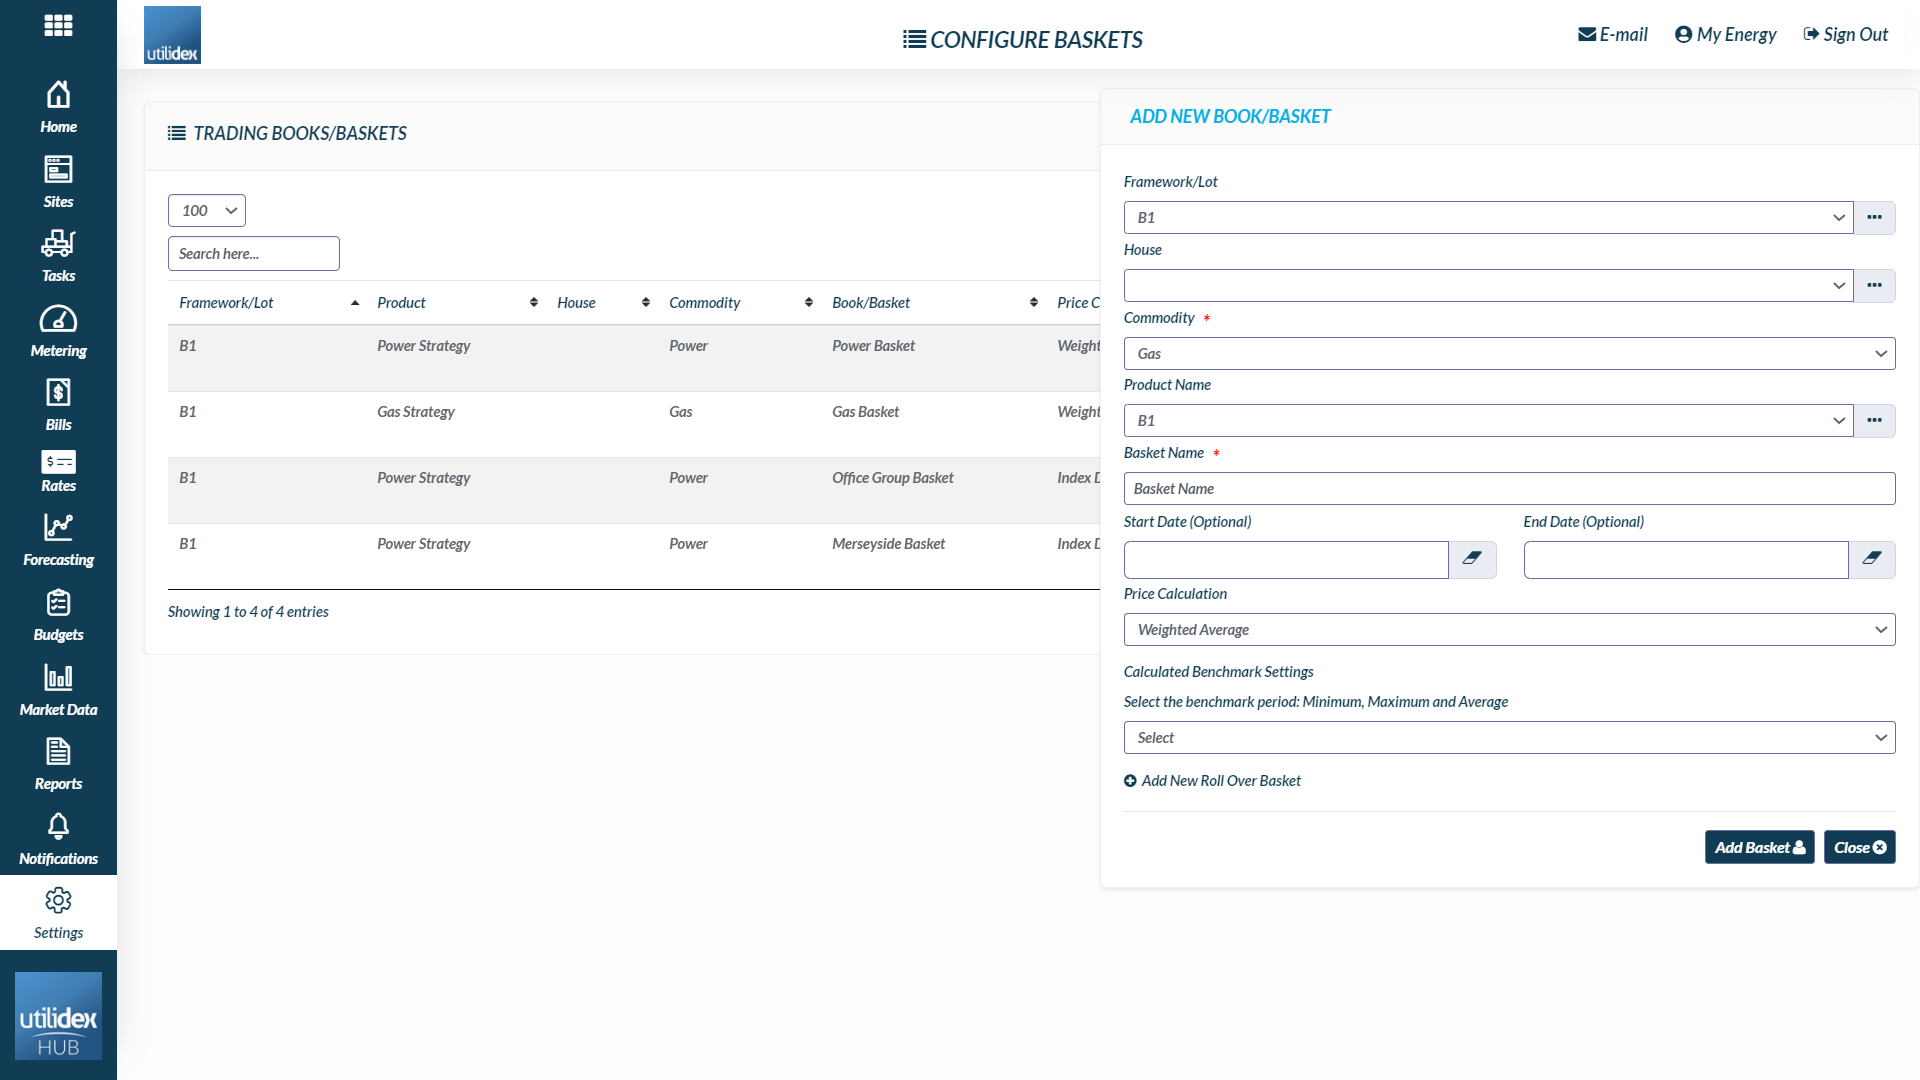
You can locate your list of baskets by navigating to Settings >> Data settings >> Basket. Please read more about Baskets and Rollover baskets here.

Commission Management
For those using the Energy.Hub for managing procurement for their end customers, you can apply commission calculations to your sites/groups.
For every customer/site and meter you can apply a commission. Commissions have a pre-defined structure, and customers can be assigned to different structures:
- It is a per meter/per day amount
- Commissions vary depending on size of customers (determined by Annual Consumption)
- Customers can be on special offers/rebates which vary from the standard £/Meter/Day.
To configure commissions, navigate to Settings >> Data settings >> Commission Management.
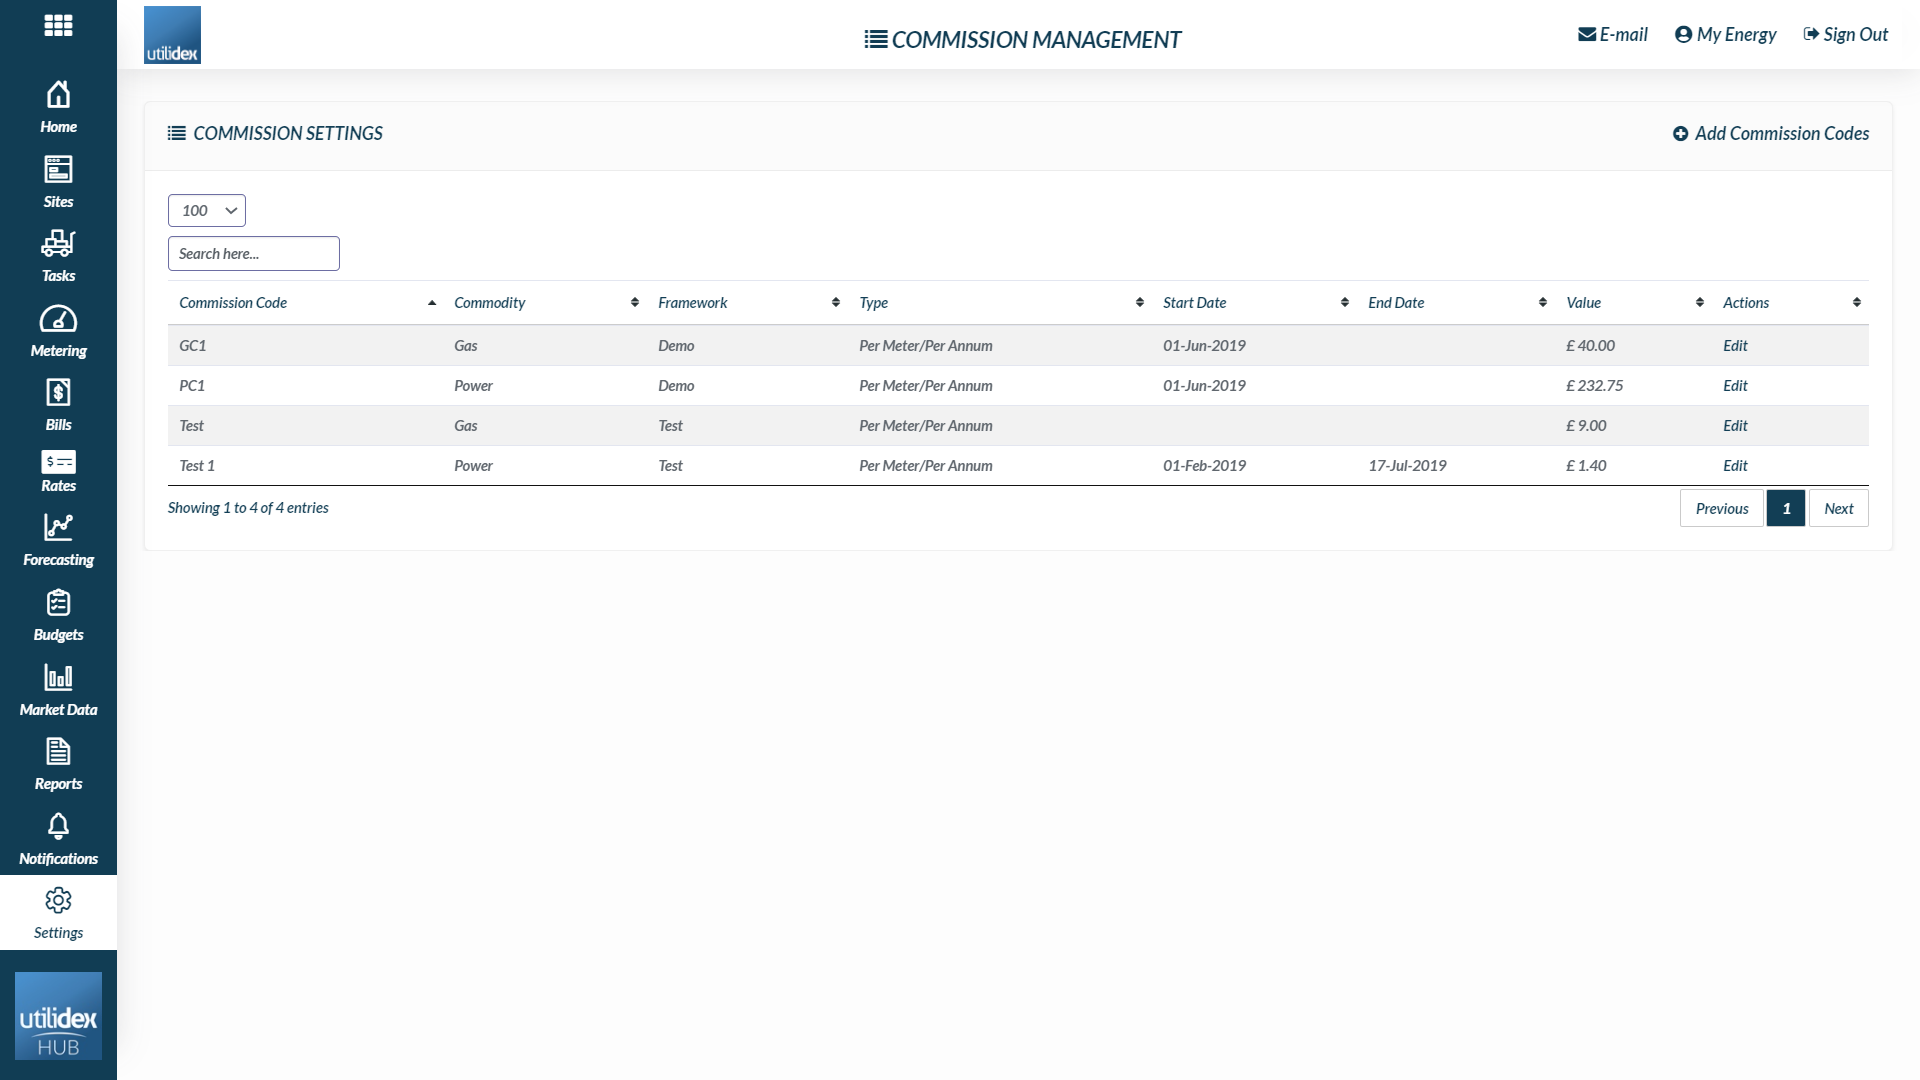
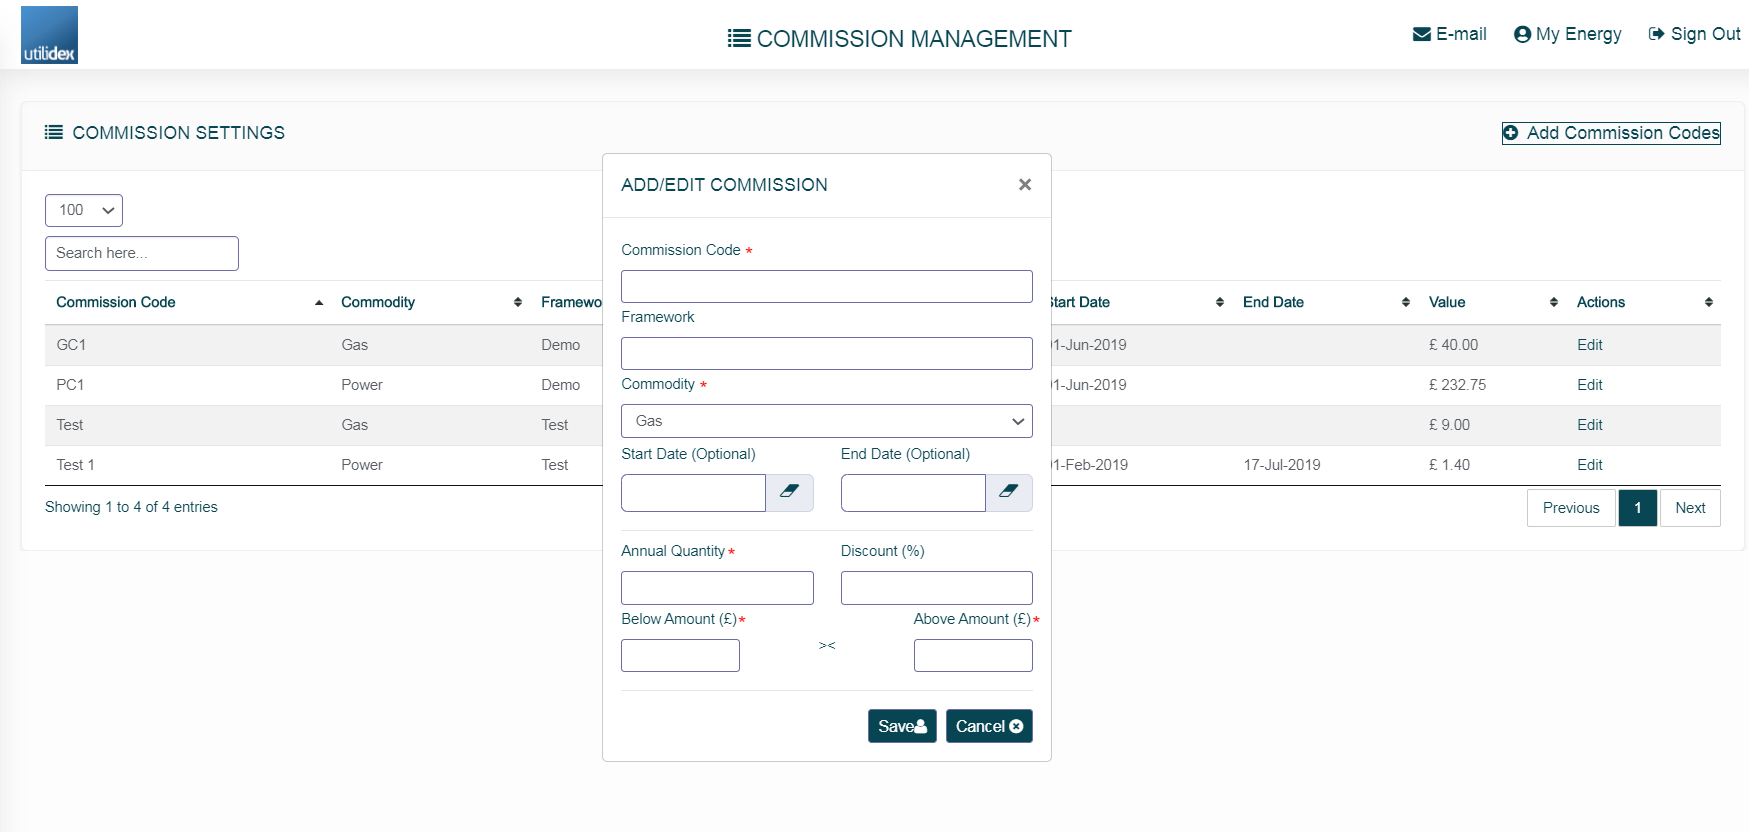
From the below screen you can:
- Create a unique Commission Code
- Add an optional framework identifier
- Select the commodity you wish to apply the commission
- Apply a start and end date
- Apply the commission to a specific profile class
- Apply the commission amount
- Apply a discount
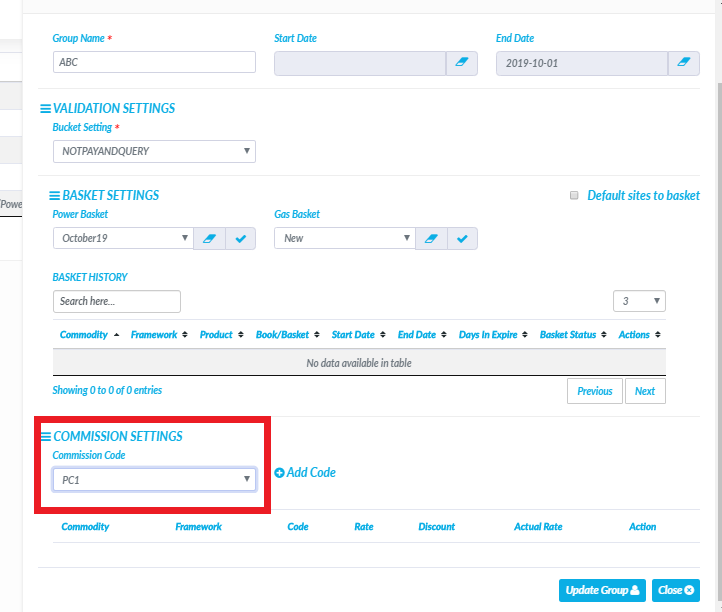
Once you have set the above parameters, you’ll need to click save and then apply the commission to the group.
To apply the commission to group, navigate to Settings >> Data settings >> Groups. You’ll then see the commission that you have created in the drop down list, and can apply it to a group as shown below: