Multiple Site Entry
If you plan to add lots of sites, or changing the information for many of these, it’s better to use the Multiple site entry.
Navigate to Sites >> Multiple Site Entry >> Actions.
There are two ways to use the Multiple site Uploader, you can select one of the following:
- Download template – This is used when you have multiple new sites to upload.
- Download data – This option is used when you want to make bulk changes to your existing portfolio.
The spreadsheets work dynamically and will offer drop down menus within the cells to predefined/configured fields. When you have completed the template. Save it, and then return to your hub and upload the template.
Download Template
You can upload new sites in bulk by navigating to Sites > Multiple Site Entry > Actions > Download Template. When you select this option, a template containing 3 different tabs will be automatically downloaded, one for power, one for gas, and one for water.
You will need to fill the information for the commodity/ies you would like to upload the data, save the template, and then upload it in the system through the Actions > Upload Data. Once the data has been uploaded, you will need to select all the records through the Site Set up screen and Push to Live.
Please see below an example of the template that will be downloaded.
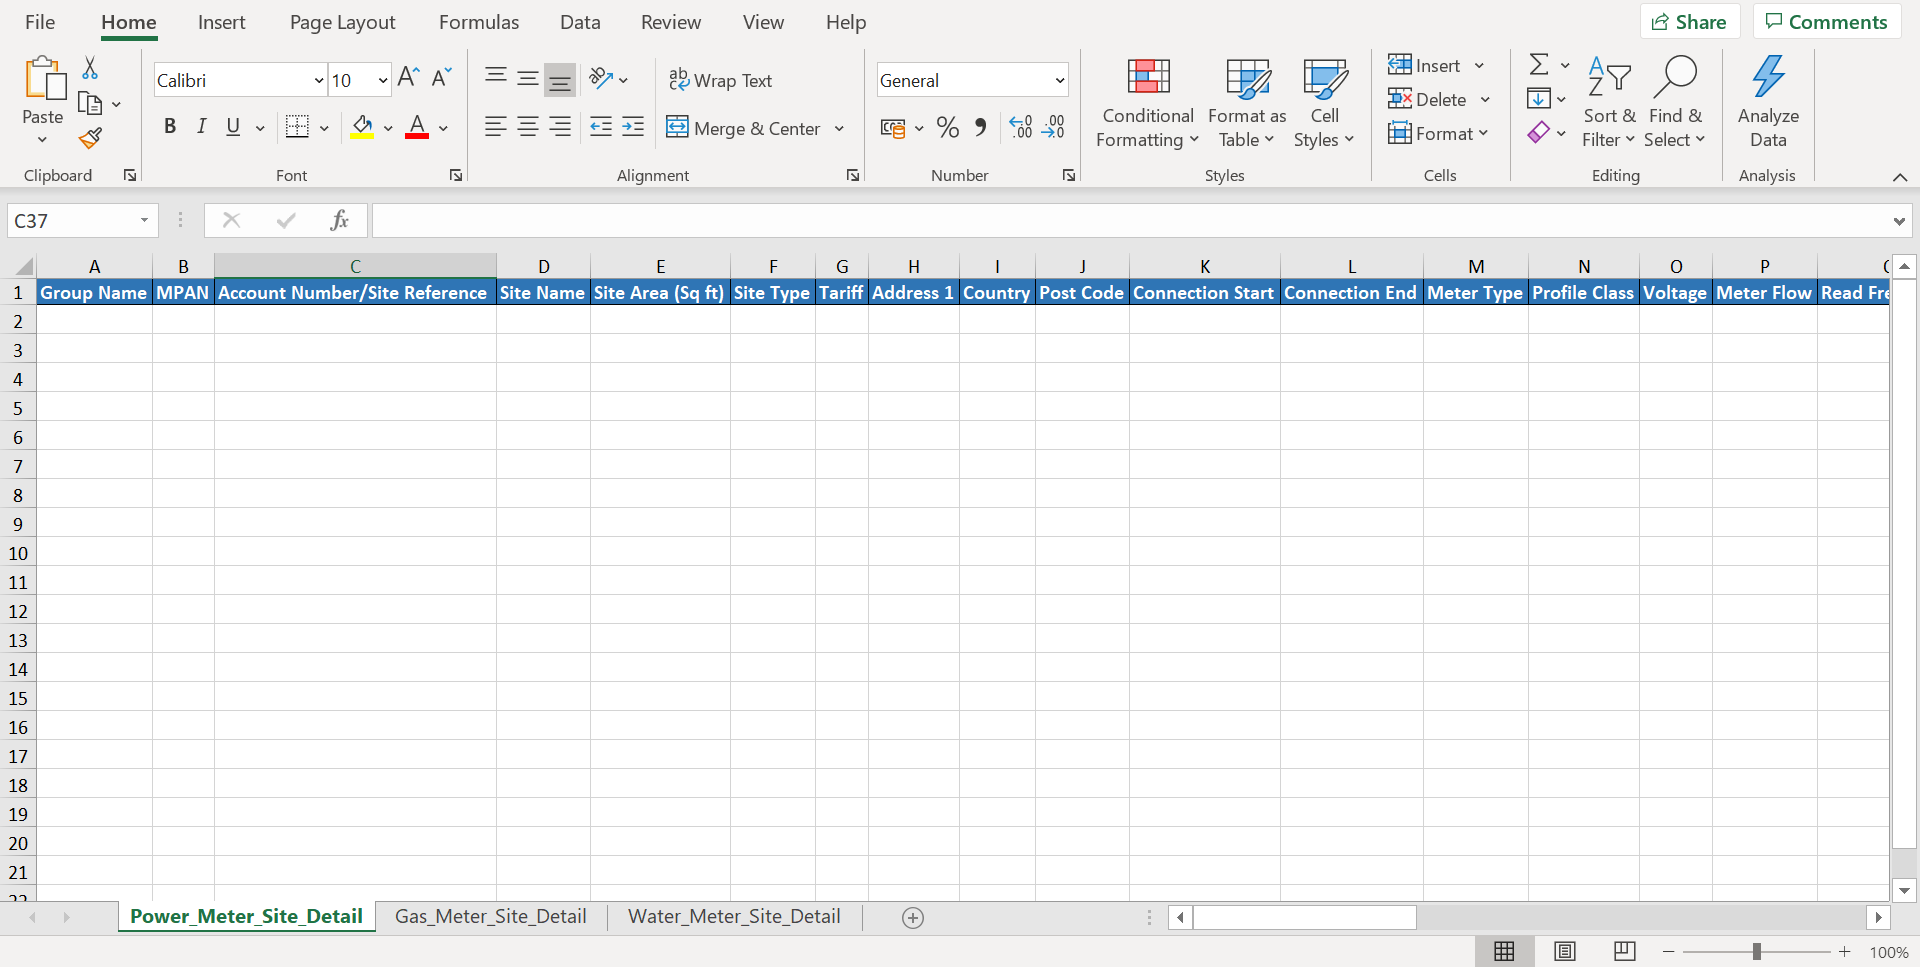
NOTE: Please note that the fields that will be allowed to view in the template, will depend on your data settings. Pease see our Data Settings article to read more.
Download Data
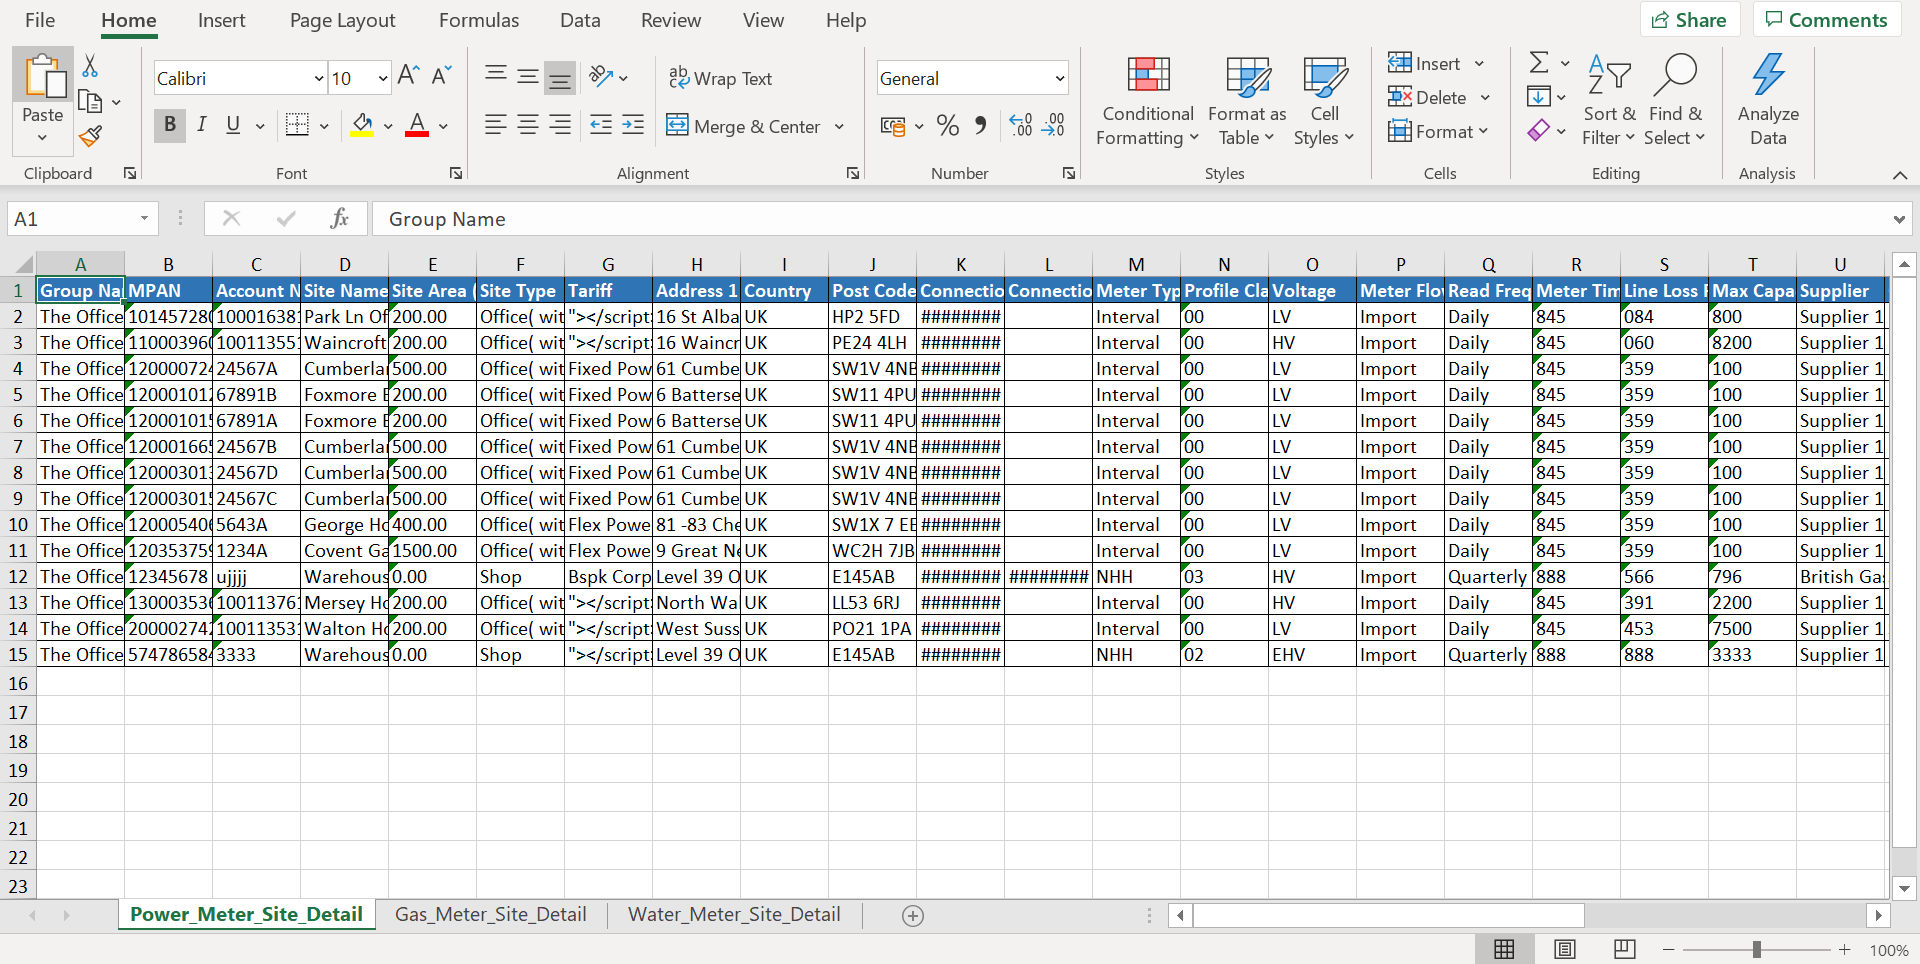
One of the most convenient ways to change existing site information is to download your existing data into an XLS file, make the necessary changes and then upload it back into your system. By selecting the Download Data button you will be prompted with the below screen, this then allows you to filter based on the Commodity, Group/Customer, Site and Meter. All the defined site information is then populated into a spreadsheet which can be updated.
Once you download the data, you can update any information you would like to change, save the excel file, re-upload the data and then Push to live. All the changes will automatically be saved in the system.
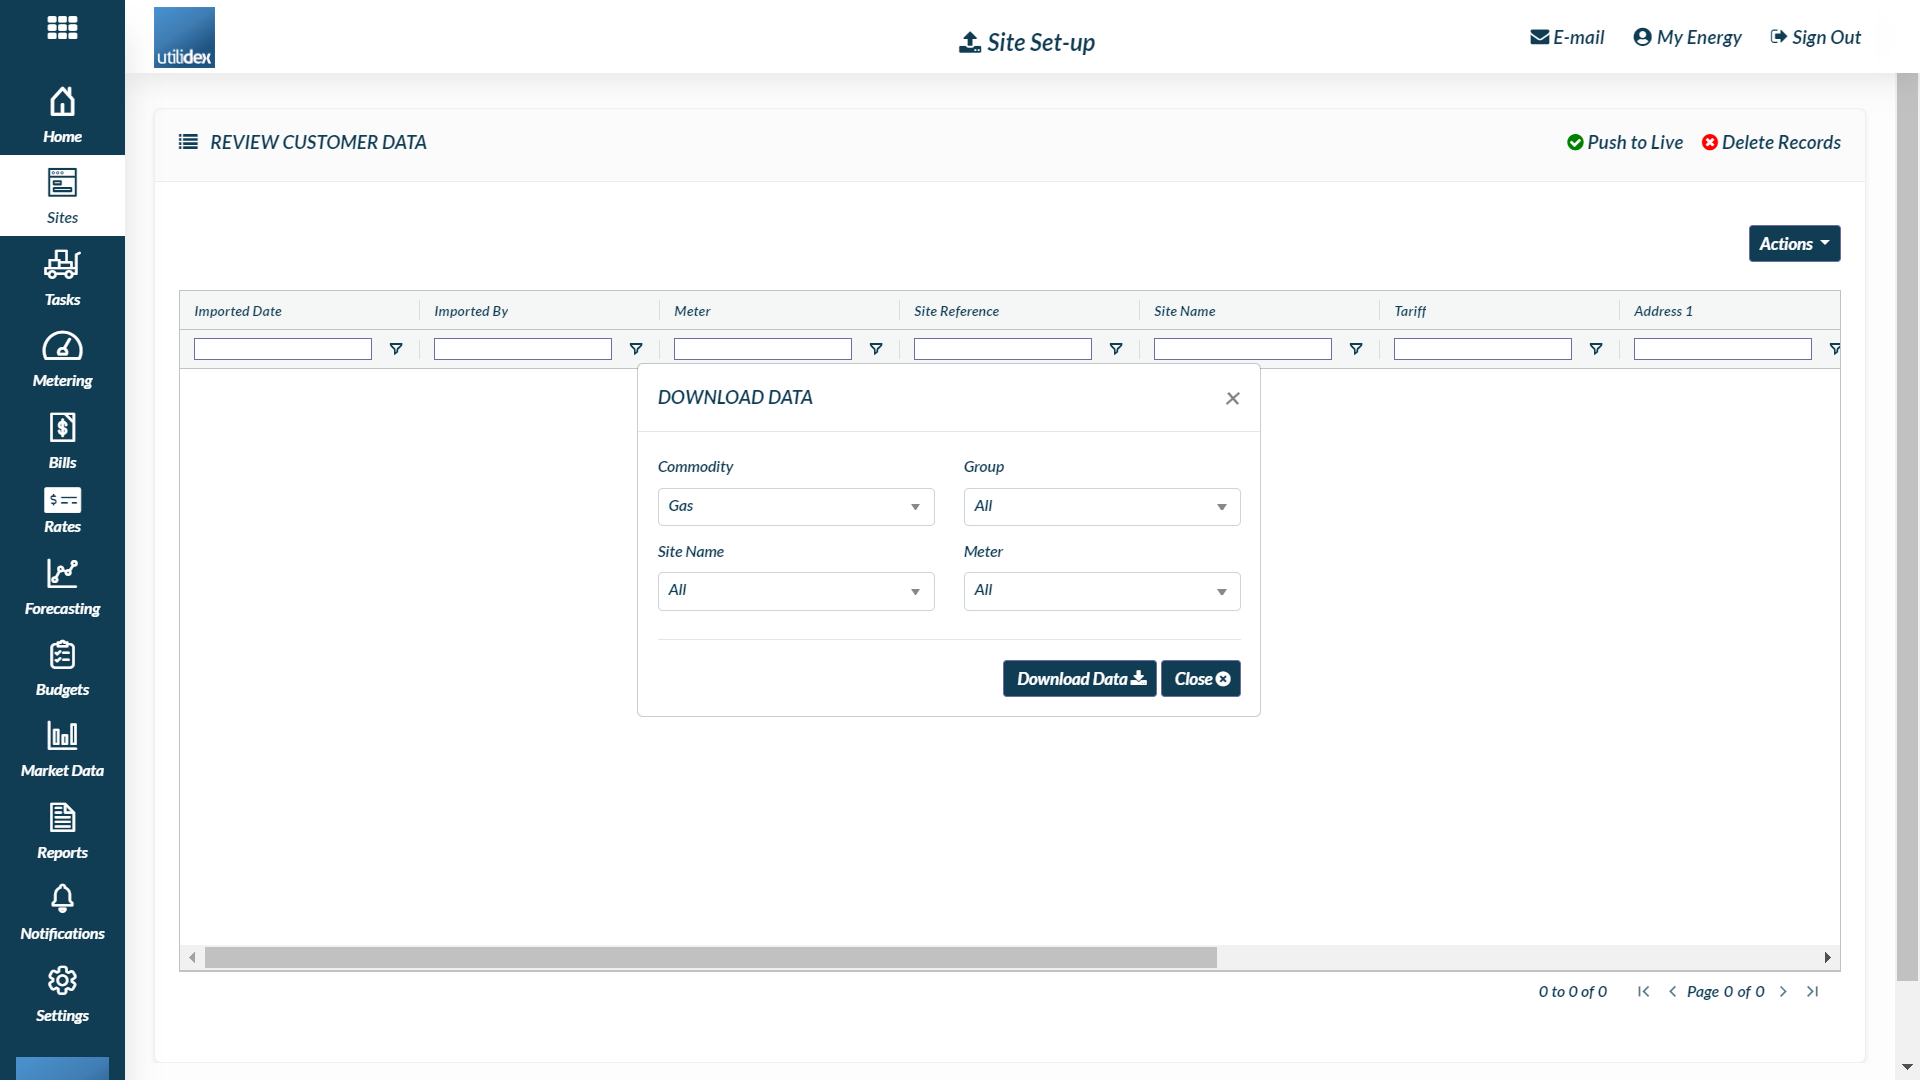
NOTE: Please note that the fields that will be allowed to view in the template, will depend on your data settings. Pease see our Data Settings article to read more.
Single Site Entry
Once you have configured the product and your data set-up, you are ready to start adding sites to your Hub.
Sites can be added to the system in two different ways; you can manually input sites using the single site entry, or you can upload multiple sites at once using the Multiple site entry screen. Your site users can add sites to the Energy.Hub and save them as a draft for approval by an admin user.
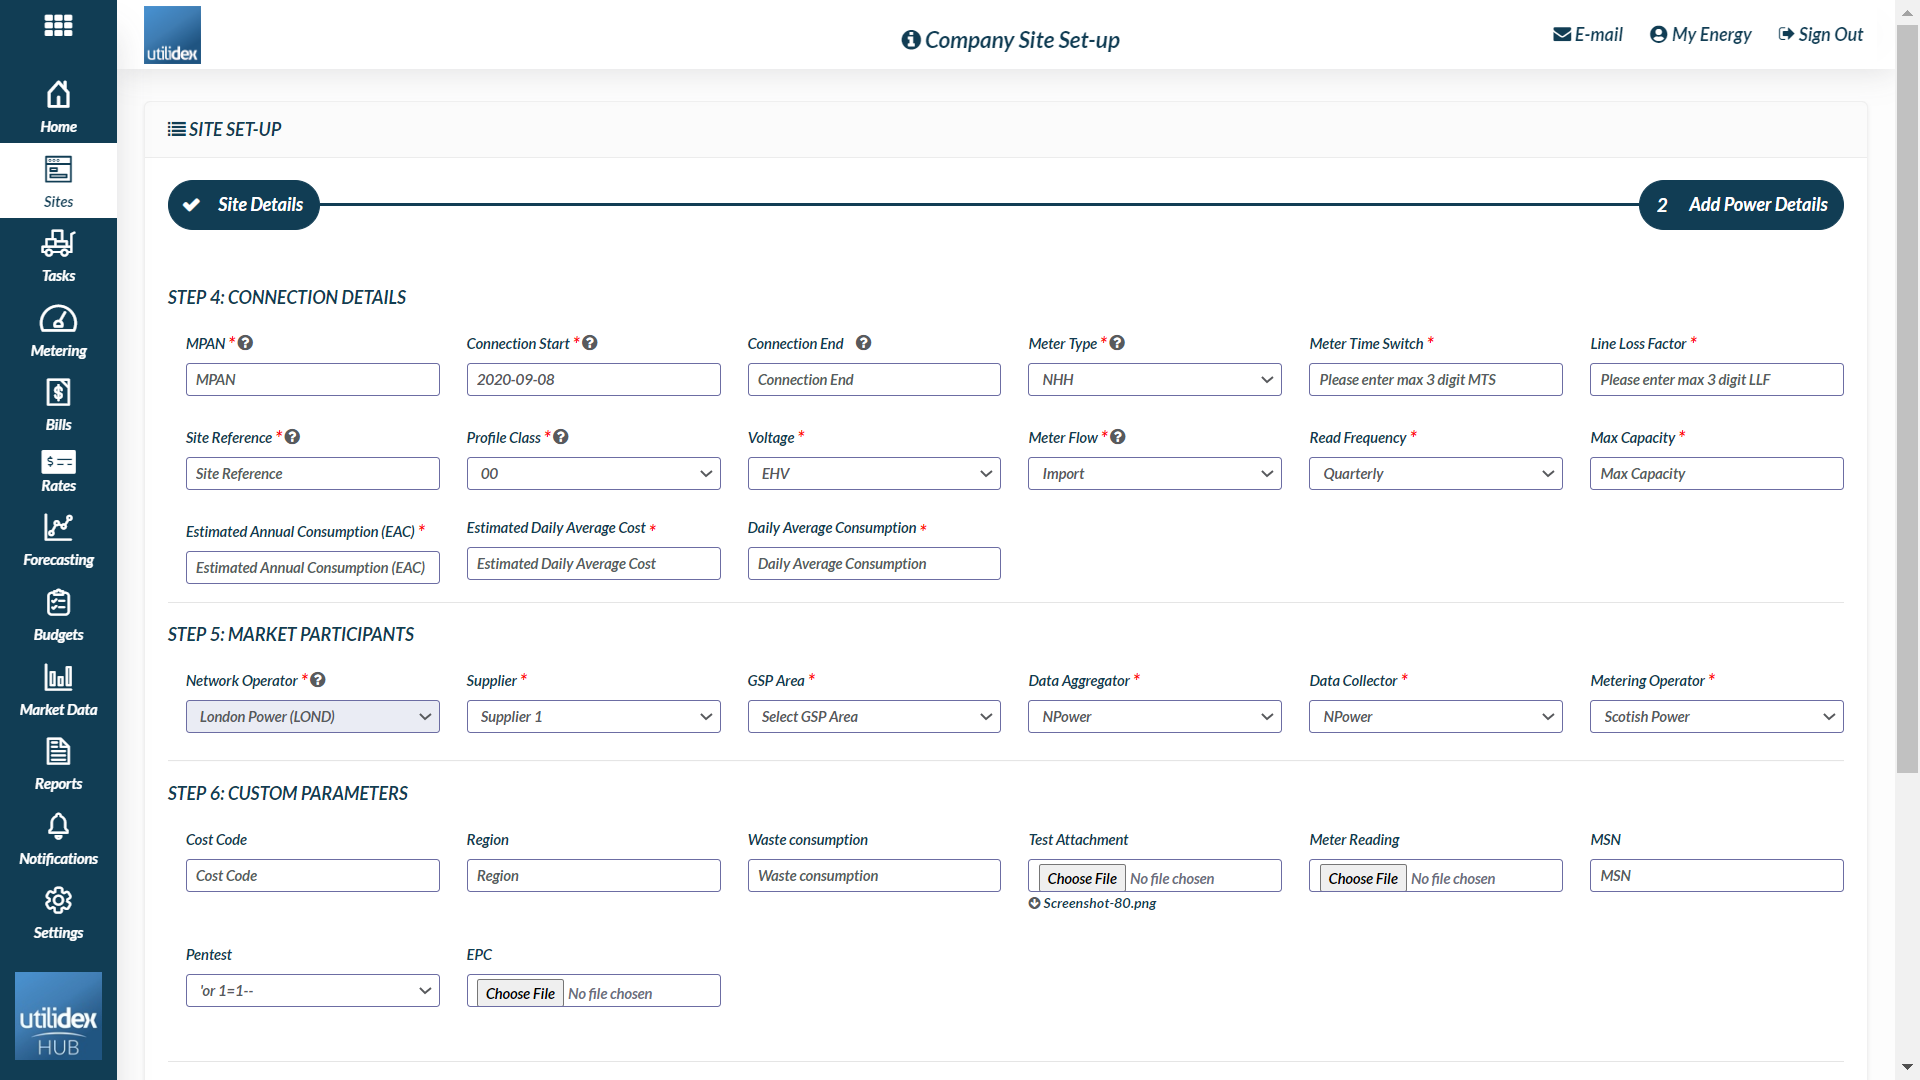
When you want to add a single site, you can manually enter the information into the Single Site Entry process as shown below:
Navigate to Sites >> Single Site Entry. You will then need to populate the single site entry process steps.

The process asks you to complete a form, starting with choosing the Group Name which the site belongs to from the drop-down menu. After completing the site code, name, site area, site type, site manager and address on the form, check which Services (Power and/or Gas) is on the site. Then click Next.
Please add the services (e.g. power/gas/water) to the site. Fill out the form for either Gas or Electricity and finish by selecting Add.
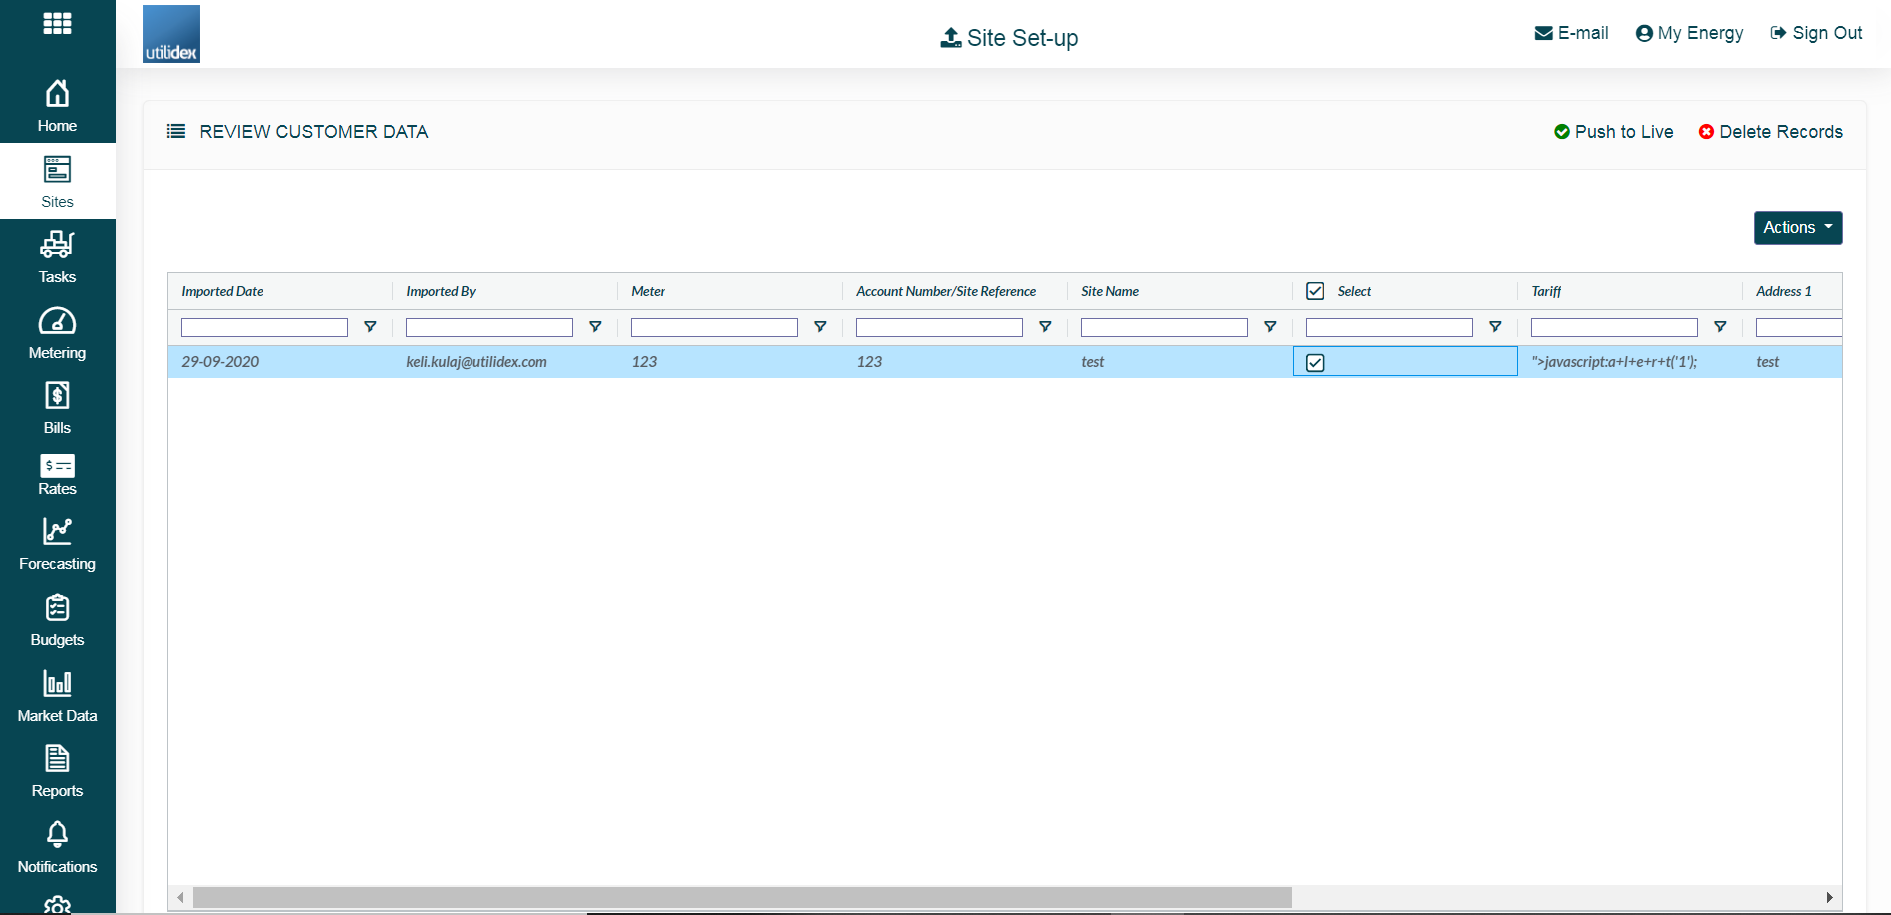
Please repeat for all the connected services (Electricity/Gas/Water) for the site. Once you have completed all of the site entry’s they will first appear in the Site Set-up screen as shown below. This is a holding area, where all the sites details will be checked. All sites will stay stored here until you either delete them or push them to live, giving you the freedom to log out and revise them again later. If there are any validation errors, they will be shown here.
You can then click into each site and correct the details as necessary. Once everything is correct, select all, then you can select the Push to Live button to add the site to the platform.