Counterparties
To configure a counterparty, users can follow the below 3 steps:
- Go to Settings >> My Company >> Counterparties
- Select Quick Add a Company
- Define the Name, Product, Address, Tenor, and Daily Volume for the supplier
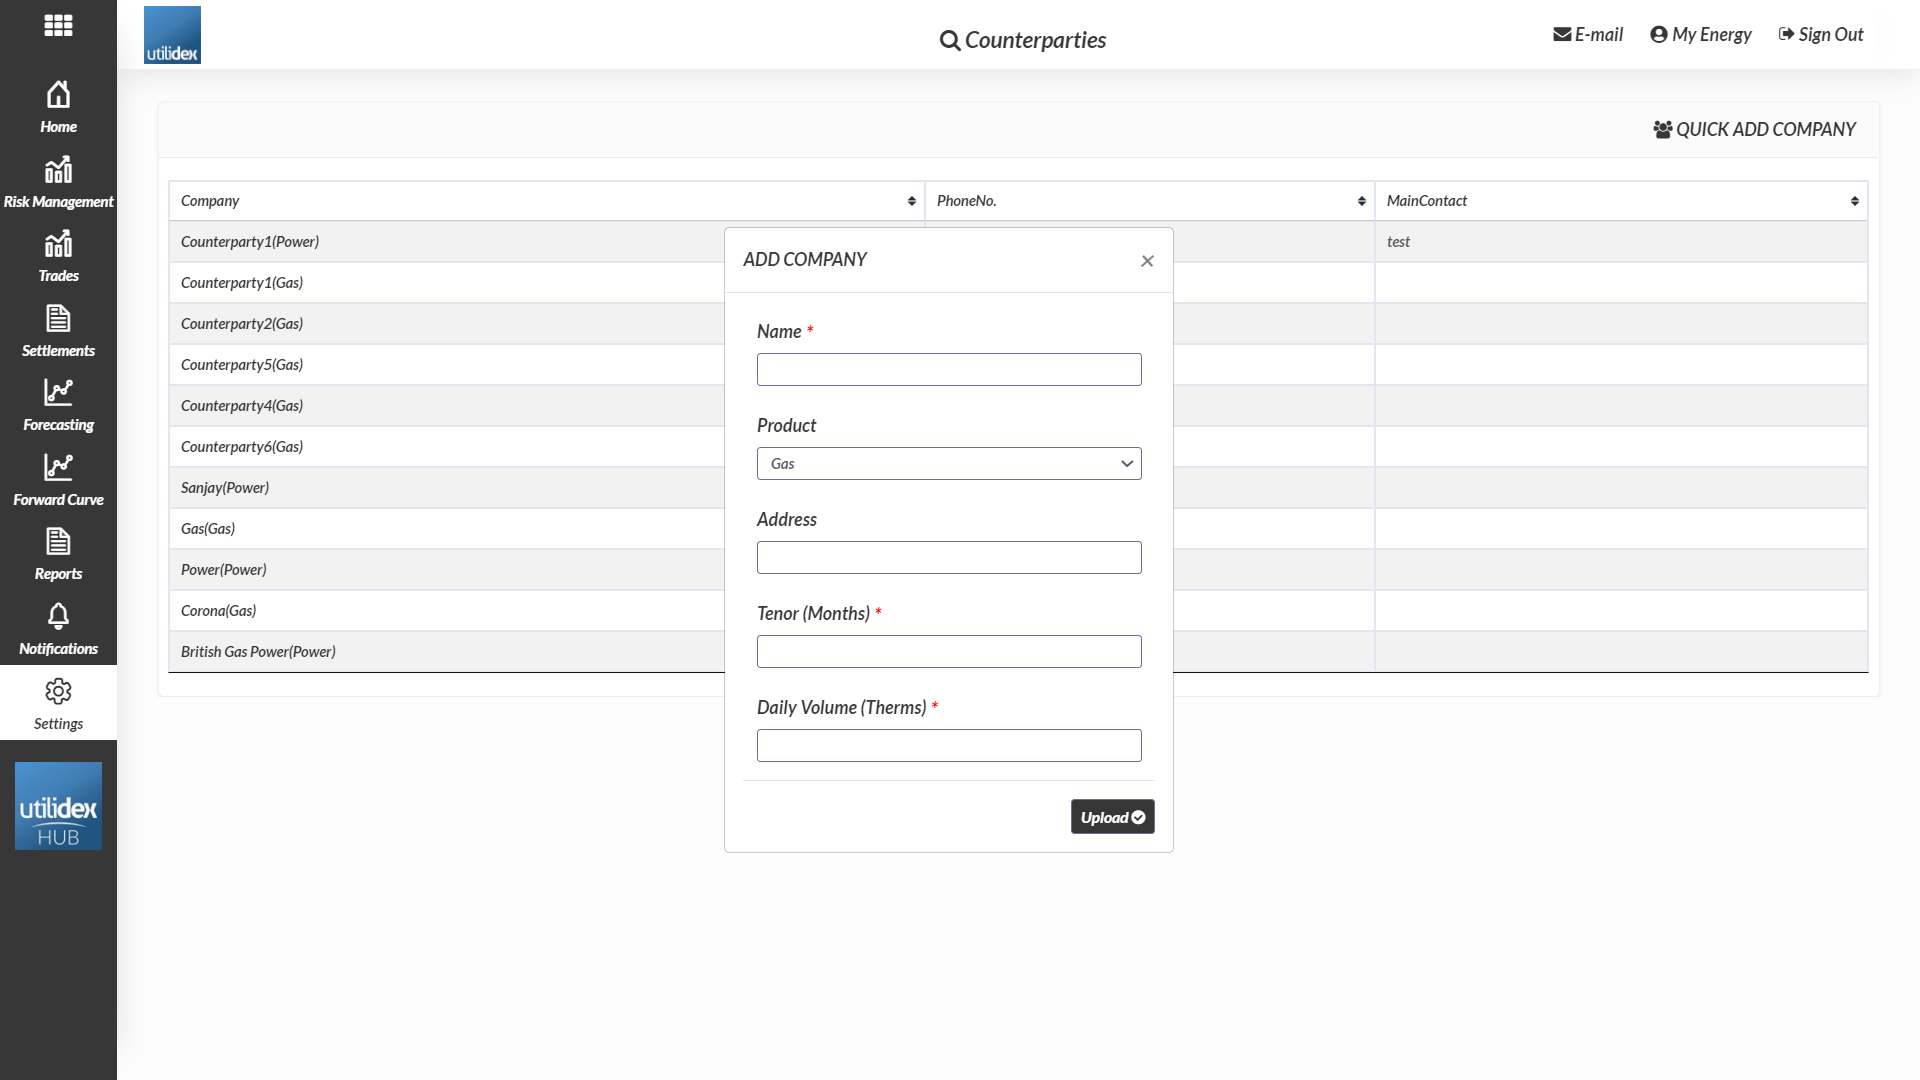
The Name, Tenor, and Daily Volume are all mandatory fields. The system uses this data to run controls for each trade (e.g. ensuring a trade does not exceed a pre-determined maximum volume).
Counterparties can later be edited by selecting the Company Name in the data table in the left-most column. Once the counterparties are configured, users will be able to enter and load trades.
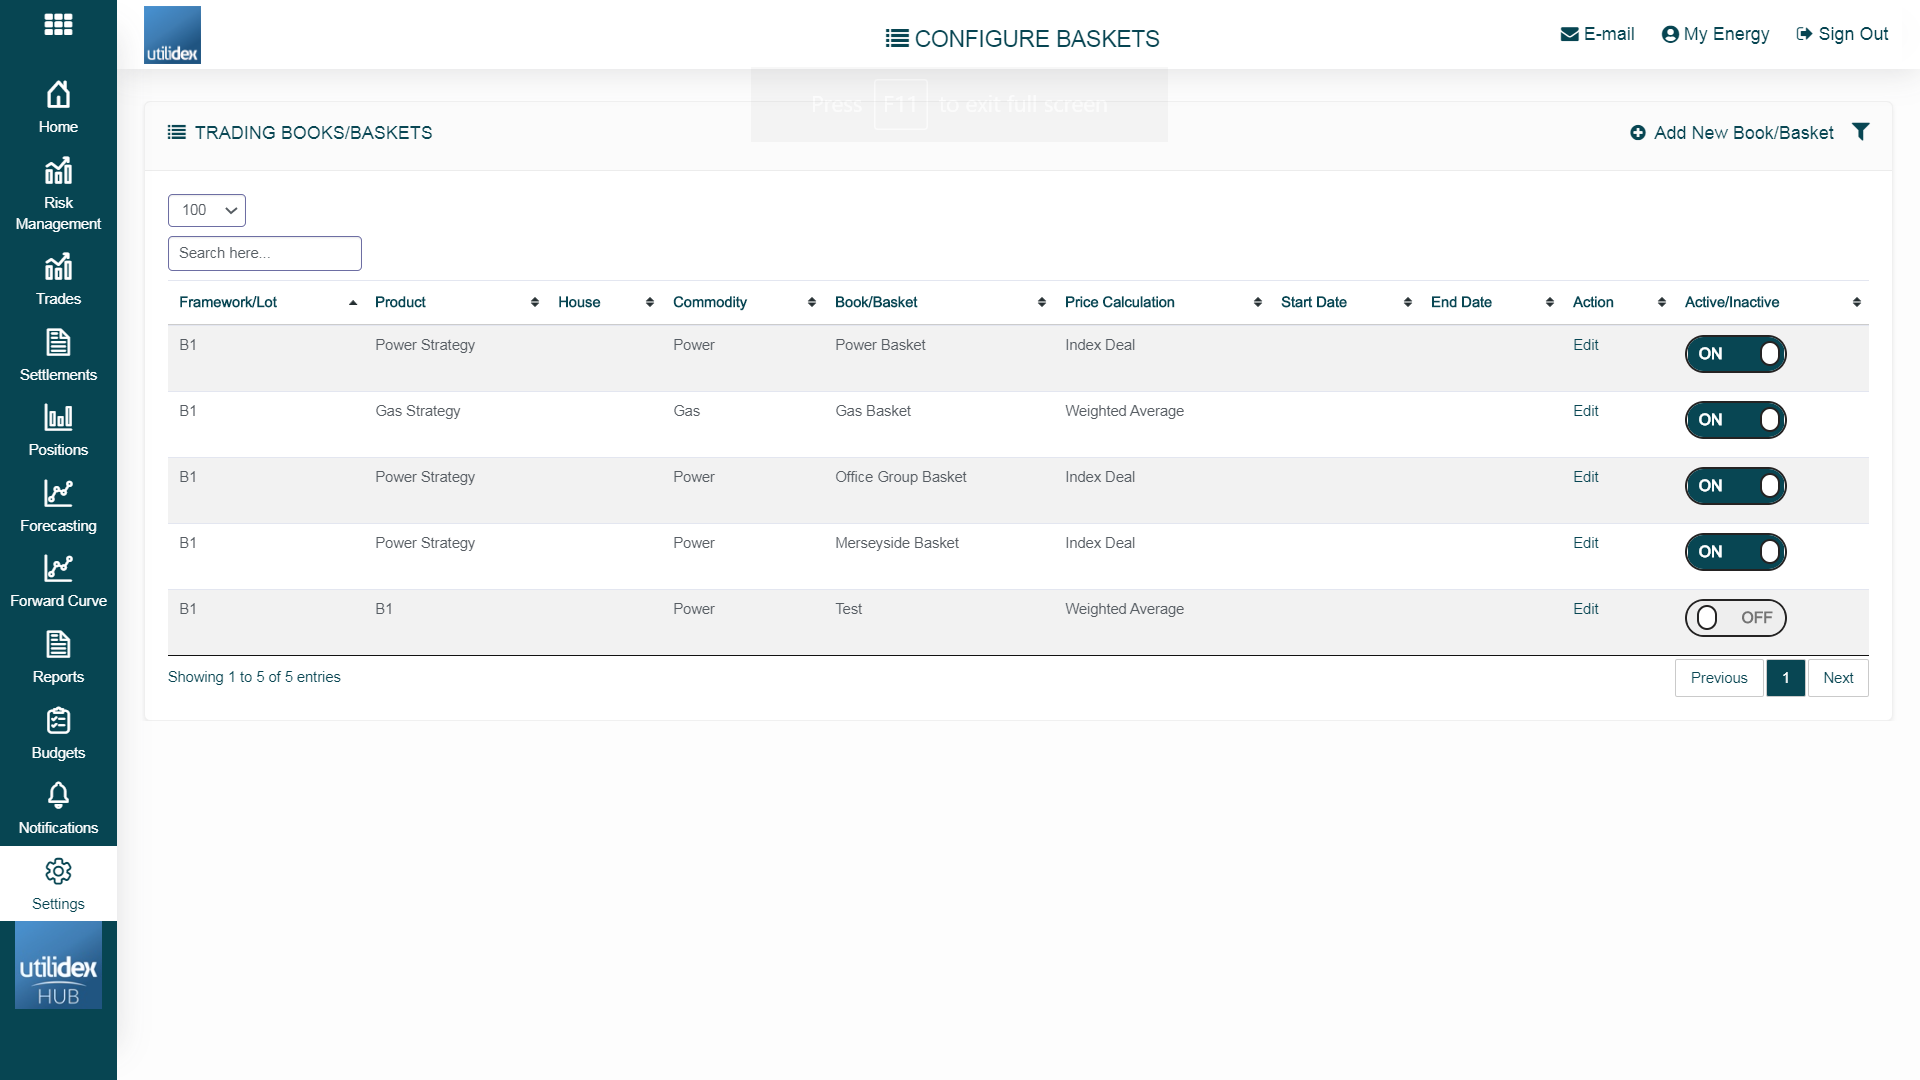
Baskets
The Utilidex ETRM system uses Baskets to allocate demand and trades to. Other systems may call a basket a purchasing group or book. To configure a Basket, users can follow the below 5 steps:
- Settings >> Data Settings >> Baskets
- Select Add New Basket
3. Fill out each field in the pop-up below
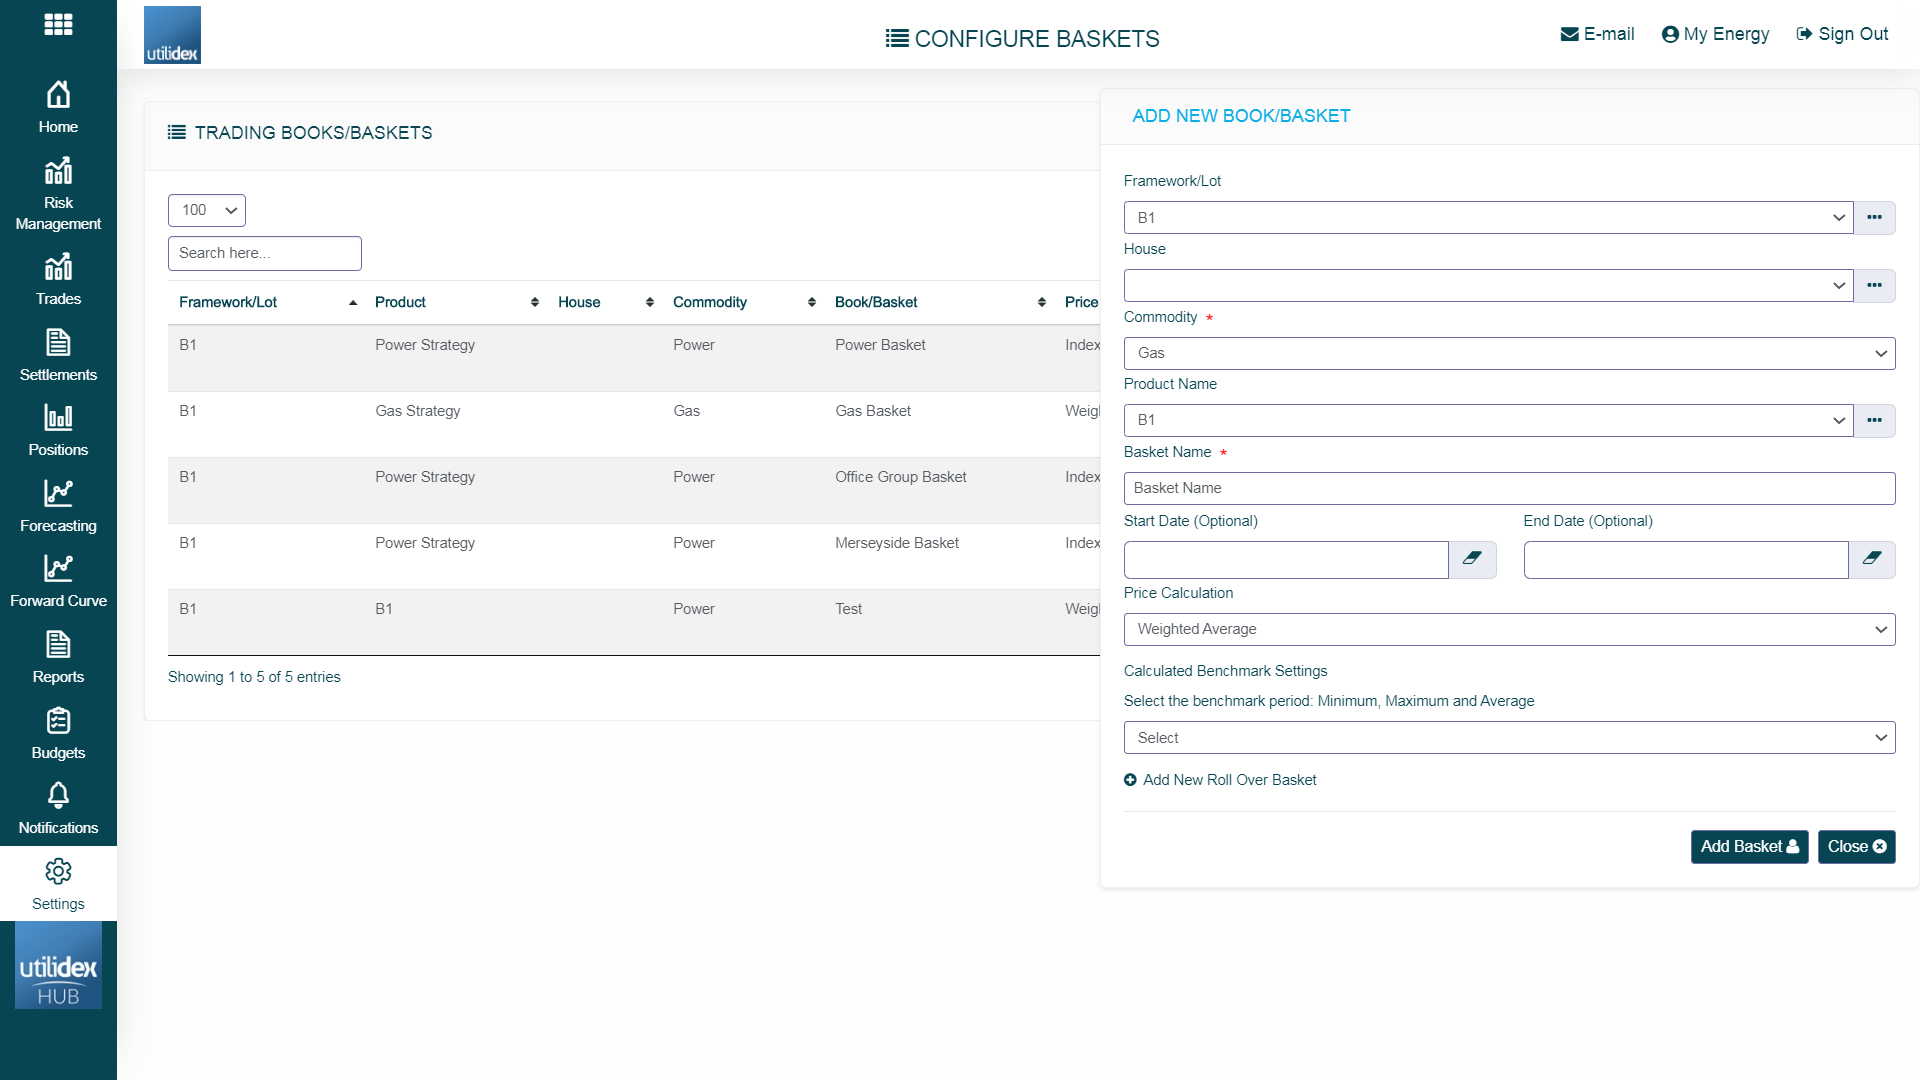
The available fields are Framework/Lot, House, Commodity, Product, Basket Name, Start and End Date, Price Calculation and Benchmark Settings. Please see below for an explanation on each field.
|
ID |
Field Name | Description |
| 1 | Framework/Lot | Users can define if there is an over-arching strategy that multiple baskets fall into, this is an available field for configuring a basket hierarchy |
| 2 | House (not mandatory) | Users can define if there is an over-arching strategy that multiple baskets fall into, this is an available field for configuring a basket hierarchy |
| 3 | Commodity | This must either be Gas or Power |
| 4 | Product Name | Users can create a Product which contains multiple baskets (e.g. a High-Risk Product and a Basket for different sites within the basket) |
| 5 | Basket Name | This is the name of the basket; it must exactly match that of the data in the Purchase Requirements and Bulk Trade Entry |
| 6 | Start & End Date | Users can define a start and end date for each basket, this allows users to note if a certain contract is due to expire and will notify them when a trade will be entered outside of the basket window. |
| 7 | Price Calculation | This is a setting which impacts how imbalance charges are calculated as a part of the Bill Validation module. |
| 8 | Benchmark Settings | Users can configure price benchmarks within a set-time frame. For example, when benchmarking performance you may compare against all historical data or just the 12 months prior to delivery. |
4. To write a new name for a specific field, a user can select the ellipsis (…) on the right of each drop-down box. After typing the new name, select the checkmark on the right to save. Users can develop a naming convention for their basket hierarchies for greater organisation and clarity when trading and reporting.
5. Users can also define if a basket is active or inactive, users will not be able to add trades for inactive baskets. The system maintains inactive baskets for historical reporting.
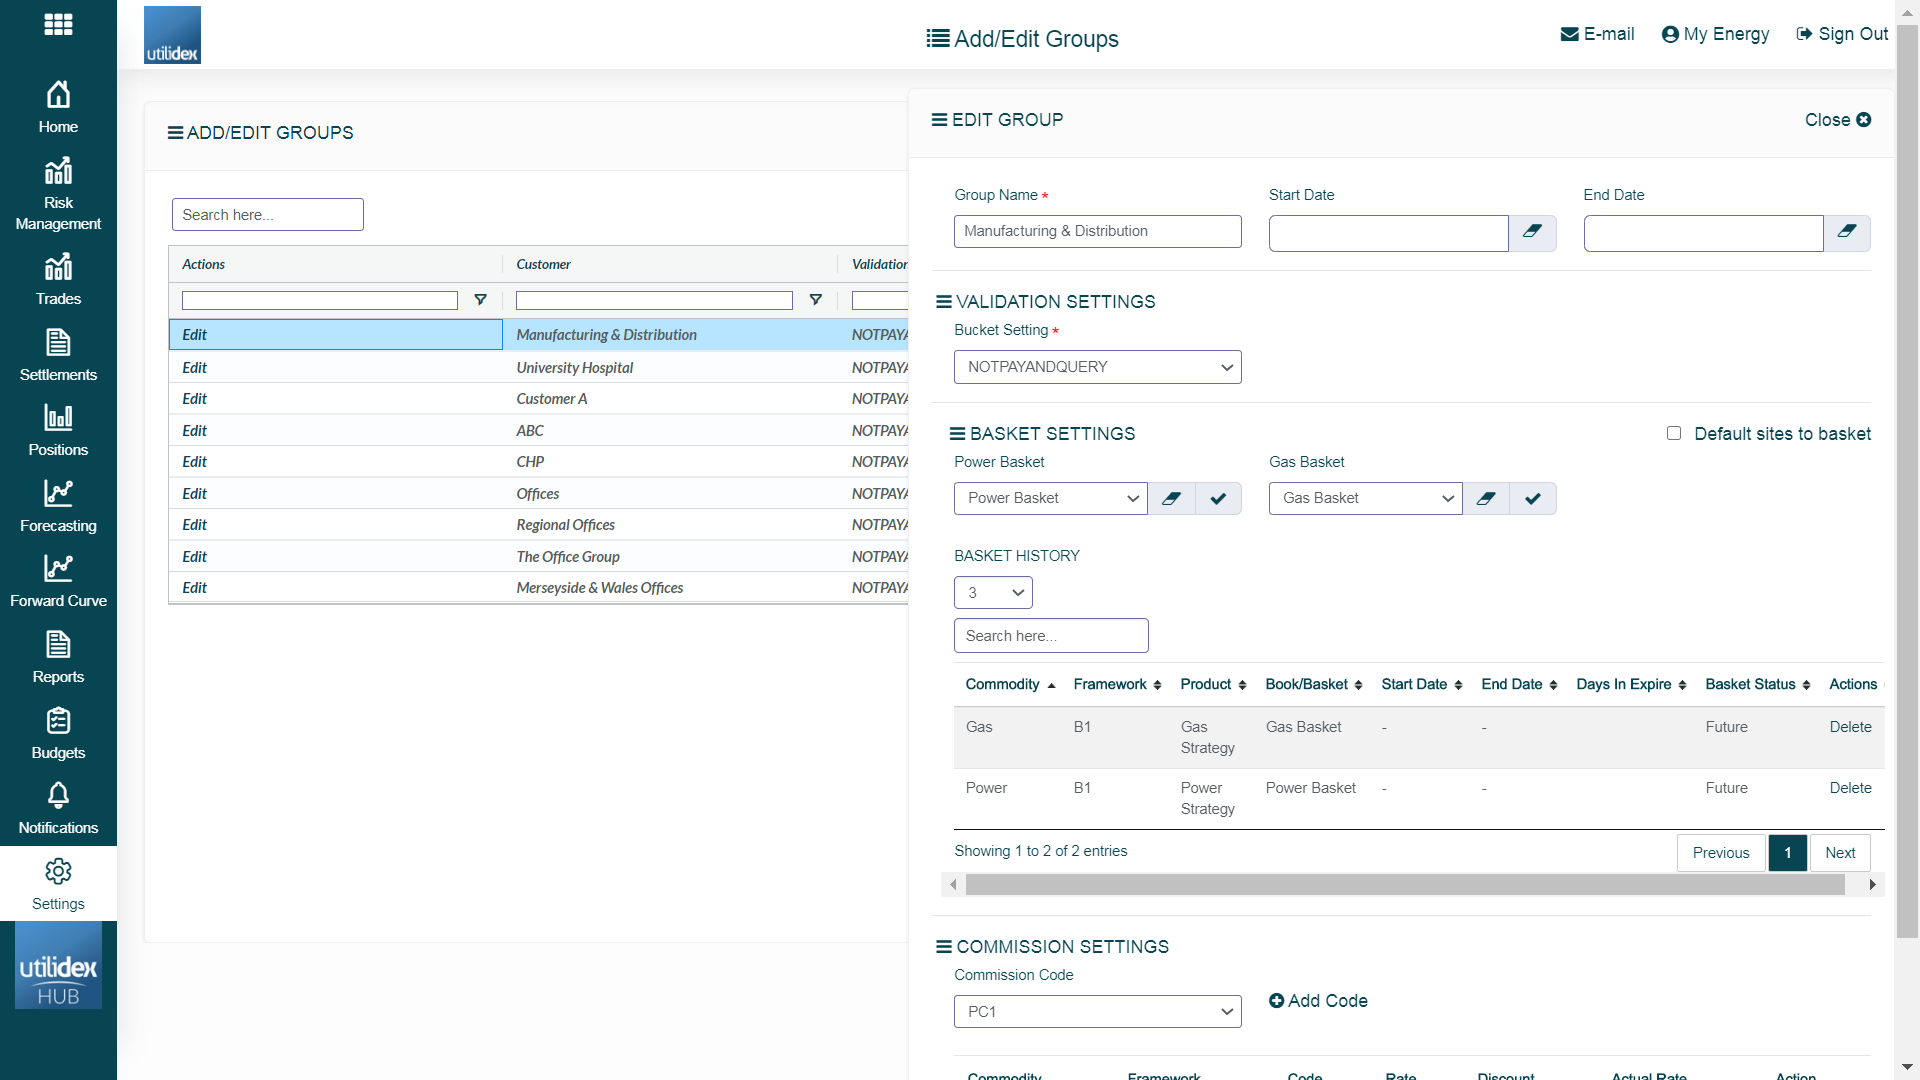
Map Groups to Baskets
Once you have created your groups, you can map these to baskets of your choice.
Navigate to Setting >> Data Settings >> Groups >> Select a Group and press Edit under the Actions column.
A window will pop up from the right side of the page. You can map groups to baskets in the Baskets Settings section. When you completed all the required fields, press Update Group.
Accessing Data Manager
To view the data flows within the system, users can open the Data Manager by going to:
- Settings >> Data Settings >> Data Manager
- Here, you can view all the data feeds configured via FTP and see when the last data was transferred

3. If a file fails to load in the FTP, you can download the file to analyse any inconsistencies in the format by selecting Download
The data manager also displays the source of data and the update methodology.