Within the energy management industry, a number of daily tasks consist of exporting reports, checking the data and sharing with a specific party. While this take time and a large part of the daily tasks, it is a straightforward workflow for anyone to complete. Therefore, we looked into some of the most common of these workflows and decided to create a framework to allow for automatic distribution of reports.
What can it do?
The report automation framework aims to save you time and worry, while also ensure your data is always up to date. Some examples of the automated reports can be seen below:
- Consumption Exception Reports
- Consumption HH/NHH & Summary Reports(site & meter)
- Carbon & Key KPI Tracking
- Data Audit Reports
- Data Quality Report
By enabling these reports, you can share important information within your organisation or automatically request missing data from the relevant parties.
How does it work?
The setup is streamlined, quick and easy. Once setup, you never have to worry about it. To automate reports, navigate to Notifications, Automation. Once you are within this screen, you will see any automated reports you previously setup. You can choose to edit, turn off or even delete any of the existing ones.
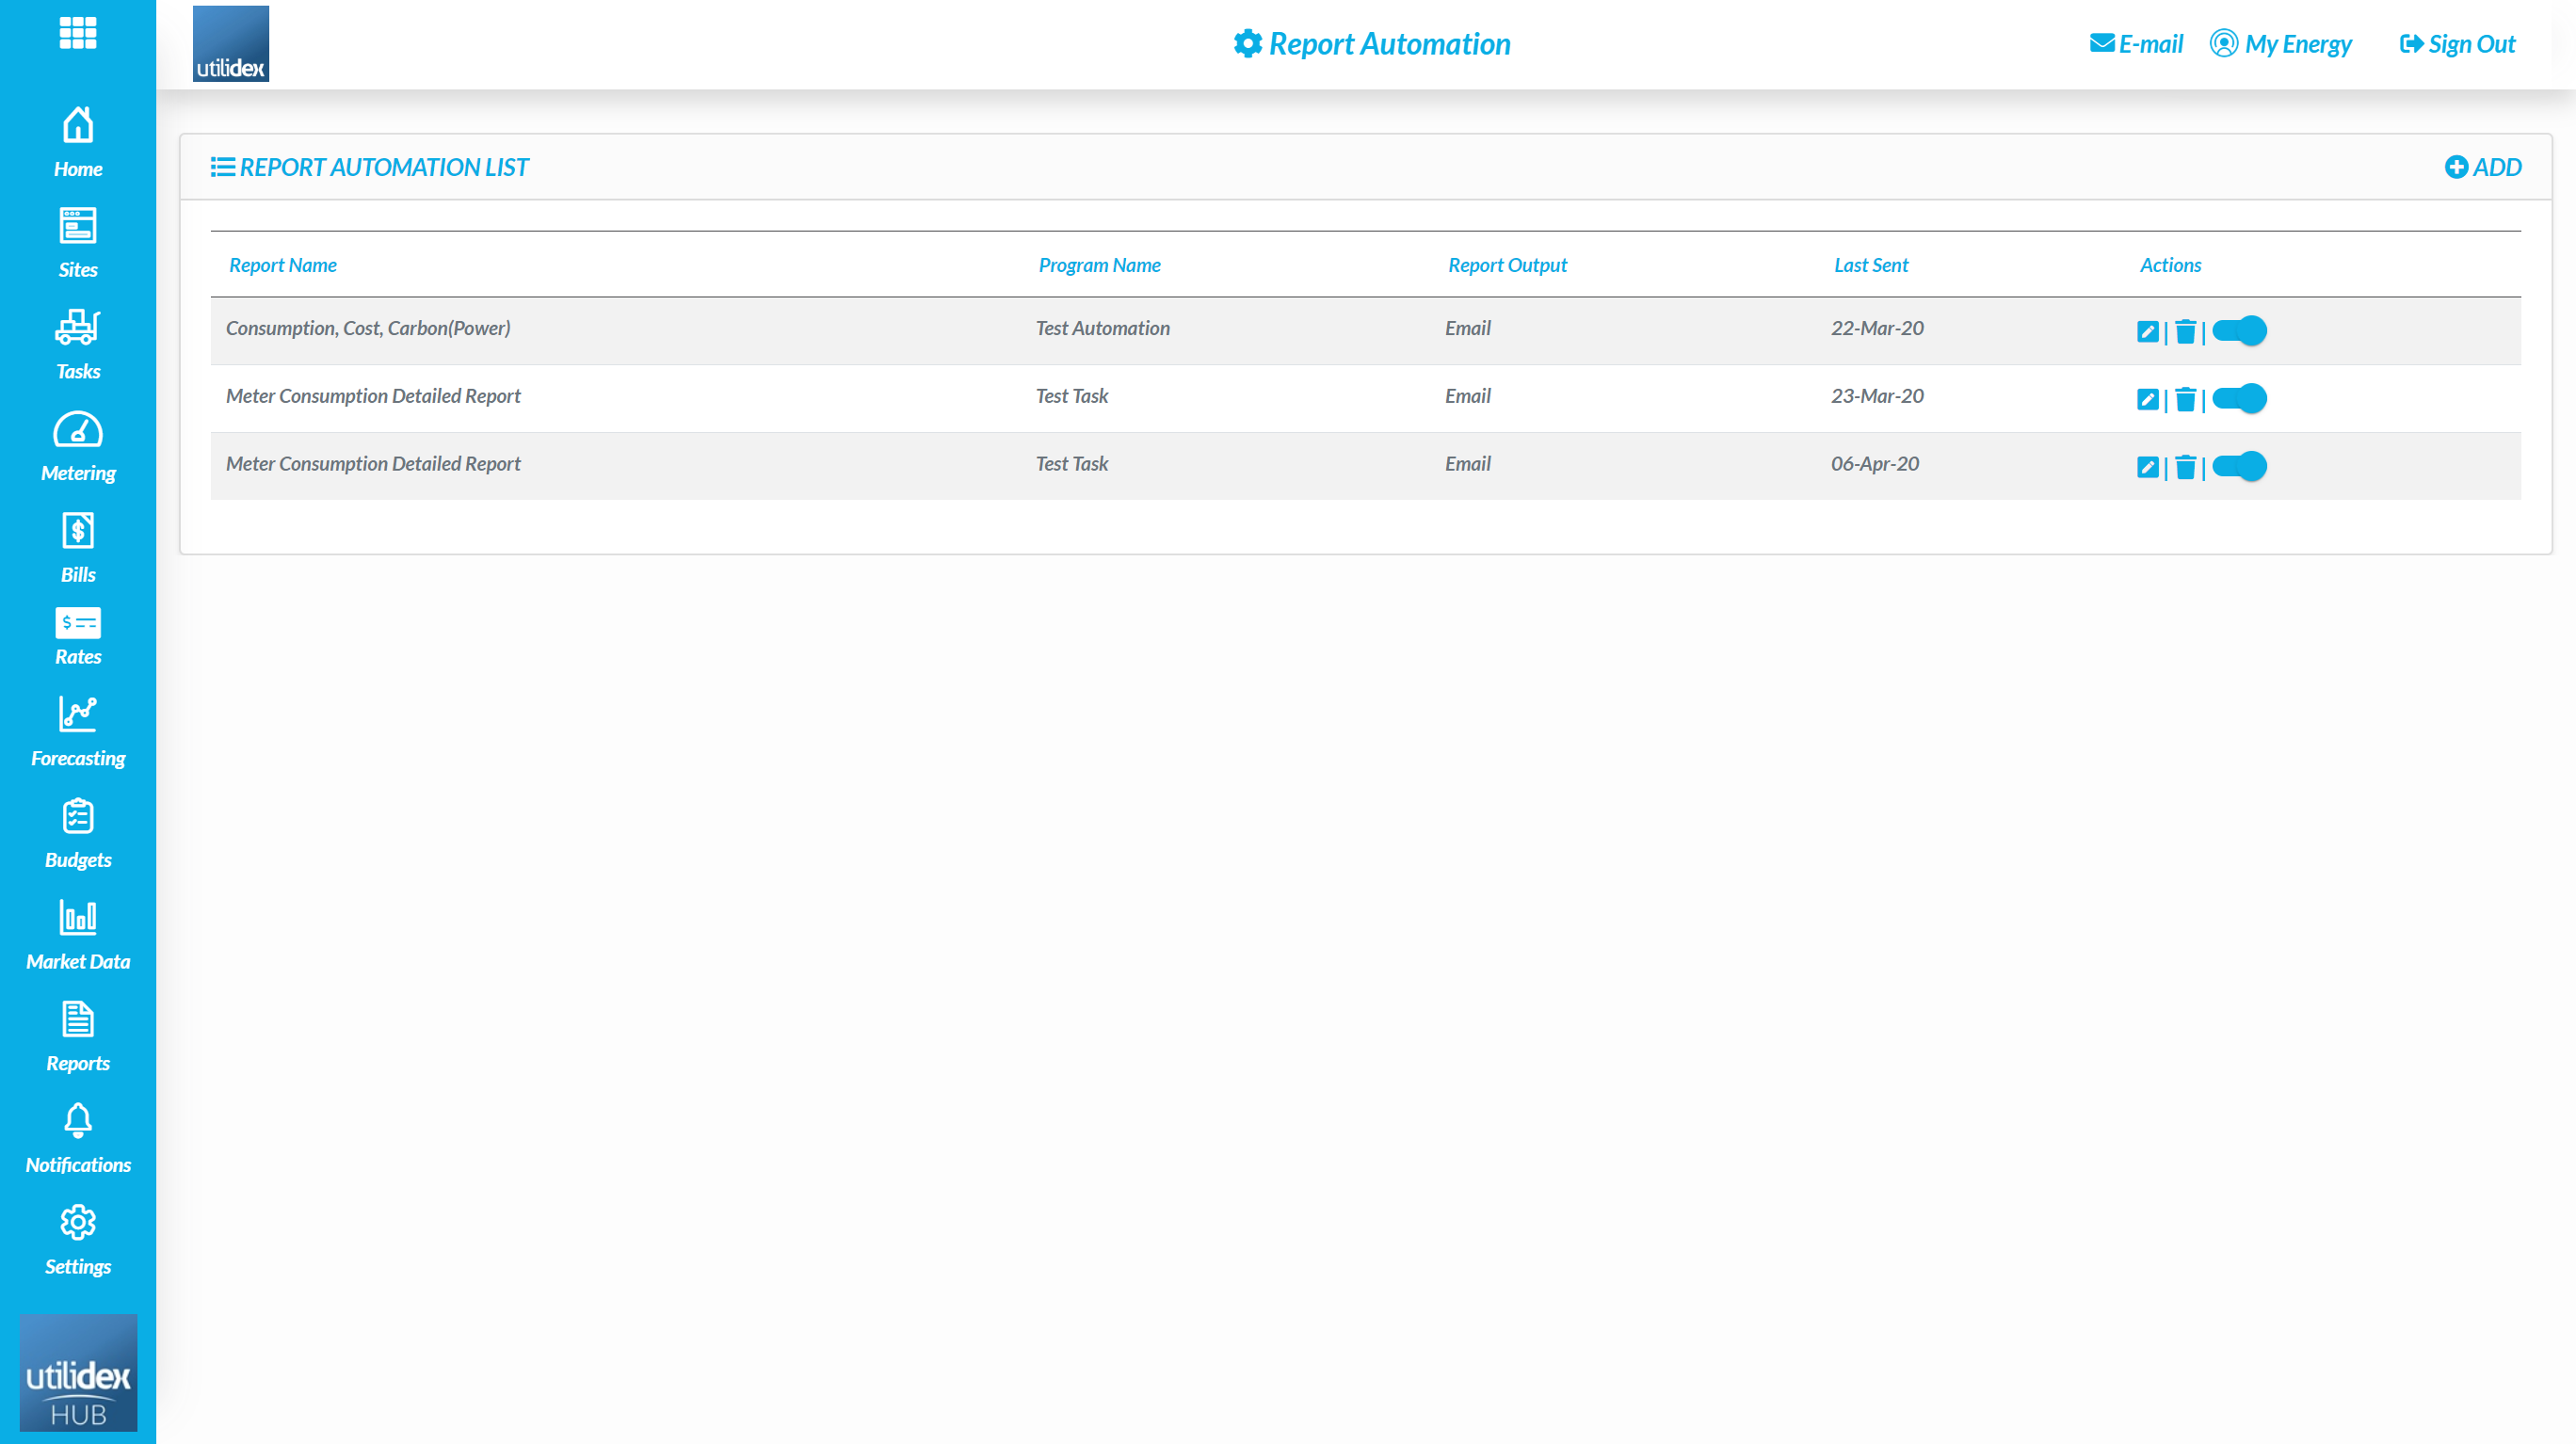
To create a new entry, click on ADD on the top right corner of the screen.
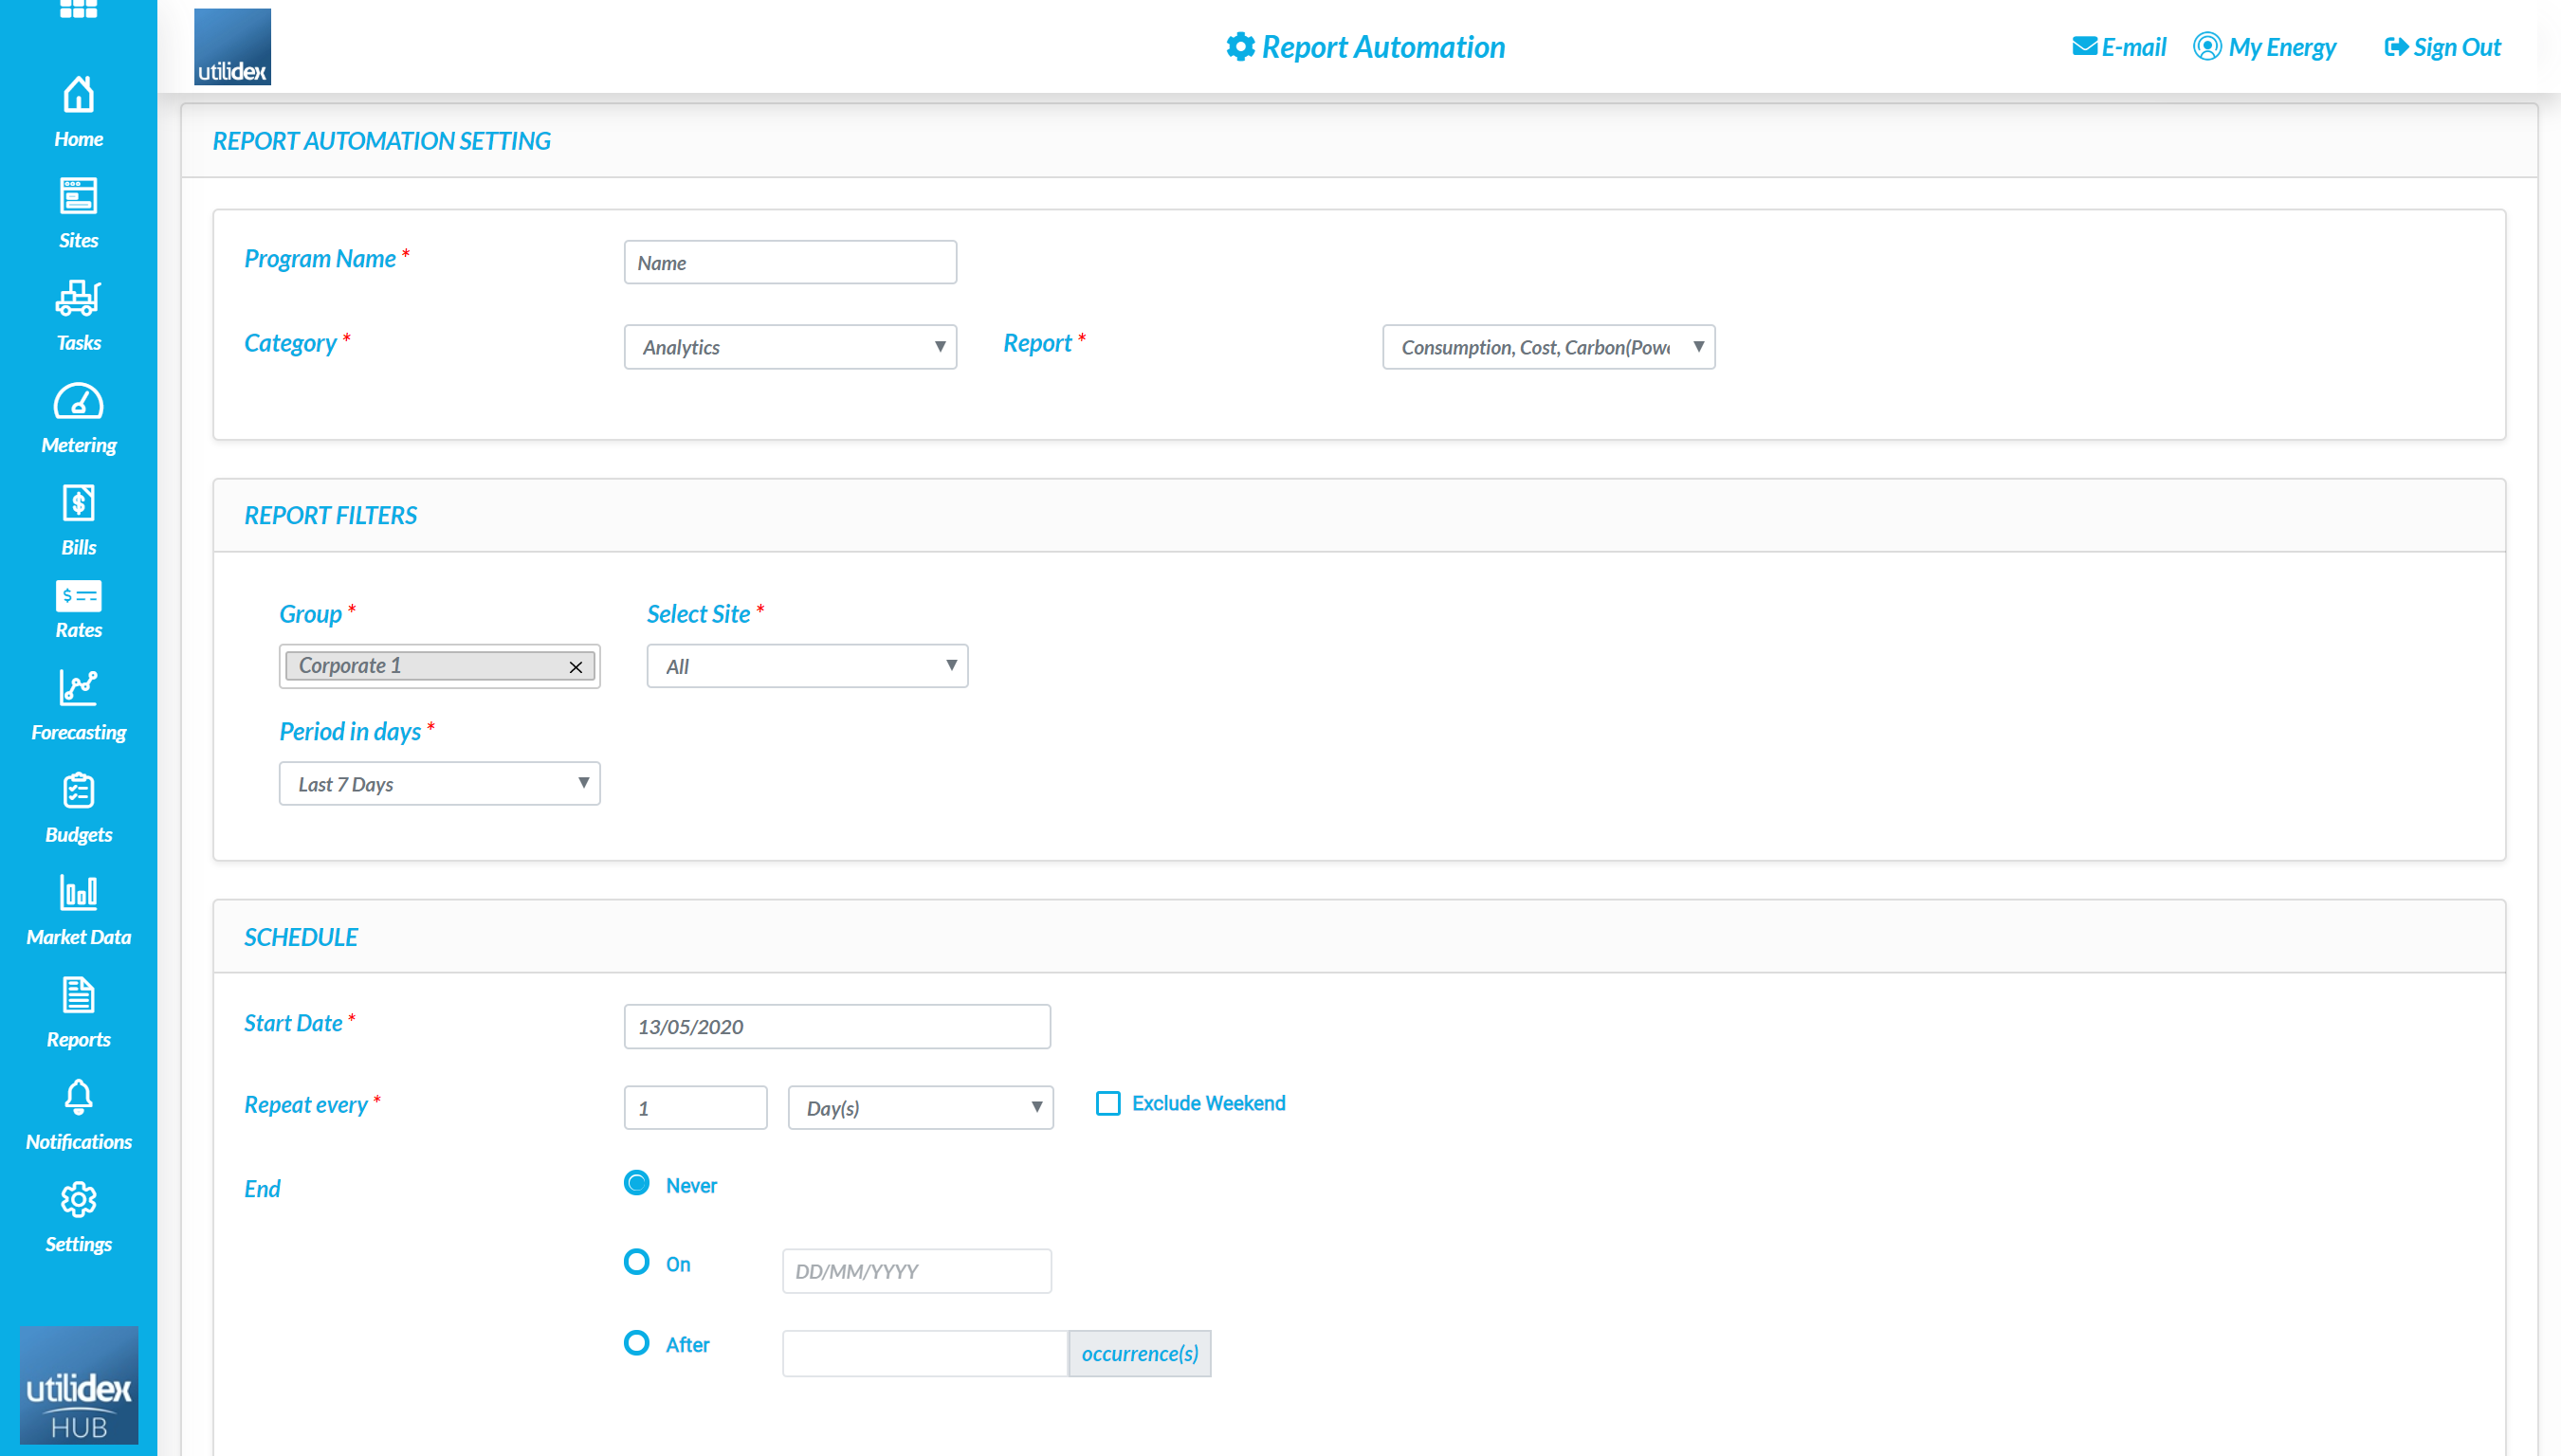
Through here, follow these steps to set it up:
Step 1 – Fill out the Program Name, this will be your unique identifier and the name of the automation you setup(e.g. Weekly Exception Report – Supplier XYZ).
Step 2 – Select the Category & Report you plan to use. This will determine which report the system will autoamtically sent out.
Step 3 – Set the Filters to your preferences. The reports are fully filterable, which means you can test them within the Reports section prior to setting the automation.
Step 4 – Create the Schedule. You can set the report to be sent out repeatedly, end after certain occurencies or date. The schedule is fully customisable and can accommodate weekends if needed.
Step 5 – Select the Ouput Type. You can set this to send out a customised email or export information directly to your FTP/SFTP solution.
Please note that if you choose the email output, you can customise the subject and content of the email.
Please contact your account manager for more details on the FTP/SFTP setup.