As part of the bill validation process, Utilidex processes billing & pricing data from suppliers and turns it into easy to understand information for the user. Pricing & billing data can come through xls, xlsx, pdf and/or EDI, which makes it difficult to access and understand for most people in the industry not specialised in billing.
Why is mapping important?
It is often seen that there will be a difference in how information is displayed within pricing files and the prices in the contract. For instance, a line item like Feed in Tariff, can be displayed as UNRESTRICTED106FIT within the billing file, but at the same time displayed as FiT in the contract. The information needs to be deciphered to produce a cohesive result during the bill validation process.
Once the information is collated and turned into easy to understand text, it requires mapping between the 2 areas (pricing name & billing name), which can differ per customer, even if they are under the same supplier.
For this reason, the Energy.Hub gives admin users the ability to configure these values. The EDI/XLS mapping tool can be found within the shadow bill validation screen and solves this issue by creating a bridge between the information. You can now choose connection points and display names. This cuts through the noise of complex industry billing and incoherent charge names.
How to perform mapping
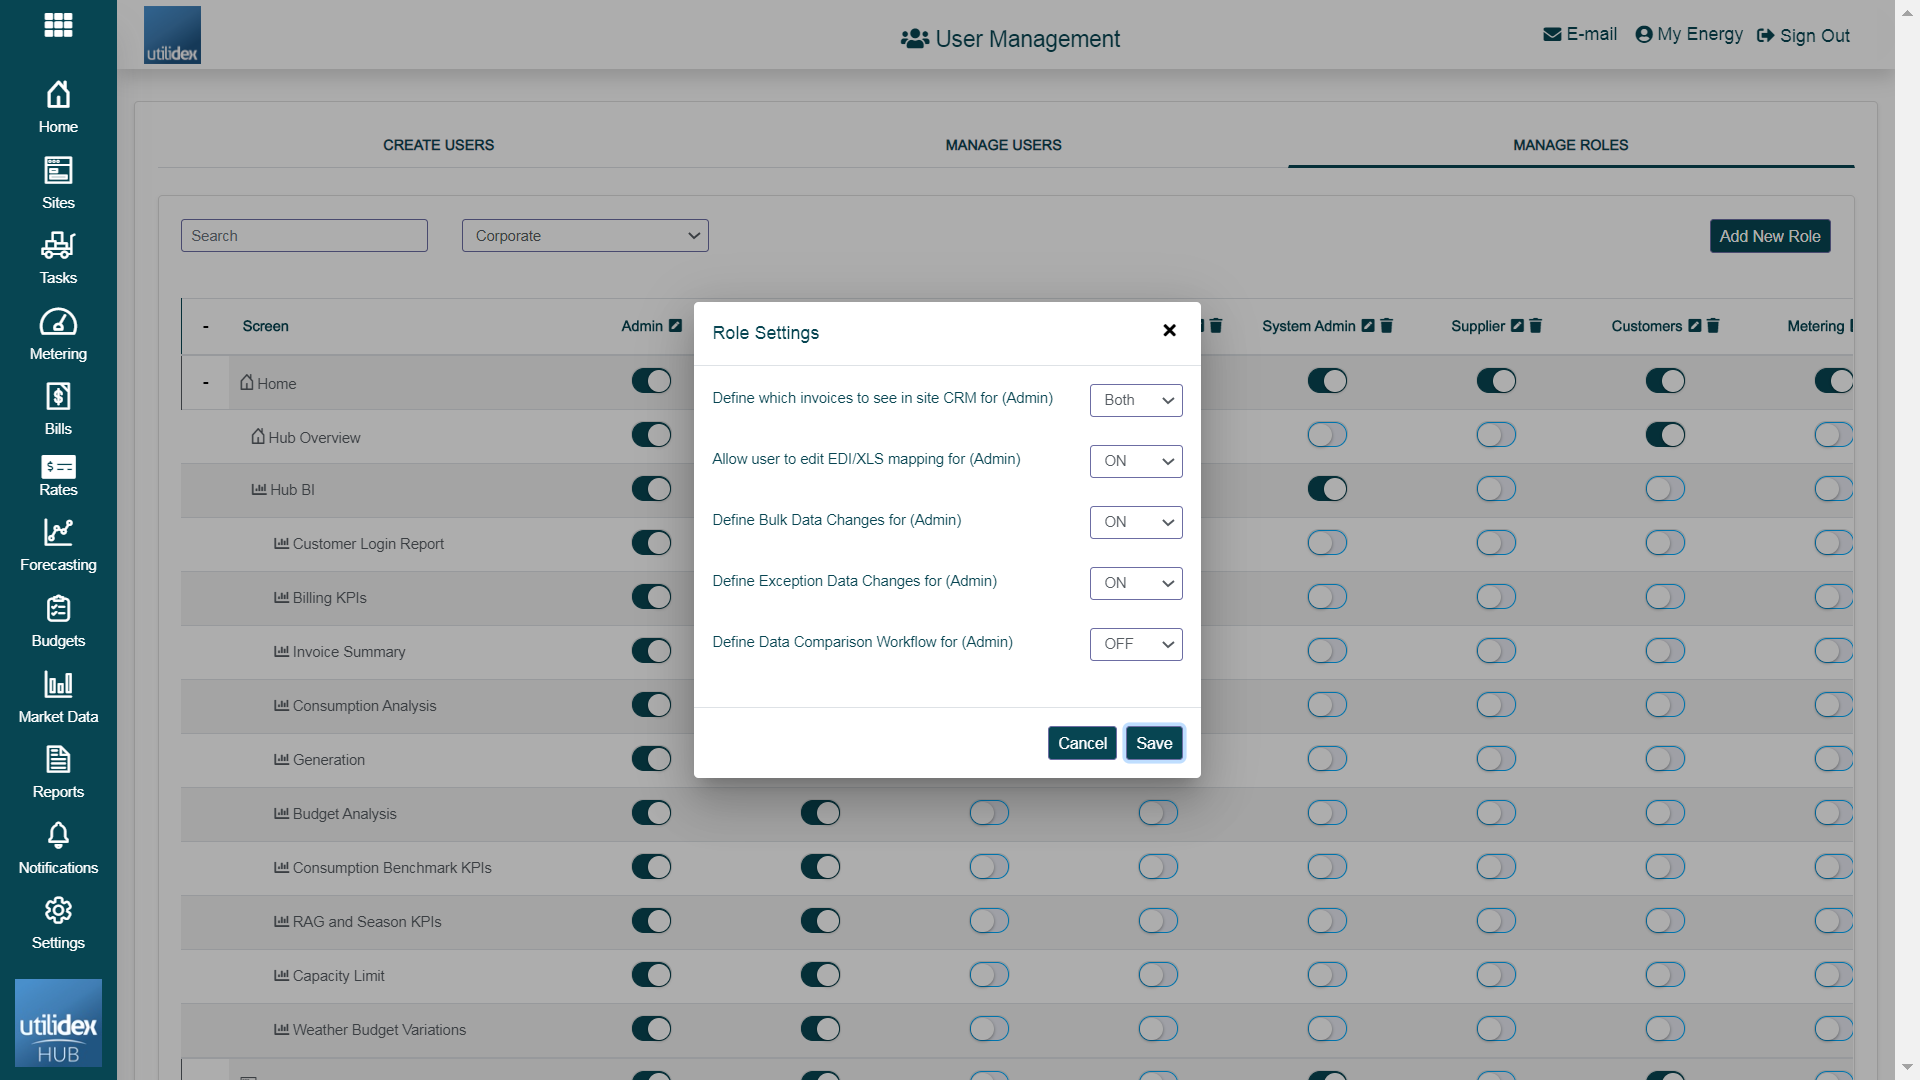
To complete the mapping, first you need to enable the feature from User management in settings. To update this, navigate to User Management >> Manage Roles. From there you need to choose the role type you wish to have access to this feature, for example Admin users. Select the pencil to the side of the user role type and turn the feature on as shown below.
Now that you have this feature enabled, you are only 2 easy steps away from completing this exercise.
- Open a shadow bill by navigating to Bills >>Validate Bills >> Select a bill >> Open a specific invoice >> select the Shadow Bill comparison tab >> Select EDI/XLS mapping on the top right corner.
- Perform the mapping between the different formats.
To better understand the actions necessary, let’s try and break down the EDI/XLS mapping tool. Once you have selected the EDI/XLS mapping tool, you will get the window shown below.
Within this window, you can identify 3 primary names, see below:
- EDI/XLS name – this is how the line items appear in the billing file
- Available Mapping – this is how the line item appears in the contract/pricing file
- Display Name – this is how the line item will be displayed in the Utilidex system
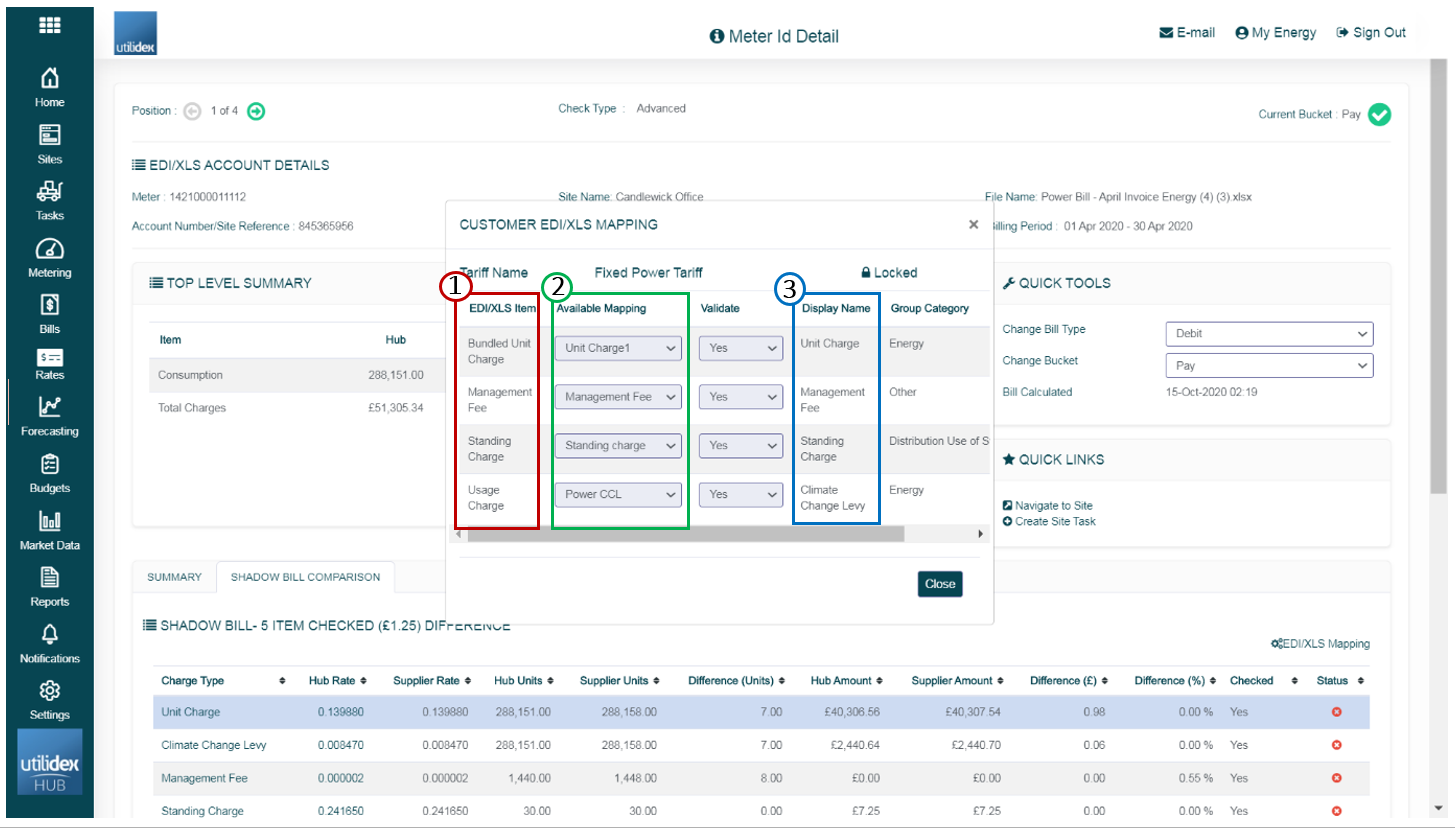
You will also see 2 additional columns(2):
- Validate – this allows you to select whether to validate the line item or not
- Group Category – this groups the line item under the selected group(the information for this is later used in analytics such as the Invoice Summary BI)
To set up, you simply select Locked on the top right corner. This will turn the editable fields yellow, see below:
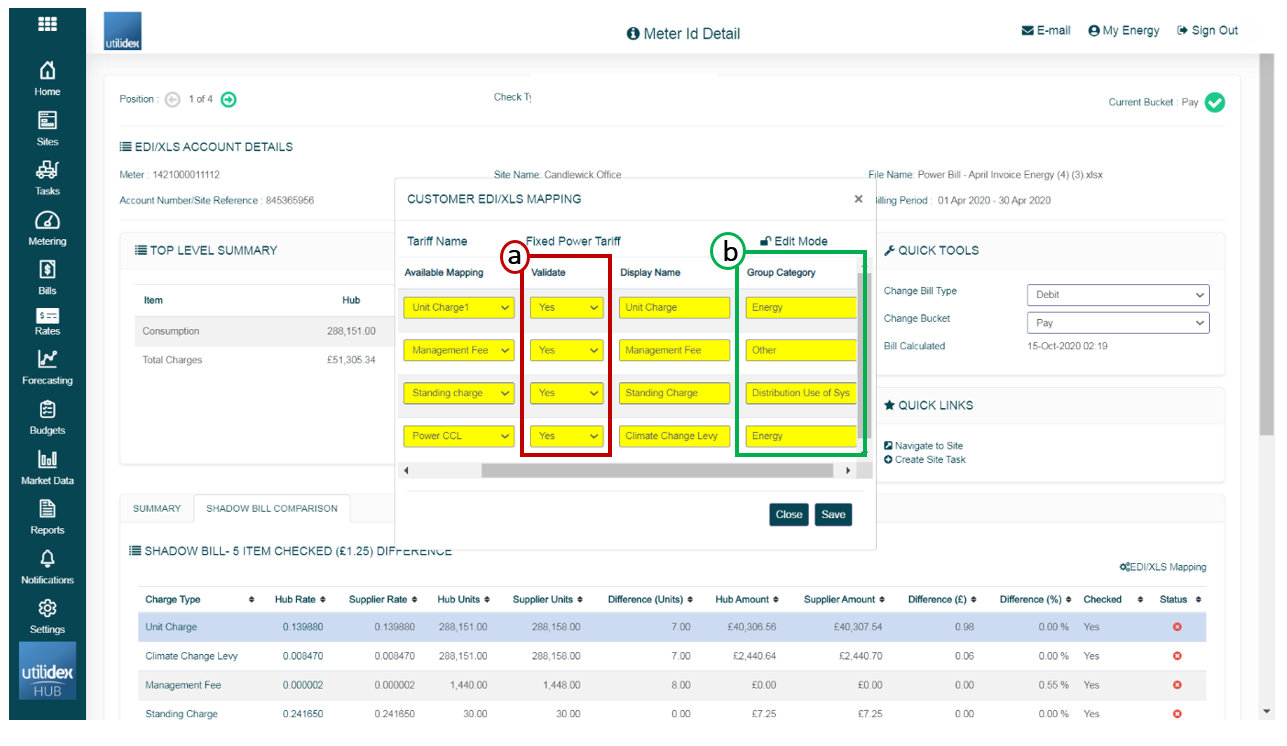
You can then proceed to edit the details. Once finished you can select save to finish the process save EDI/XLS mapping for the specific tariff.
Please note you will need to re-run the billing file(s) to see the changes reflected.