The Energy.Hub allows you to reduce the time you spend on correcting data issues or false positives. About 60% of the invoices gets disputed because of data issues that are not actual errors worth disputing. The process of correcting the data according to the values used by the supplier may be lengthy and causing overhead.
With the new Invoice Cleanser, we want to make sure to solve the data issues raised by bill validation, so that you can focus on the real disputes. Please see below the instructions on how to use this screen!
Accessing single invoices
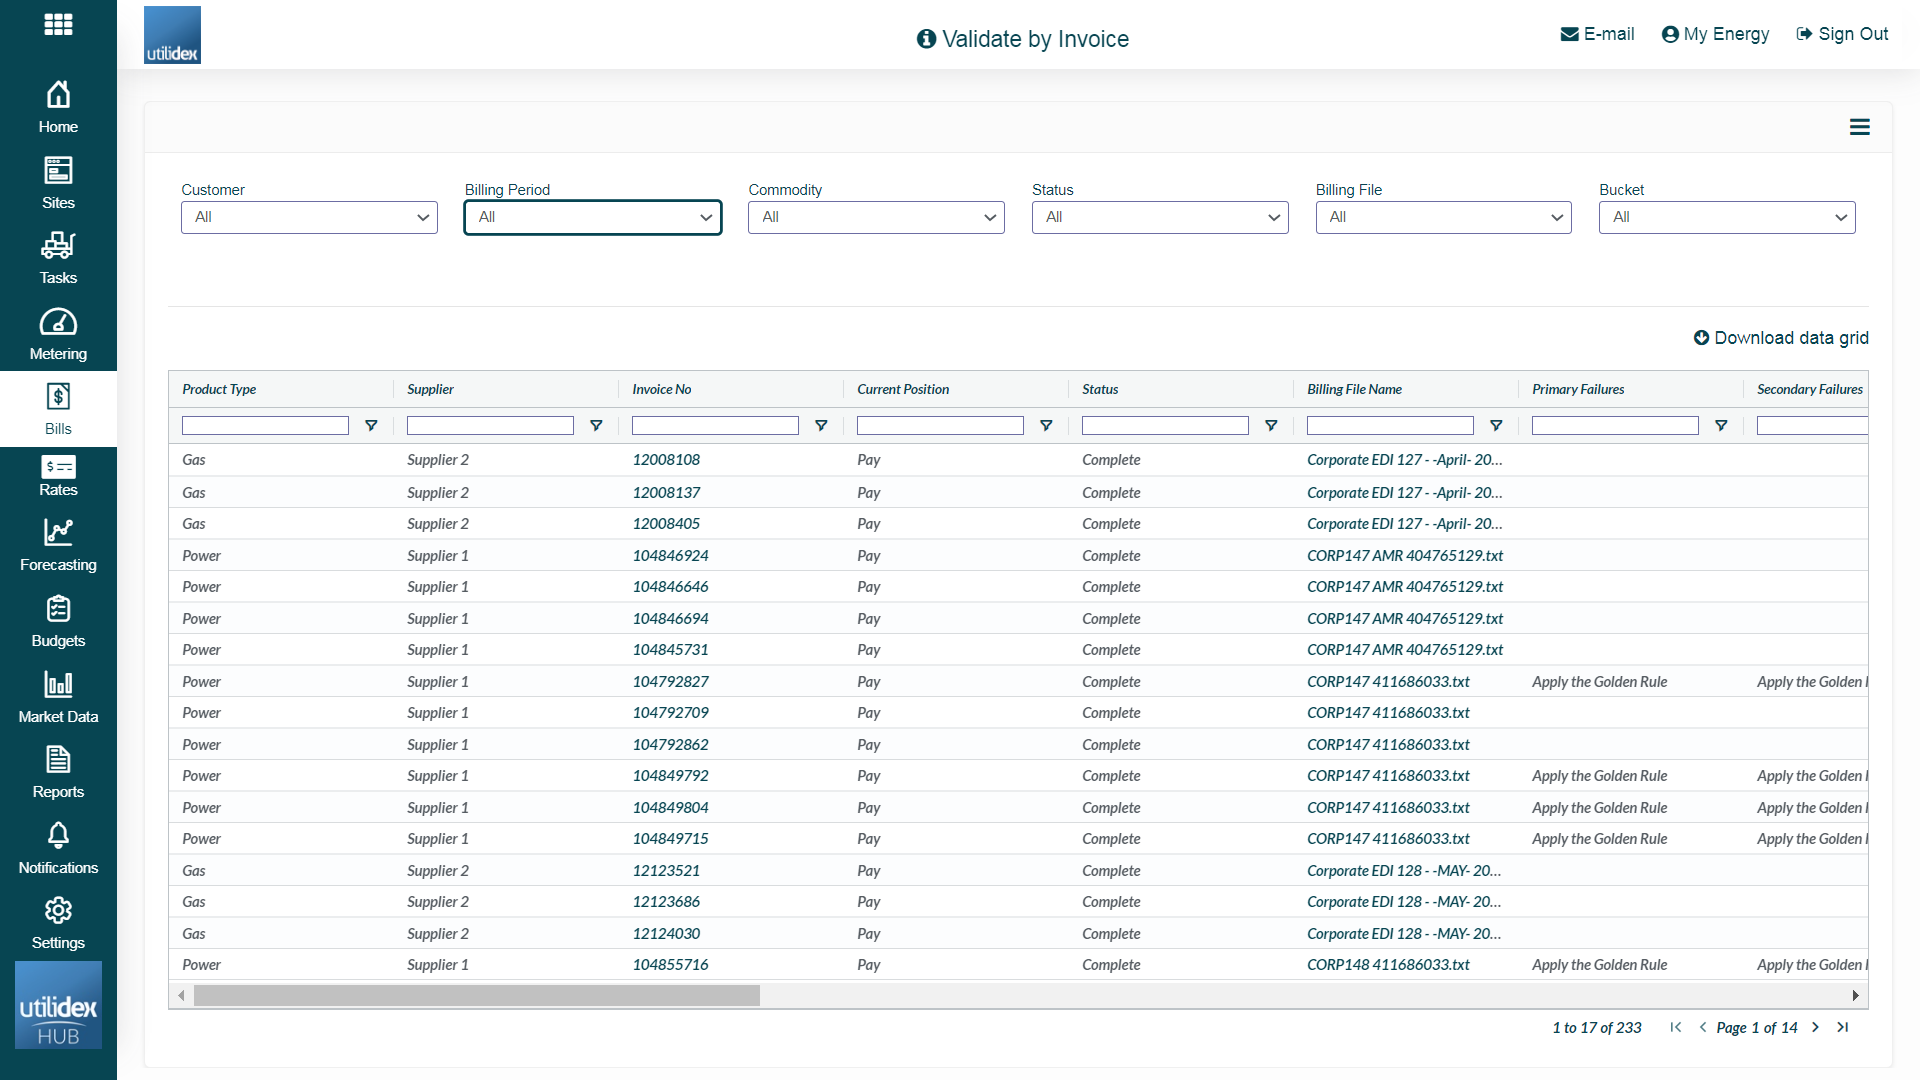
By Navigating to Bills > Validation > Validate Invoices, you will be able to access a screen that will give you an overview of each invoice received for your sites. The table shown below can be fully customisable by choosing the columns that you would like to see. You can add or remove columns by clicking on the accordion (three lines) on the top right side of the screen.
Our bill validation product provides both high level overviews while also allowing you to examine invoices down to the HH charges applied. This is made possible through what we call the Shadow bill (invoice) screen. You can access single invoices by navigating to Bills > Validation > Validate Invoices > Select the invoice. Please note that by scrolling all the way to the right of the table, you will be able to download a PDF copy of the invoices.
When accessing a single invoice, you will be able to see the following information:
- EDI/XLS account details – A quick glance that provides information on meter/site in question, as well as the period for which it refers to.
- Top level summary – From this section, you can quickly determine whether the dispute is worth the analysis or not. Here you can find information on cost and consumption differences.
- Detailed Summary and failure explanations – Here you can find the bill statistics, meter data information, as well as further explanation on why the validation checks failed.
Here you can also access the Shadow bill Comparison. Please access Shadow Bill section. for more information.
Invoice Cleanser
You are now able to view and correct the validation disputes based on data issues, such as rate differences and site standing data (topline). This screen allows to reduce the time you spend on performing validation, by matching the data with what is present in the bill. Please see the workflow below.
- Find Rates and Topline disputes
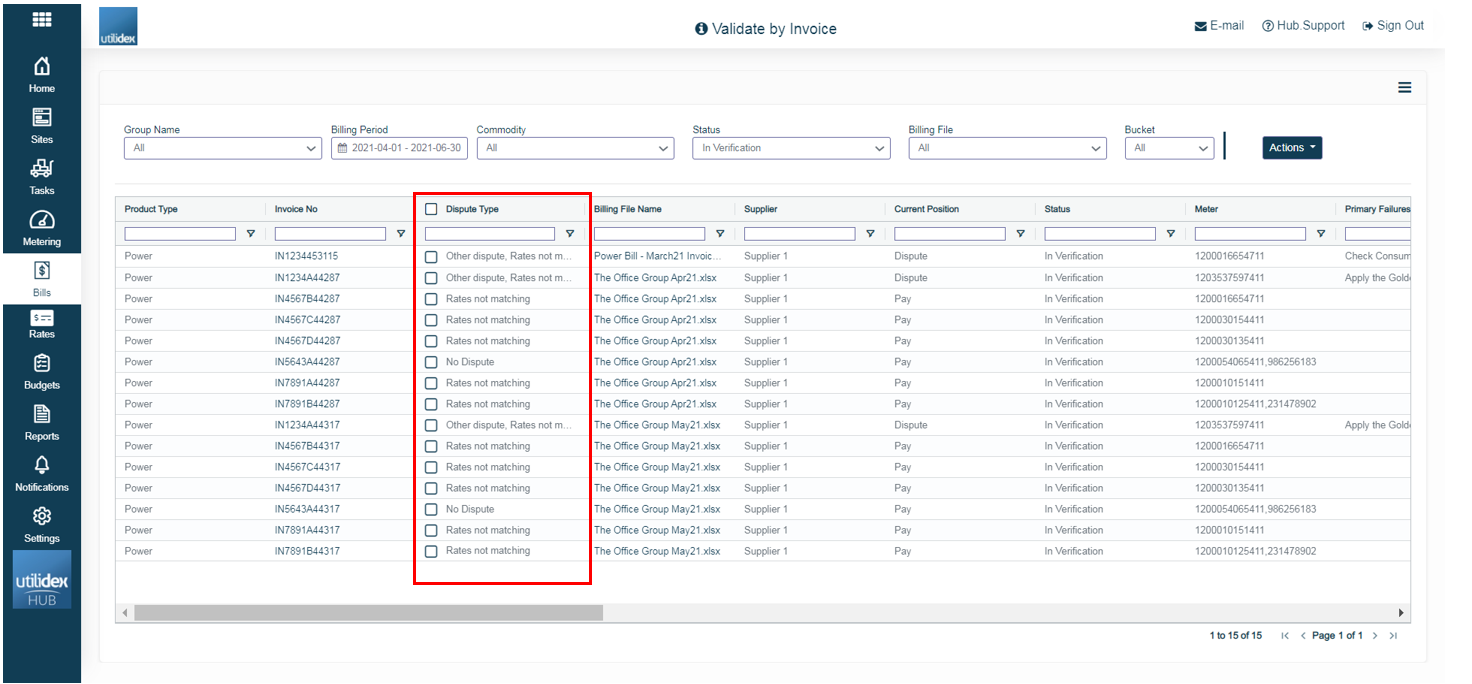
The table will allow to filter the invoices according to the disputes raised. You will be able to find the following options:
- Rates not matching
- Topline not matching
- Other dispute
- No Dispute
2. Match the data
You can match the Energy.Hub data with the supplier’s data by following the below steps:
- Select the dispute type (Rates not matching, Topline not matching)
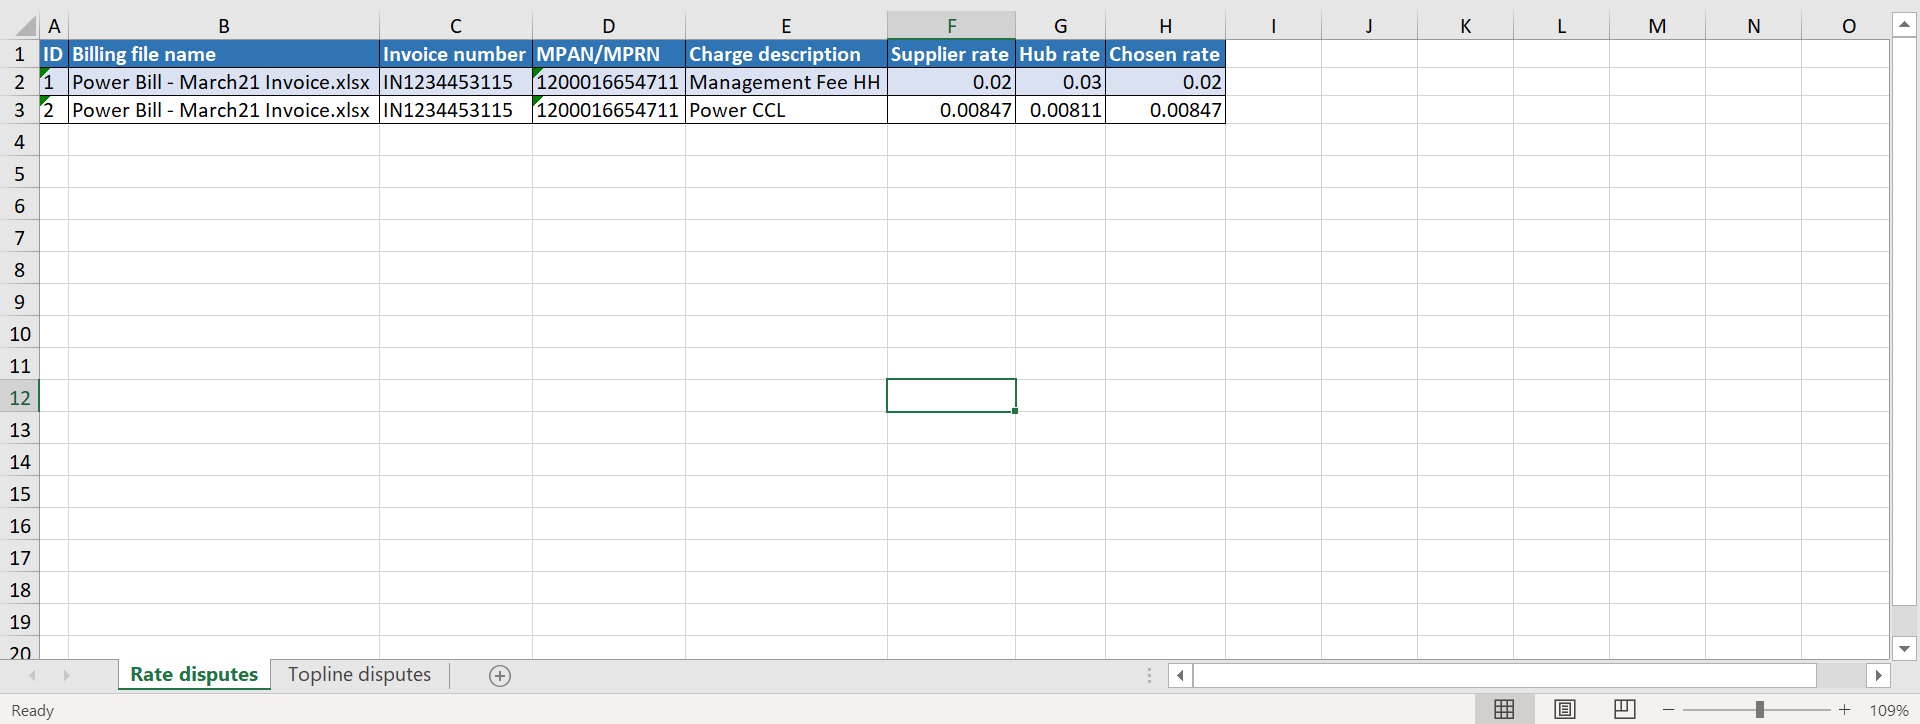
- Click on Actions > Download Dispute Type. The system will download an excel file as shown below. This highlights the Hub and supplier data, and gives you the possibility to match the rates or topline present in the system with the supplier’s one.
- Fill the “Chosen Rate/Topline” column with the data you would like to update. Please note that as a default option, the excel will contain the supplier’s data in the “Chosen Rate/Topline” column.
- Upload the excel with the changes through Actions > Upload Data. Once you re-upload the excel file, the rates or topline for the specific meter will automatically update in the Energy.Hub.
- Re-run the file through Actions > Re-run.