Counter-parties
To configure a counterparty, users can follow the below 3 steps:
- Go to Settings, My Company & Counter-parties
- Select Quick Add a Company
- Define the Name, Product, Address, Tenor, and Daily Volume for the supplier
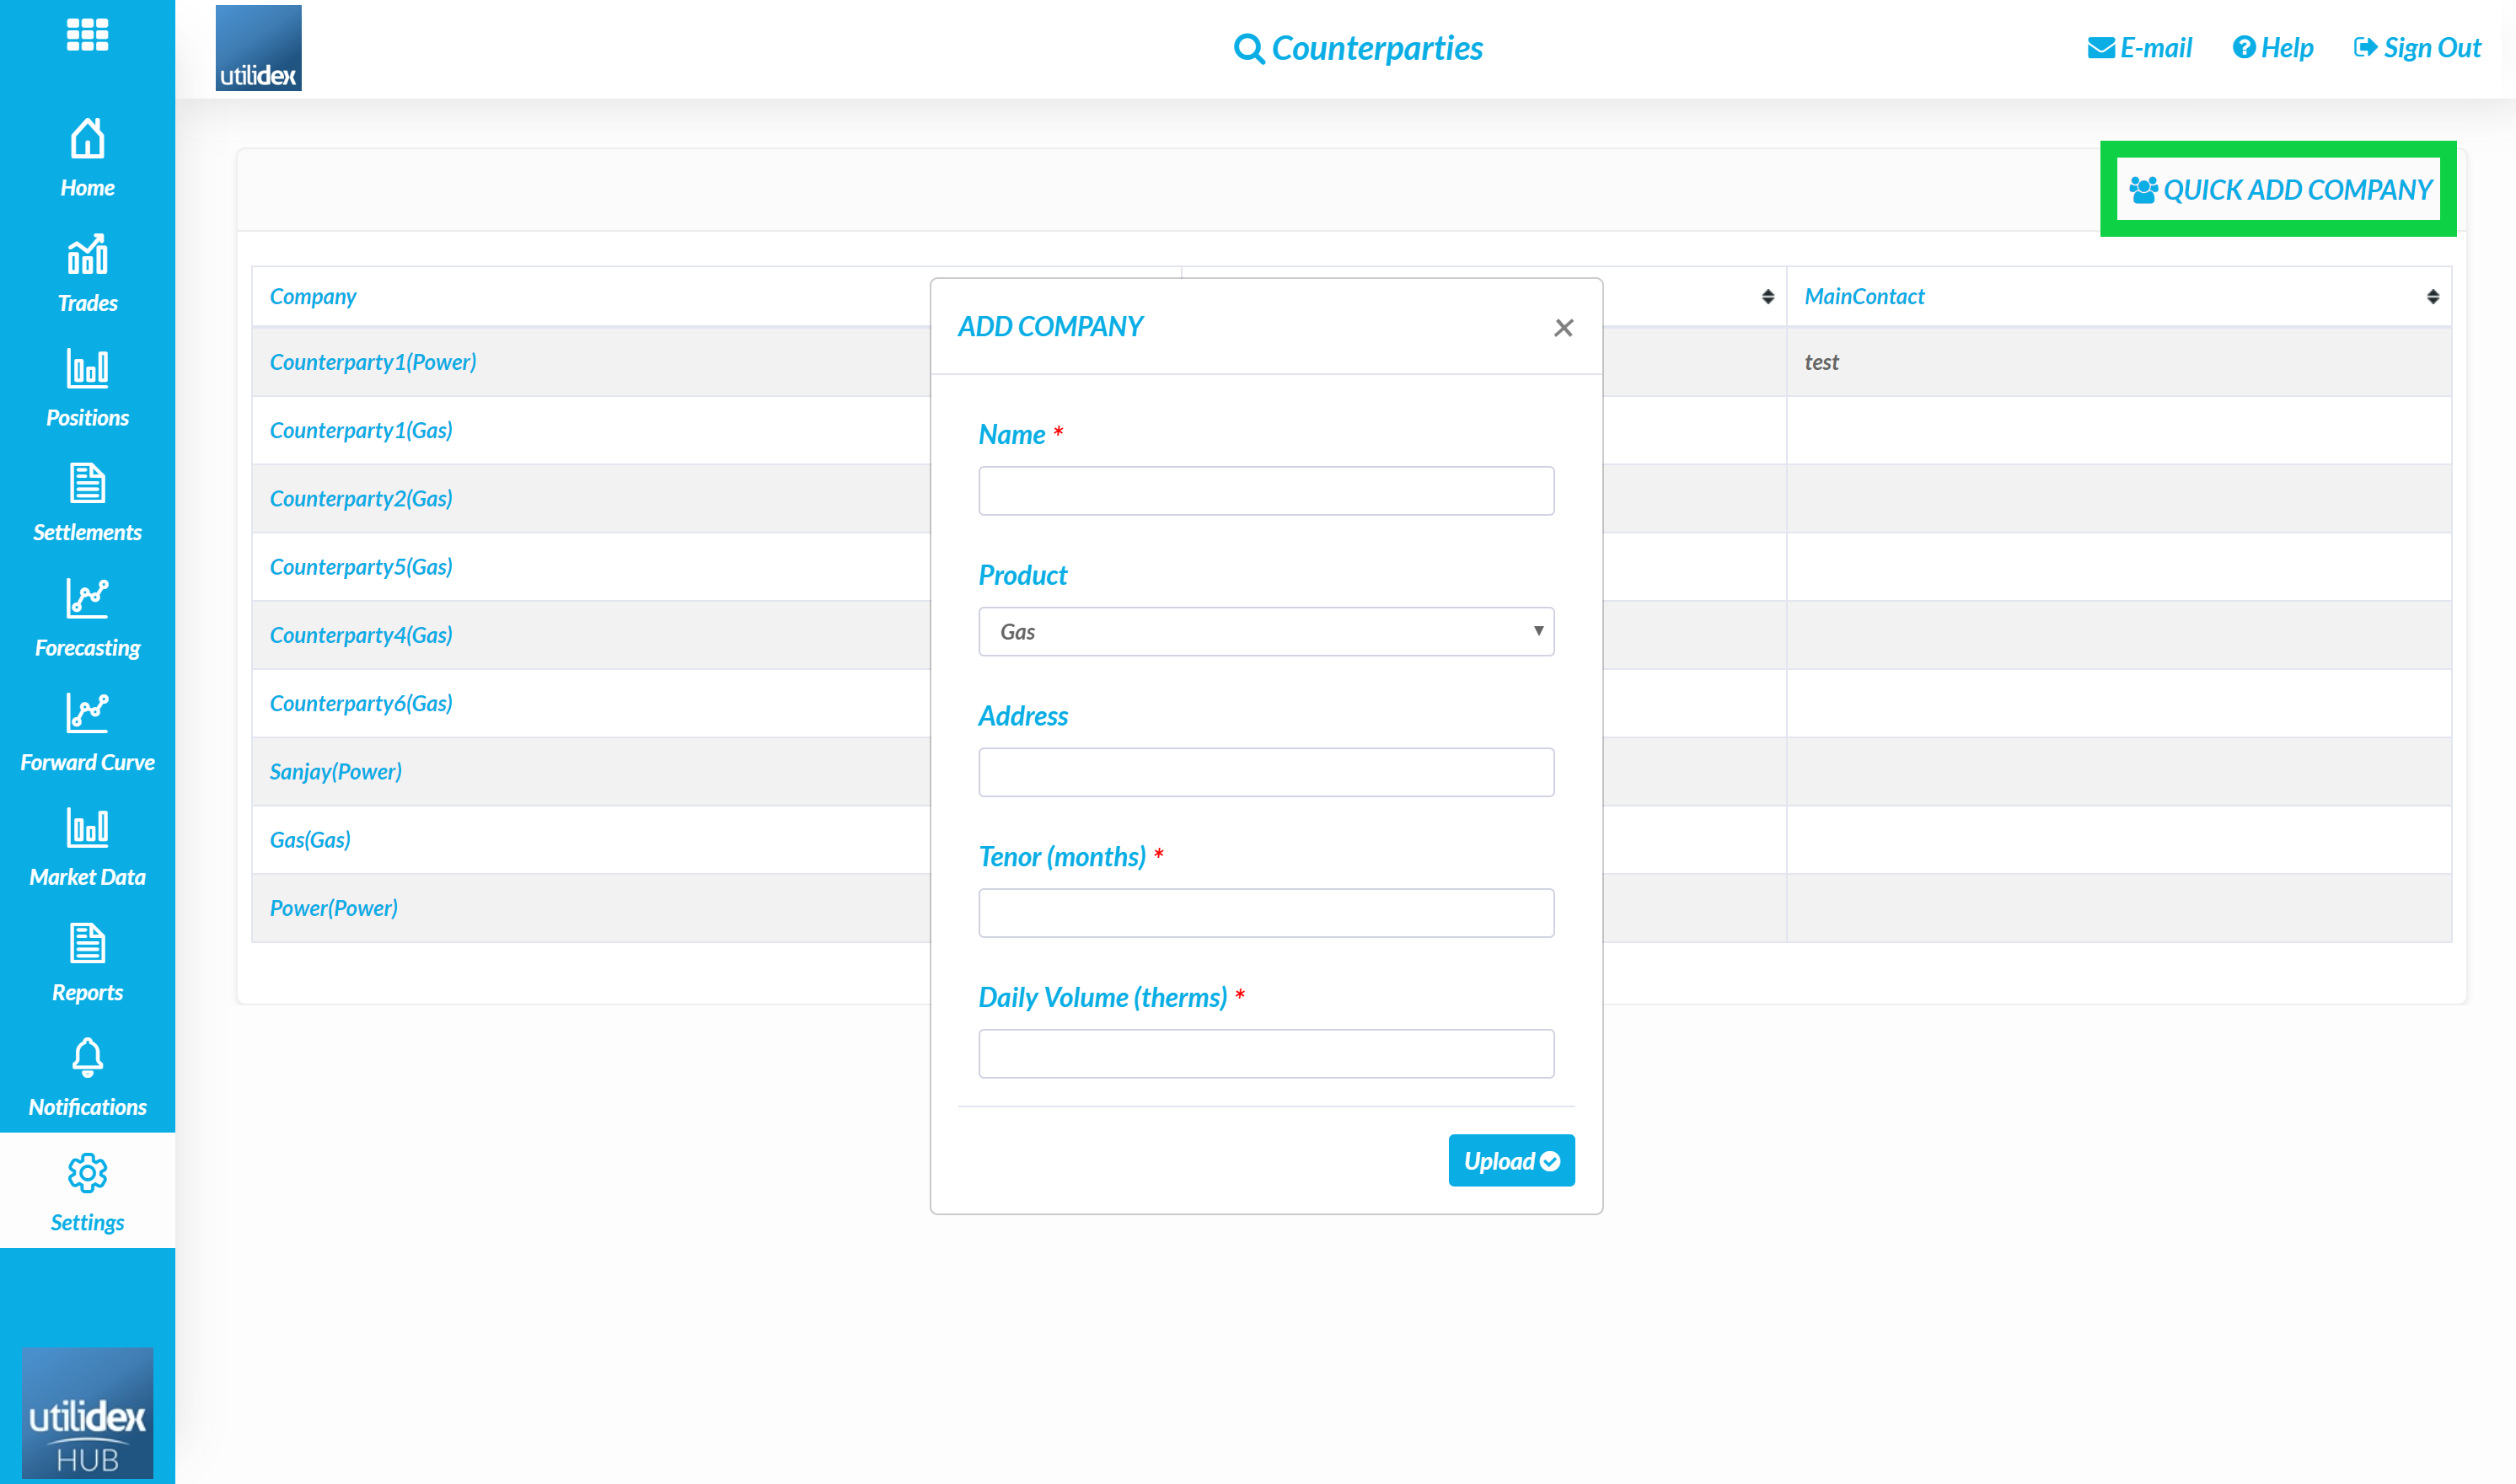
The Name, Tenor, and Daily Volume are all mandatory fields. The system uses this data to run controls for each trade (e.g. ensuring a trade does not exceed a maximum volume pre-determined by a supplier).
Counterparties can later be edited by selecting the Company Name in the data table in the left-most column. Each counterparty will then appear in the trade entry workflow and can be entered via the excel bulk trade upload template.
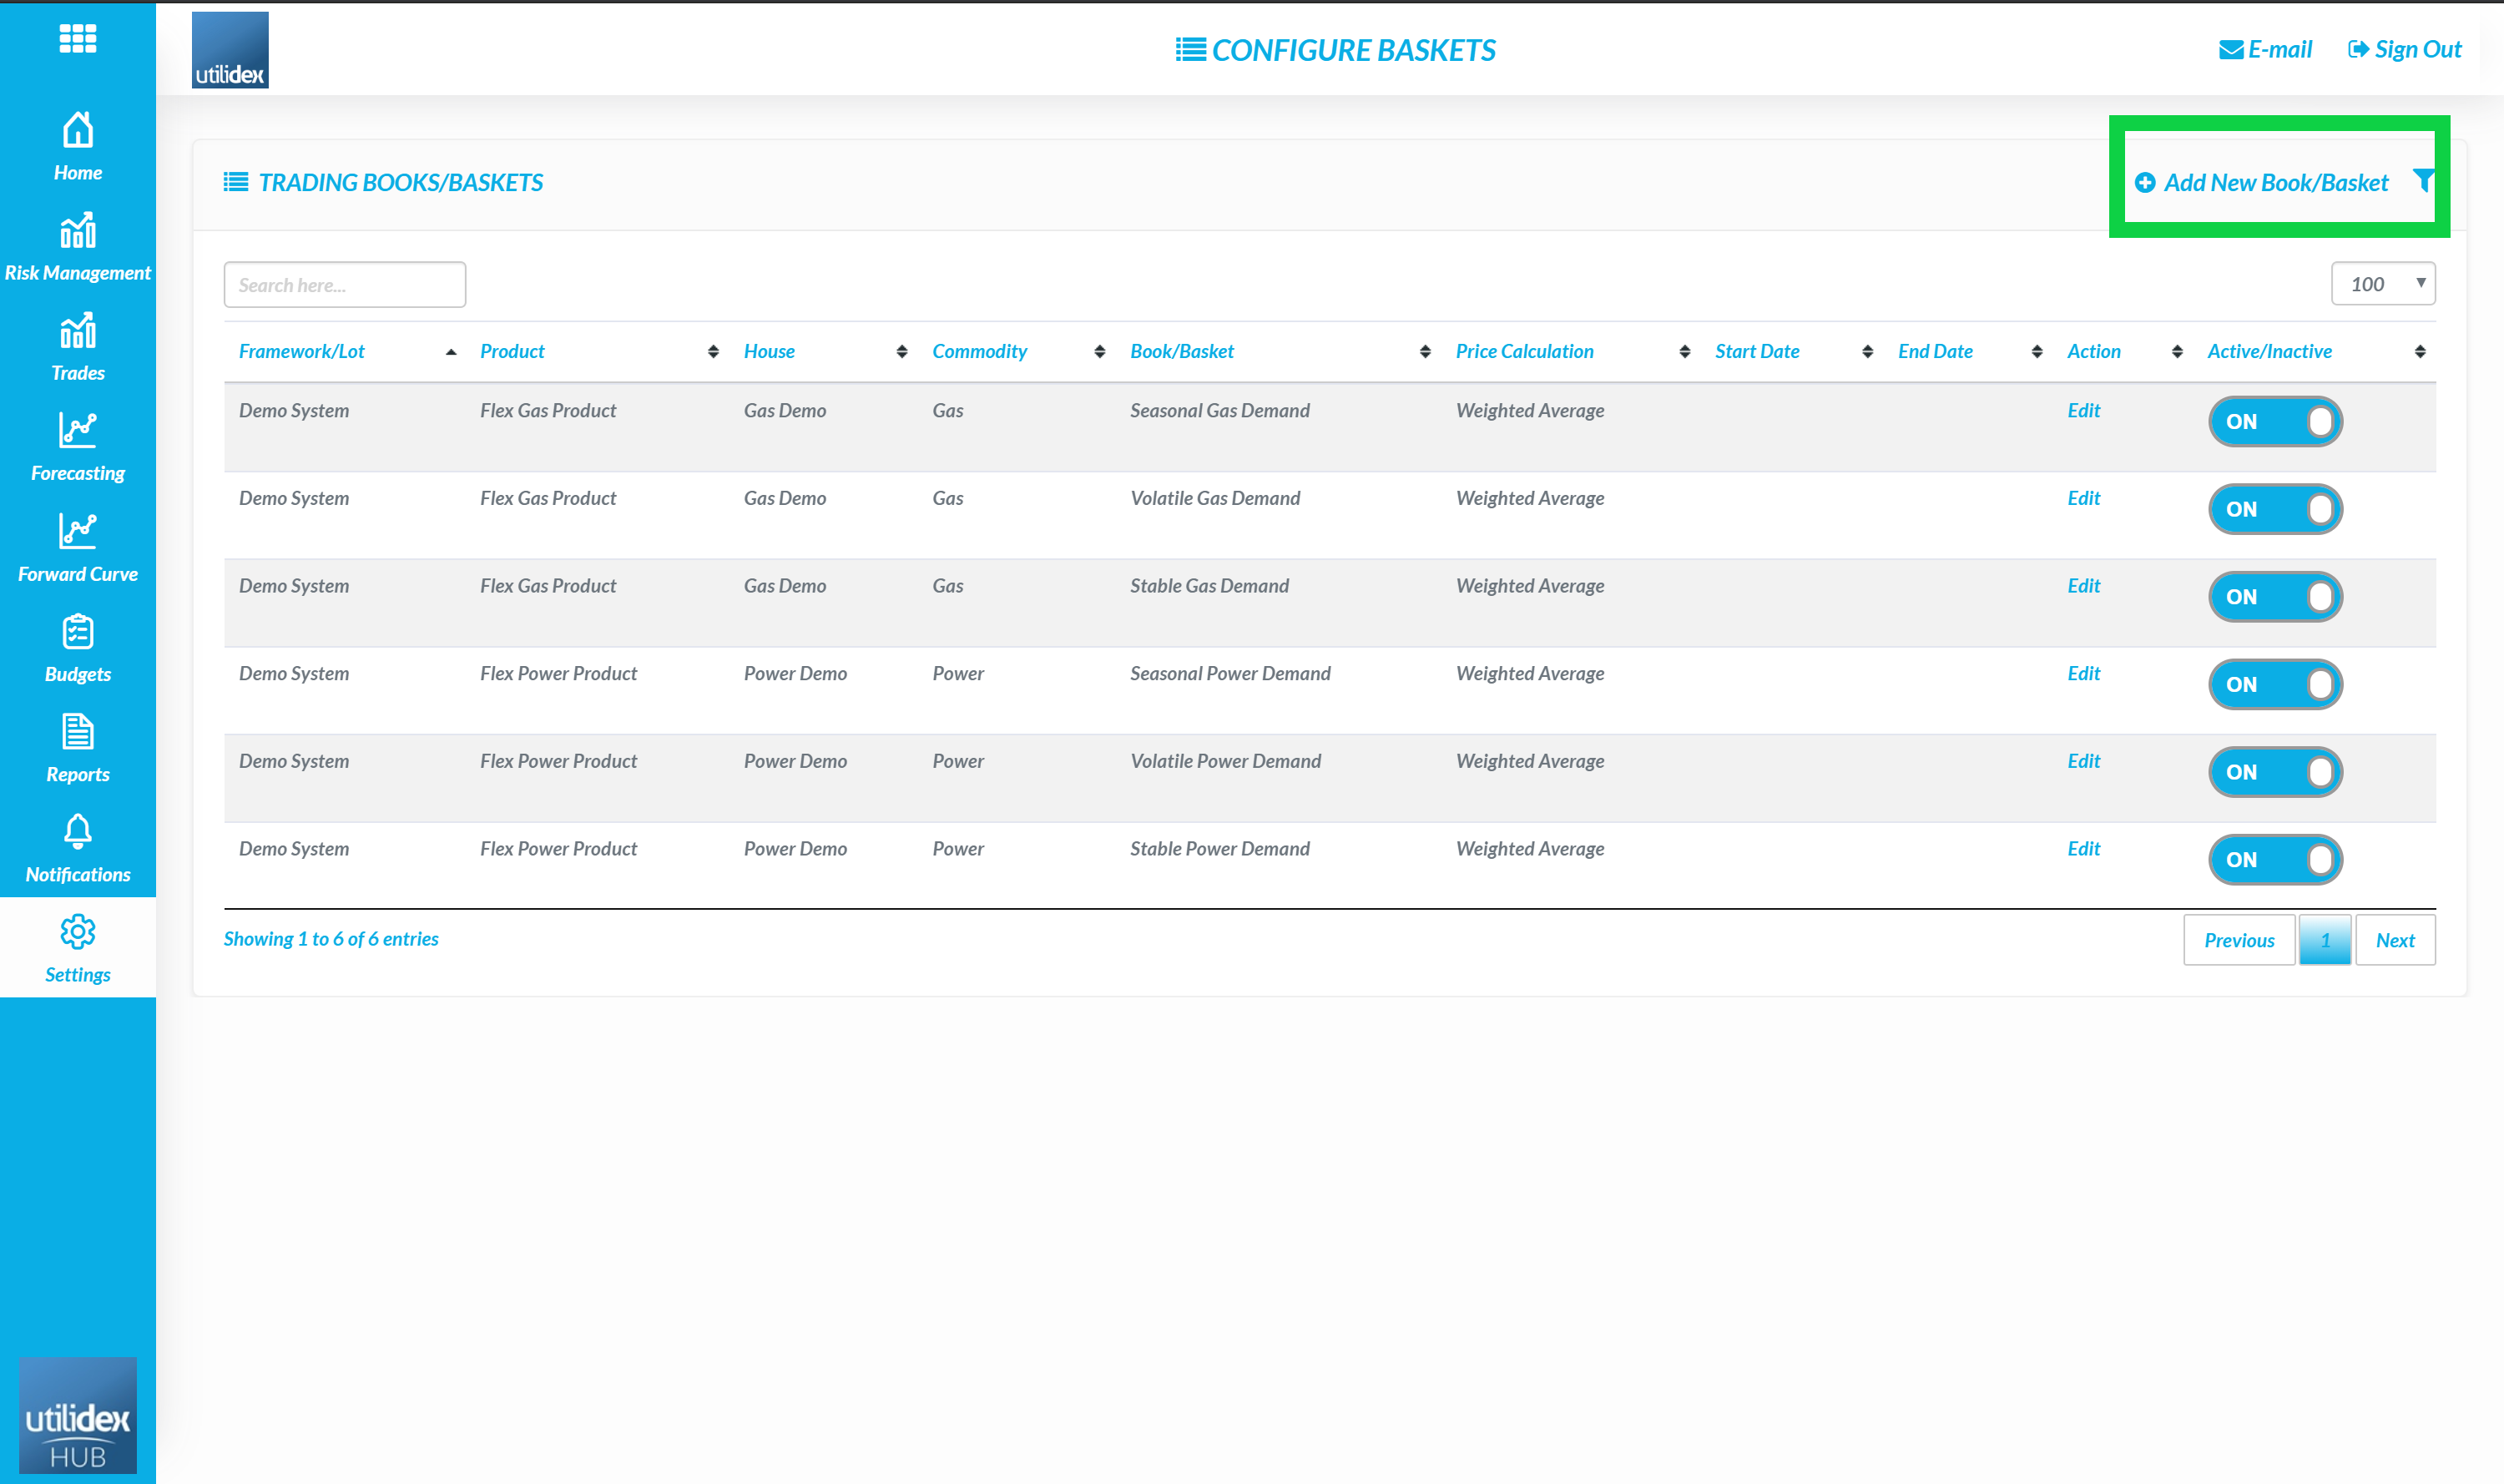
Baskets
The Utilidex ETRM system uses Baskets to allocate demand and trades to. Other systems may call a basket a purchasing group or book. To configure a Basket, users can follow the below 5 steps:
- Settings, Data Settings & Baskets
- Select Add New Basket
Accessing Data Manager
To manage the data flows within the system, users can open the Data Manager by going to:
- Settings, Data Settings & Data Manager
- Here, you can view all the data feeds configured via FTP and see when the last data was transferred
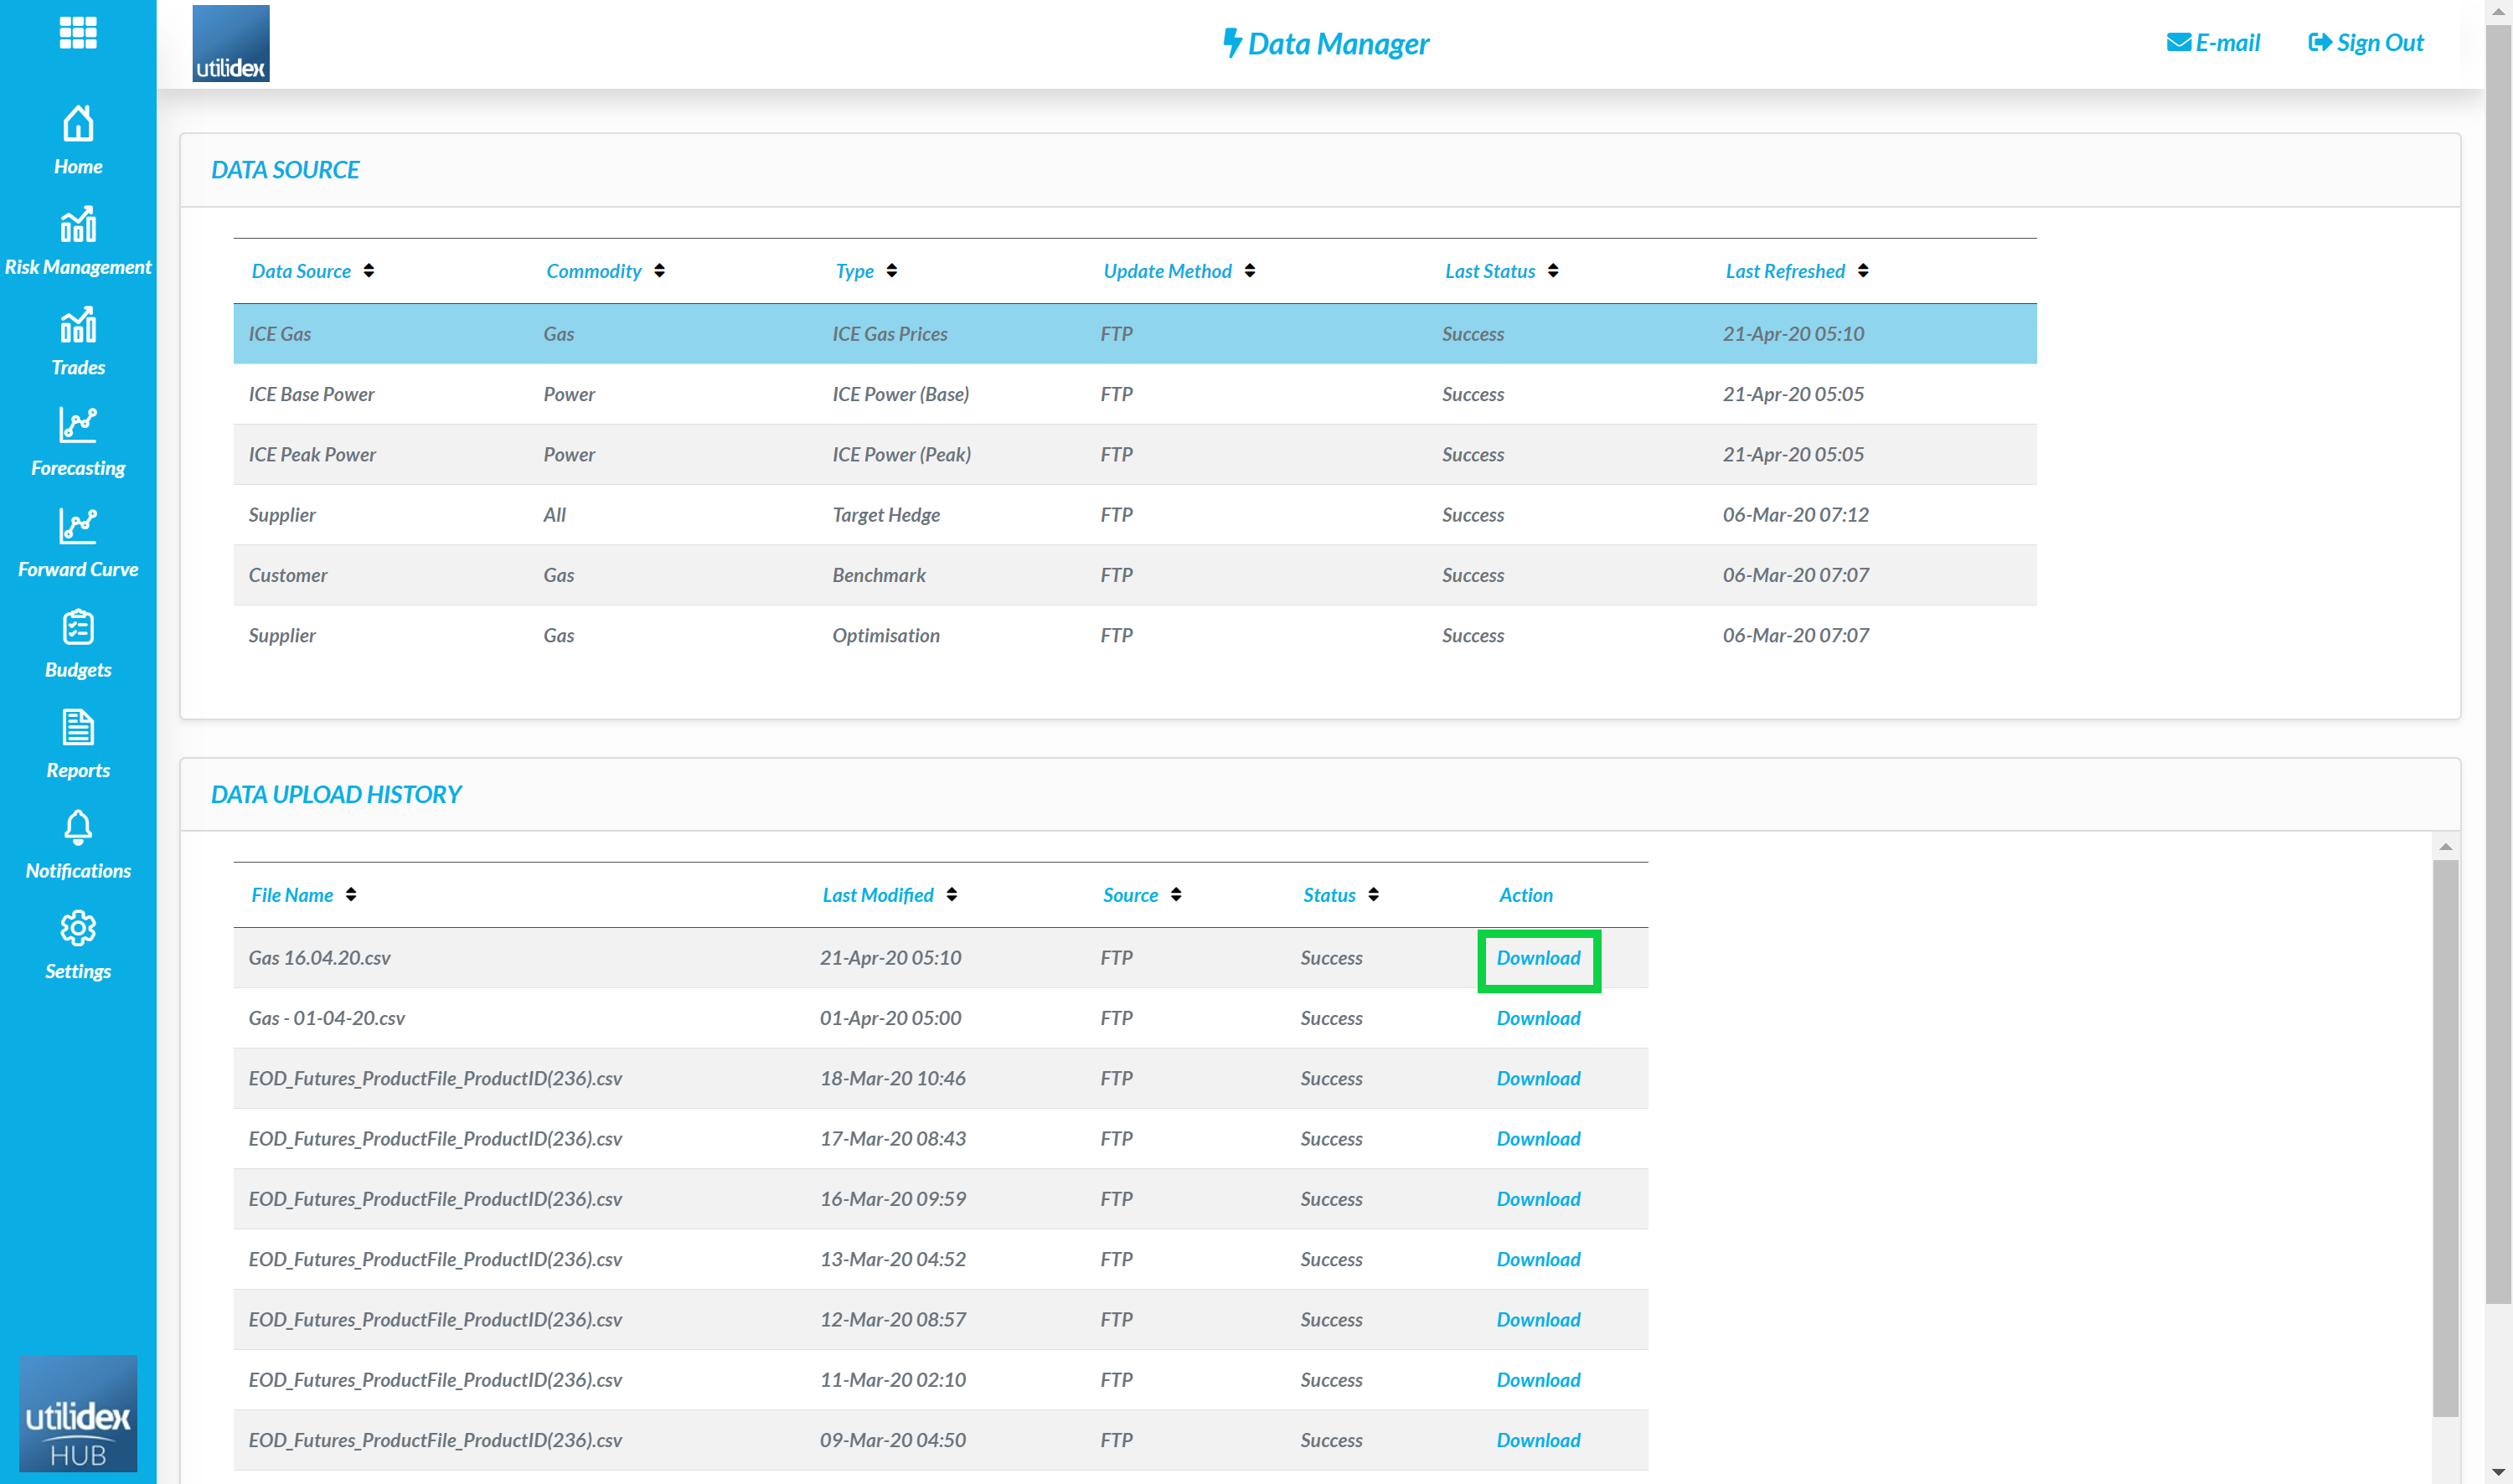
- If a file fails to load in the FTP, you can download the file to analyse any inconsistencies in the format by selecting Download
The data manager also displays the source of data and the update methodology.
Purchase Requirement
Data Templates
Gas
Below is a screen shot of the excel data template for gas:
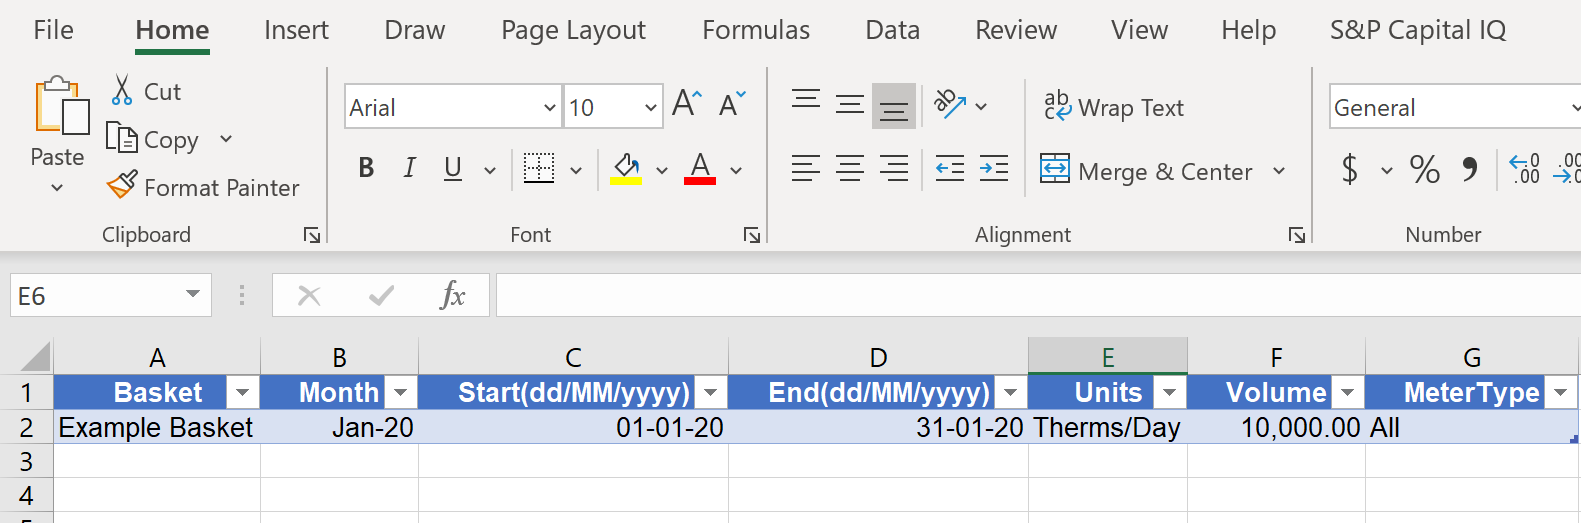
Users must allocate a demand against each month for each basket, they can determine if the units are either Therms/Day or Therms. The file will fail to upload if the Basket does not match the pre-defined baskets configured within the settings, the system provides a file which details any issues within a file if the first upload is unsuccessful.
Users can also assign a meter type (e.g. non-daily metered or daily metered) which can be used for demand analytics.
Power
For power, users must fill in the below template:
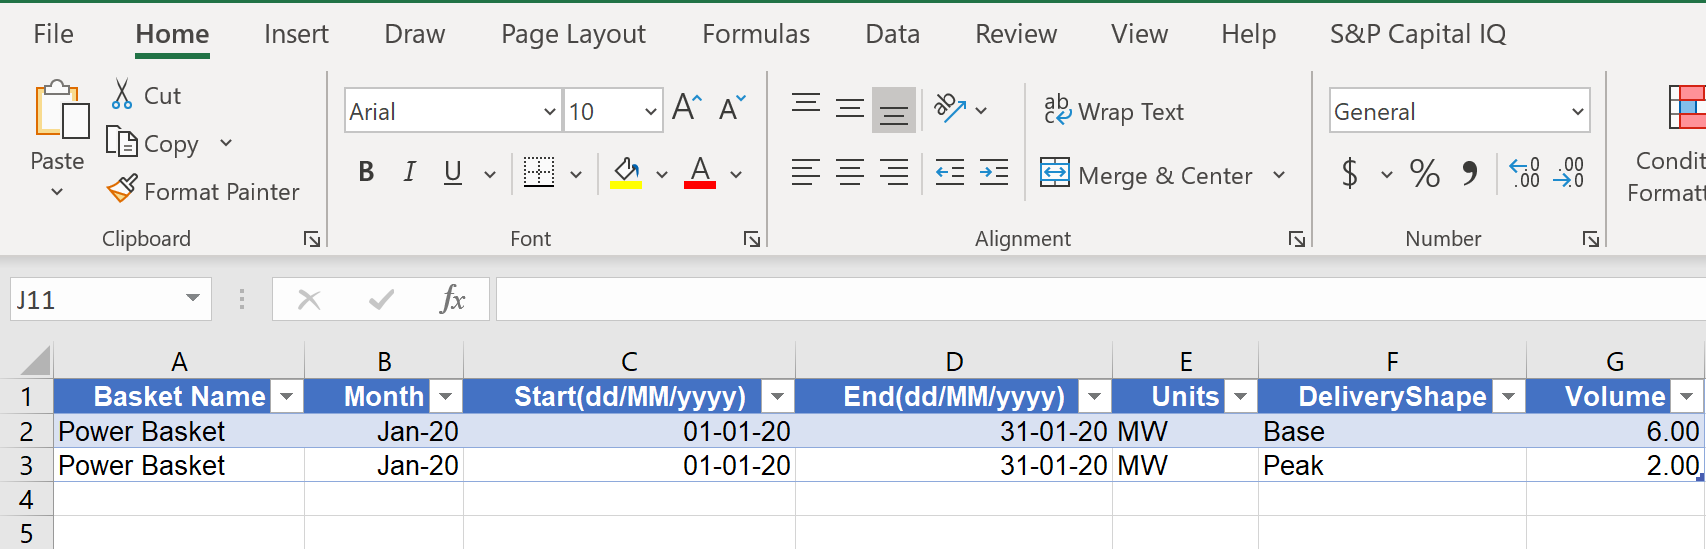
The core difference between power and gas is that for power users must assign a shape for each row in the data table. The Units must either be MW or MWh.
The file will fail to upload if the Basket does not match the pre-defined baskets configured within the settings, the system provides a file which details any issues within a file if the first upload is unsuccessful.
Uploading Data
To Upload the Purchase Requirements, users should follow the below 9 steps:
- Go to Forecasting & Forecast Curves
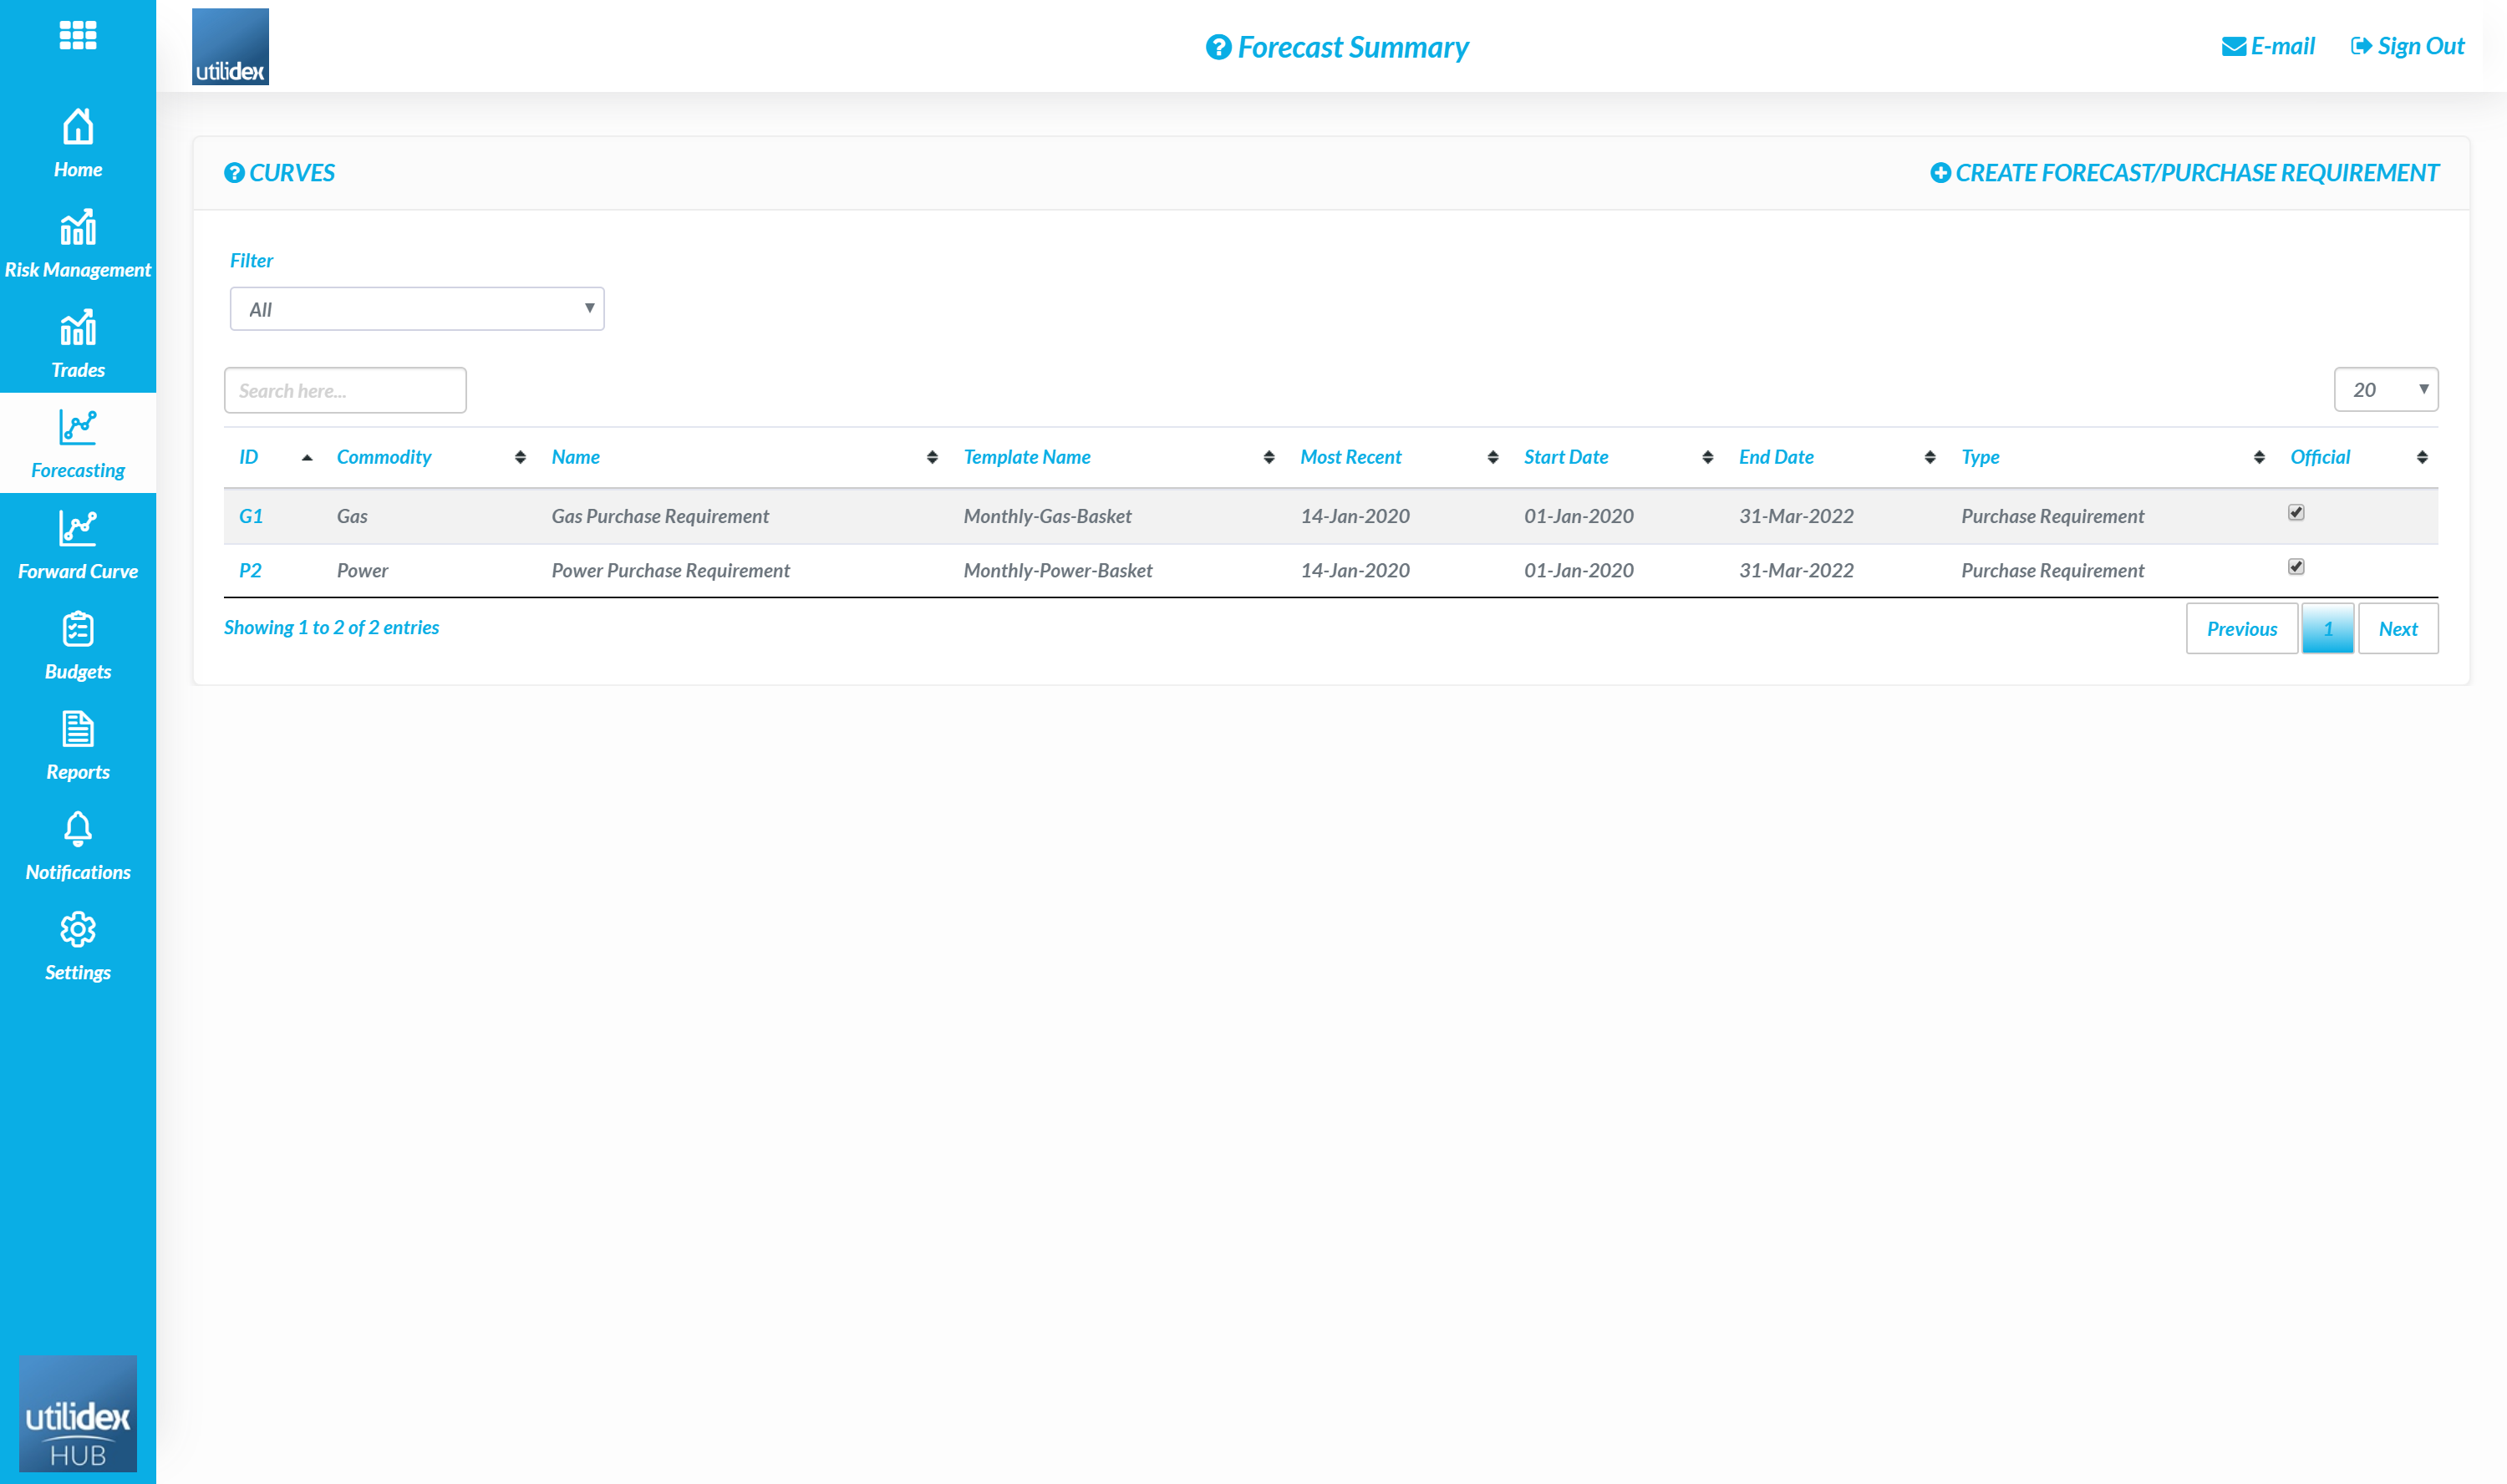
- Select Create Forecast/Purchase Requirement
- Fill in the details in the below pop-up:
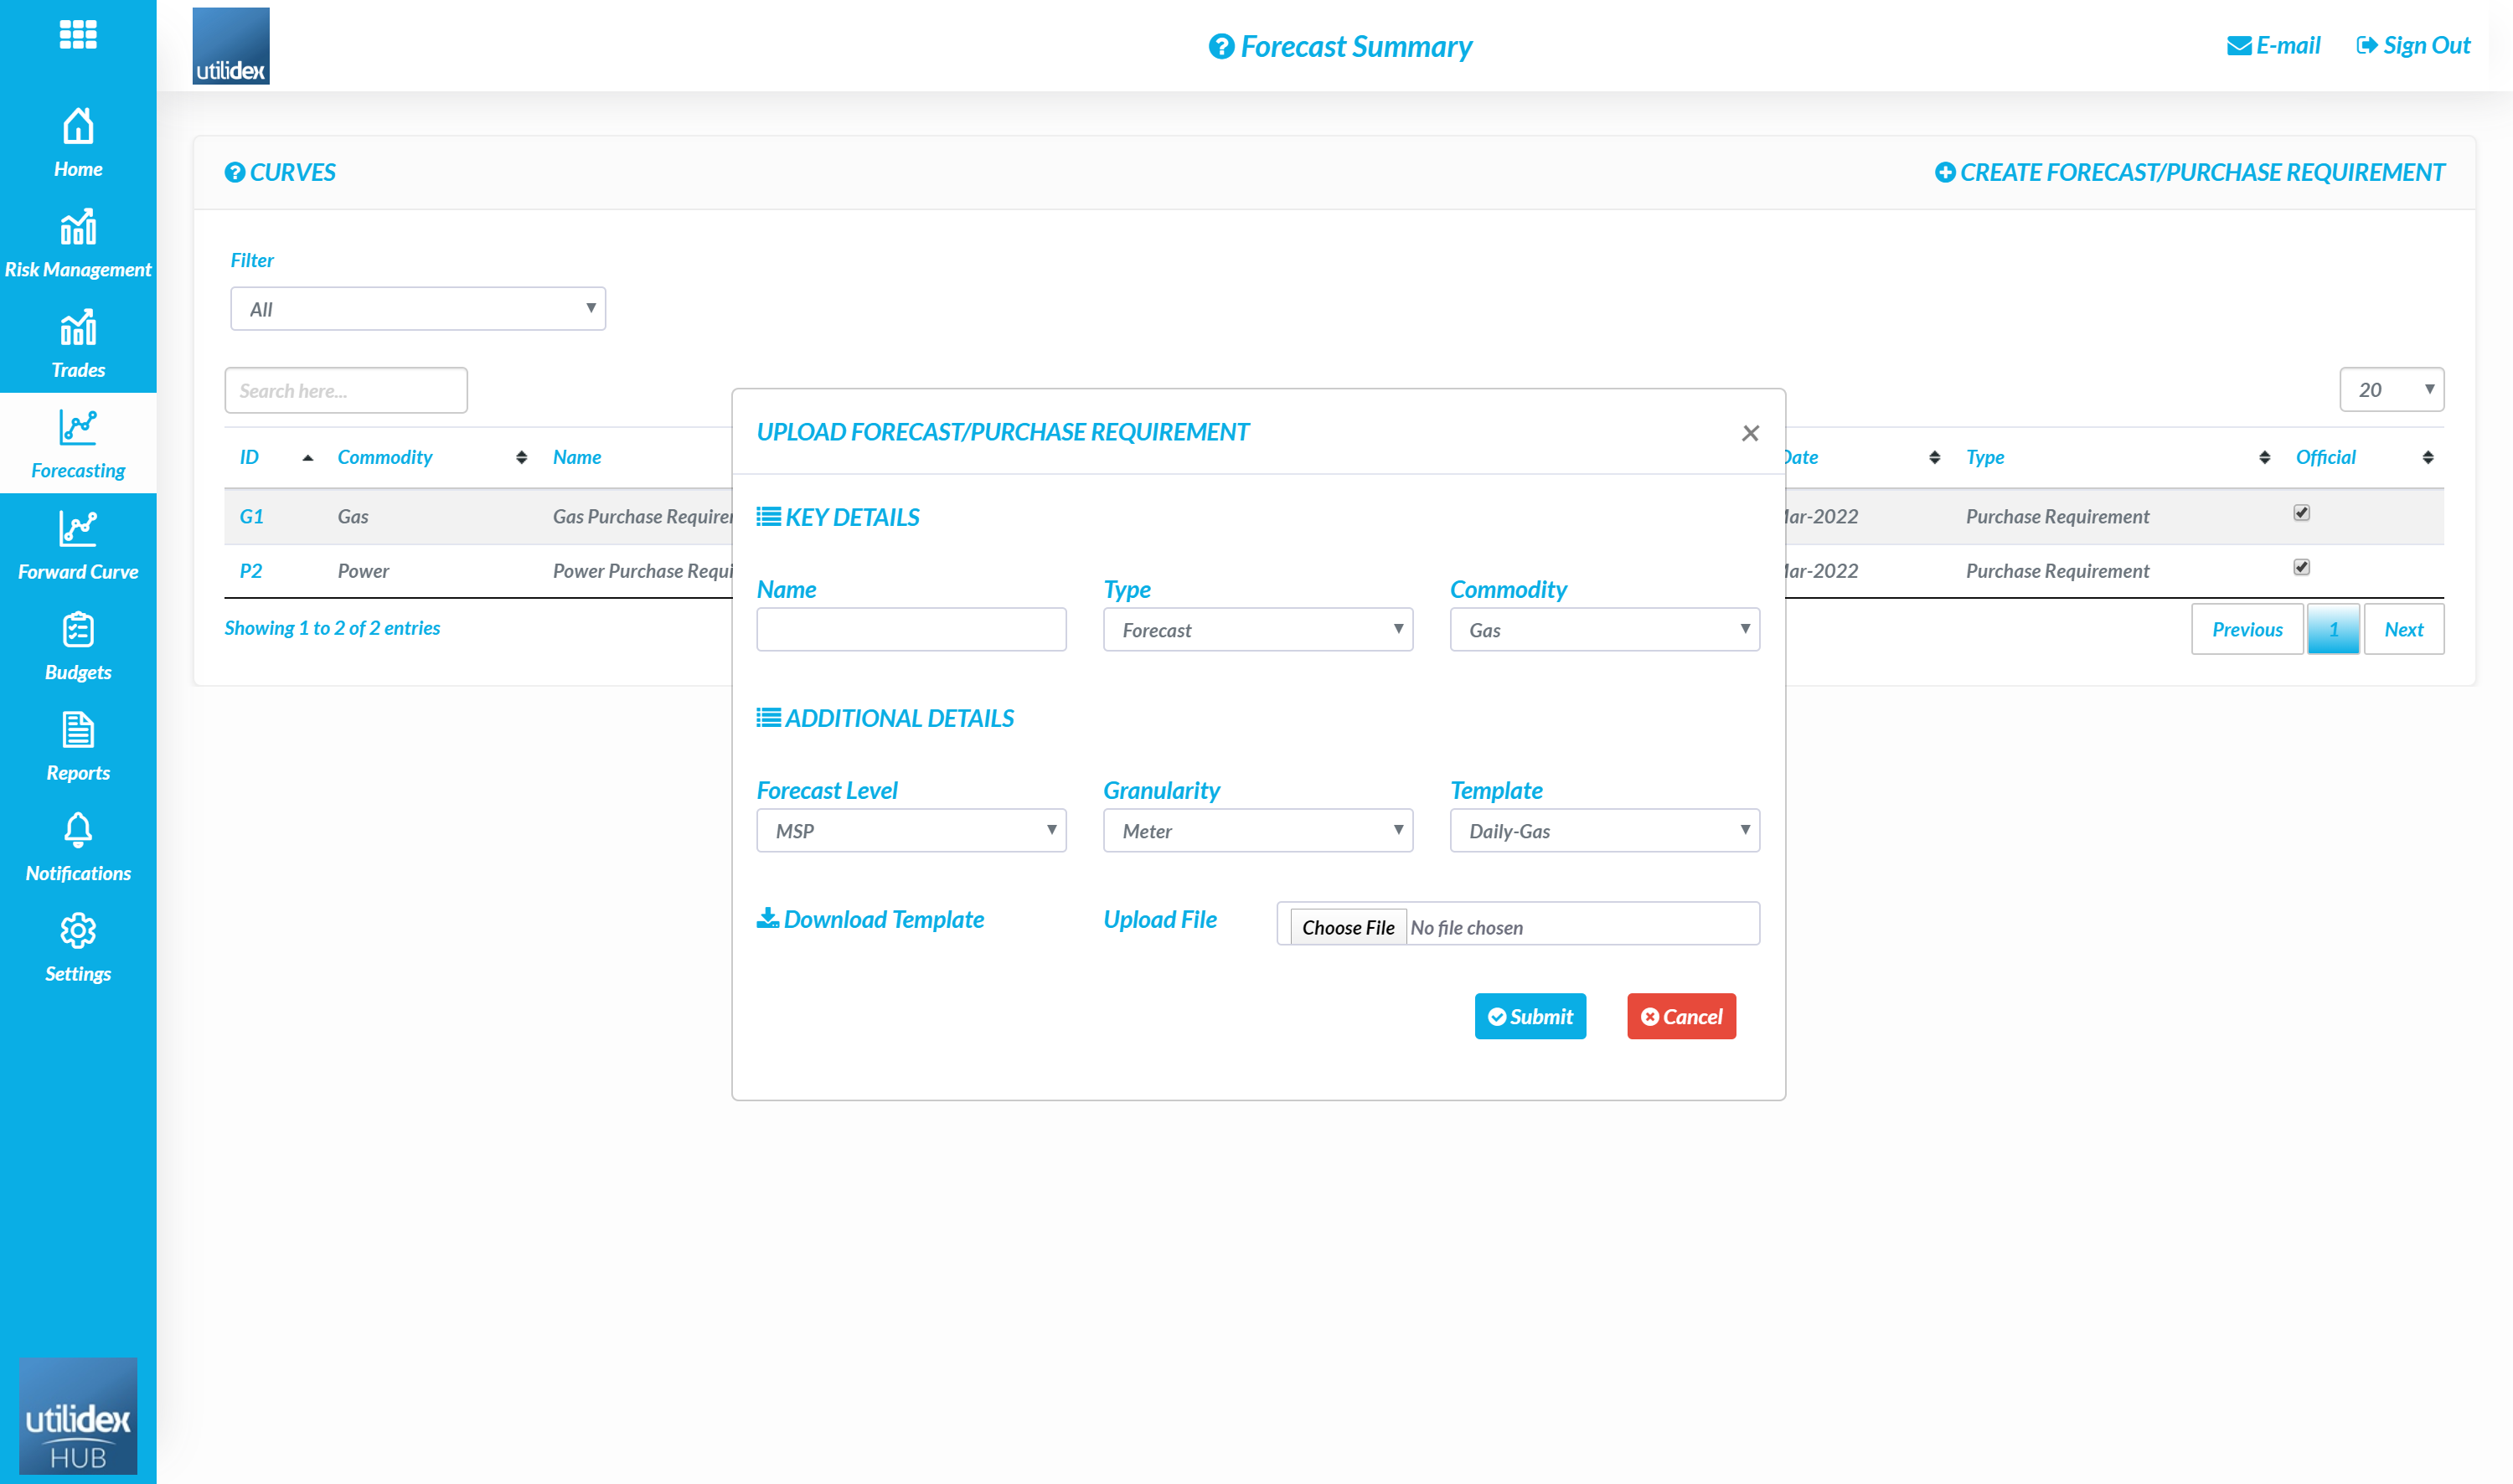
- Users can name each purchase requirement per basket (e.g. Official Gas Purchase Requirement)
- Users must then select the commodity
- In the market there are multiple levels at which forecasts are generated (e.g. Meter Supply Point, Grid Supply Point, or National Balancing Point). Users should select NBP as this is the most common volume for suppliers to provide when trading.
- Users can then download the template and upload once complete
- A user can then view the purchase requirement by selecting the ID
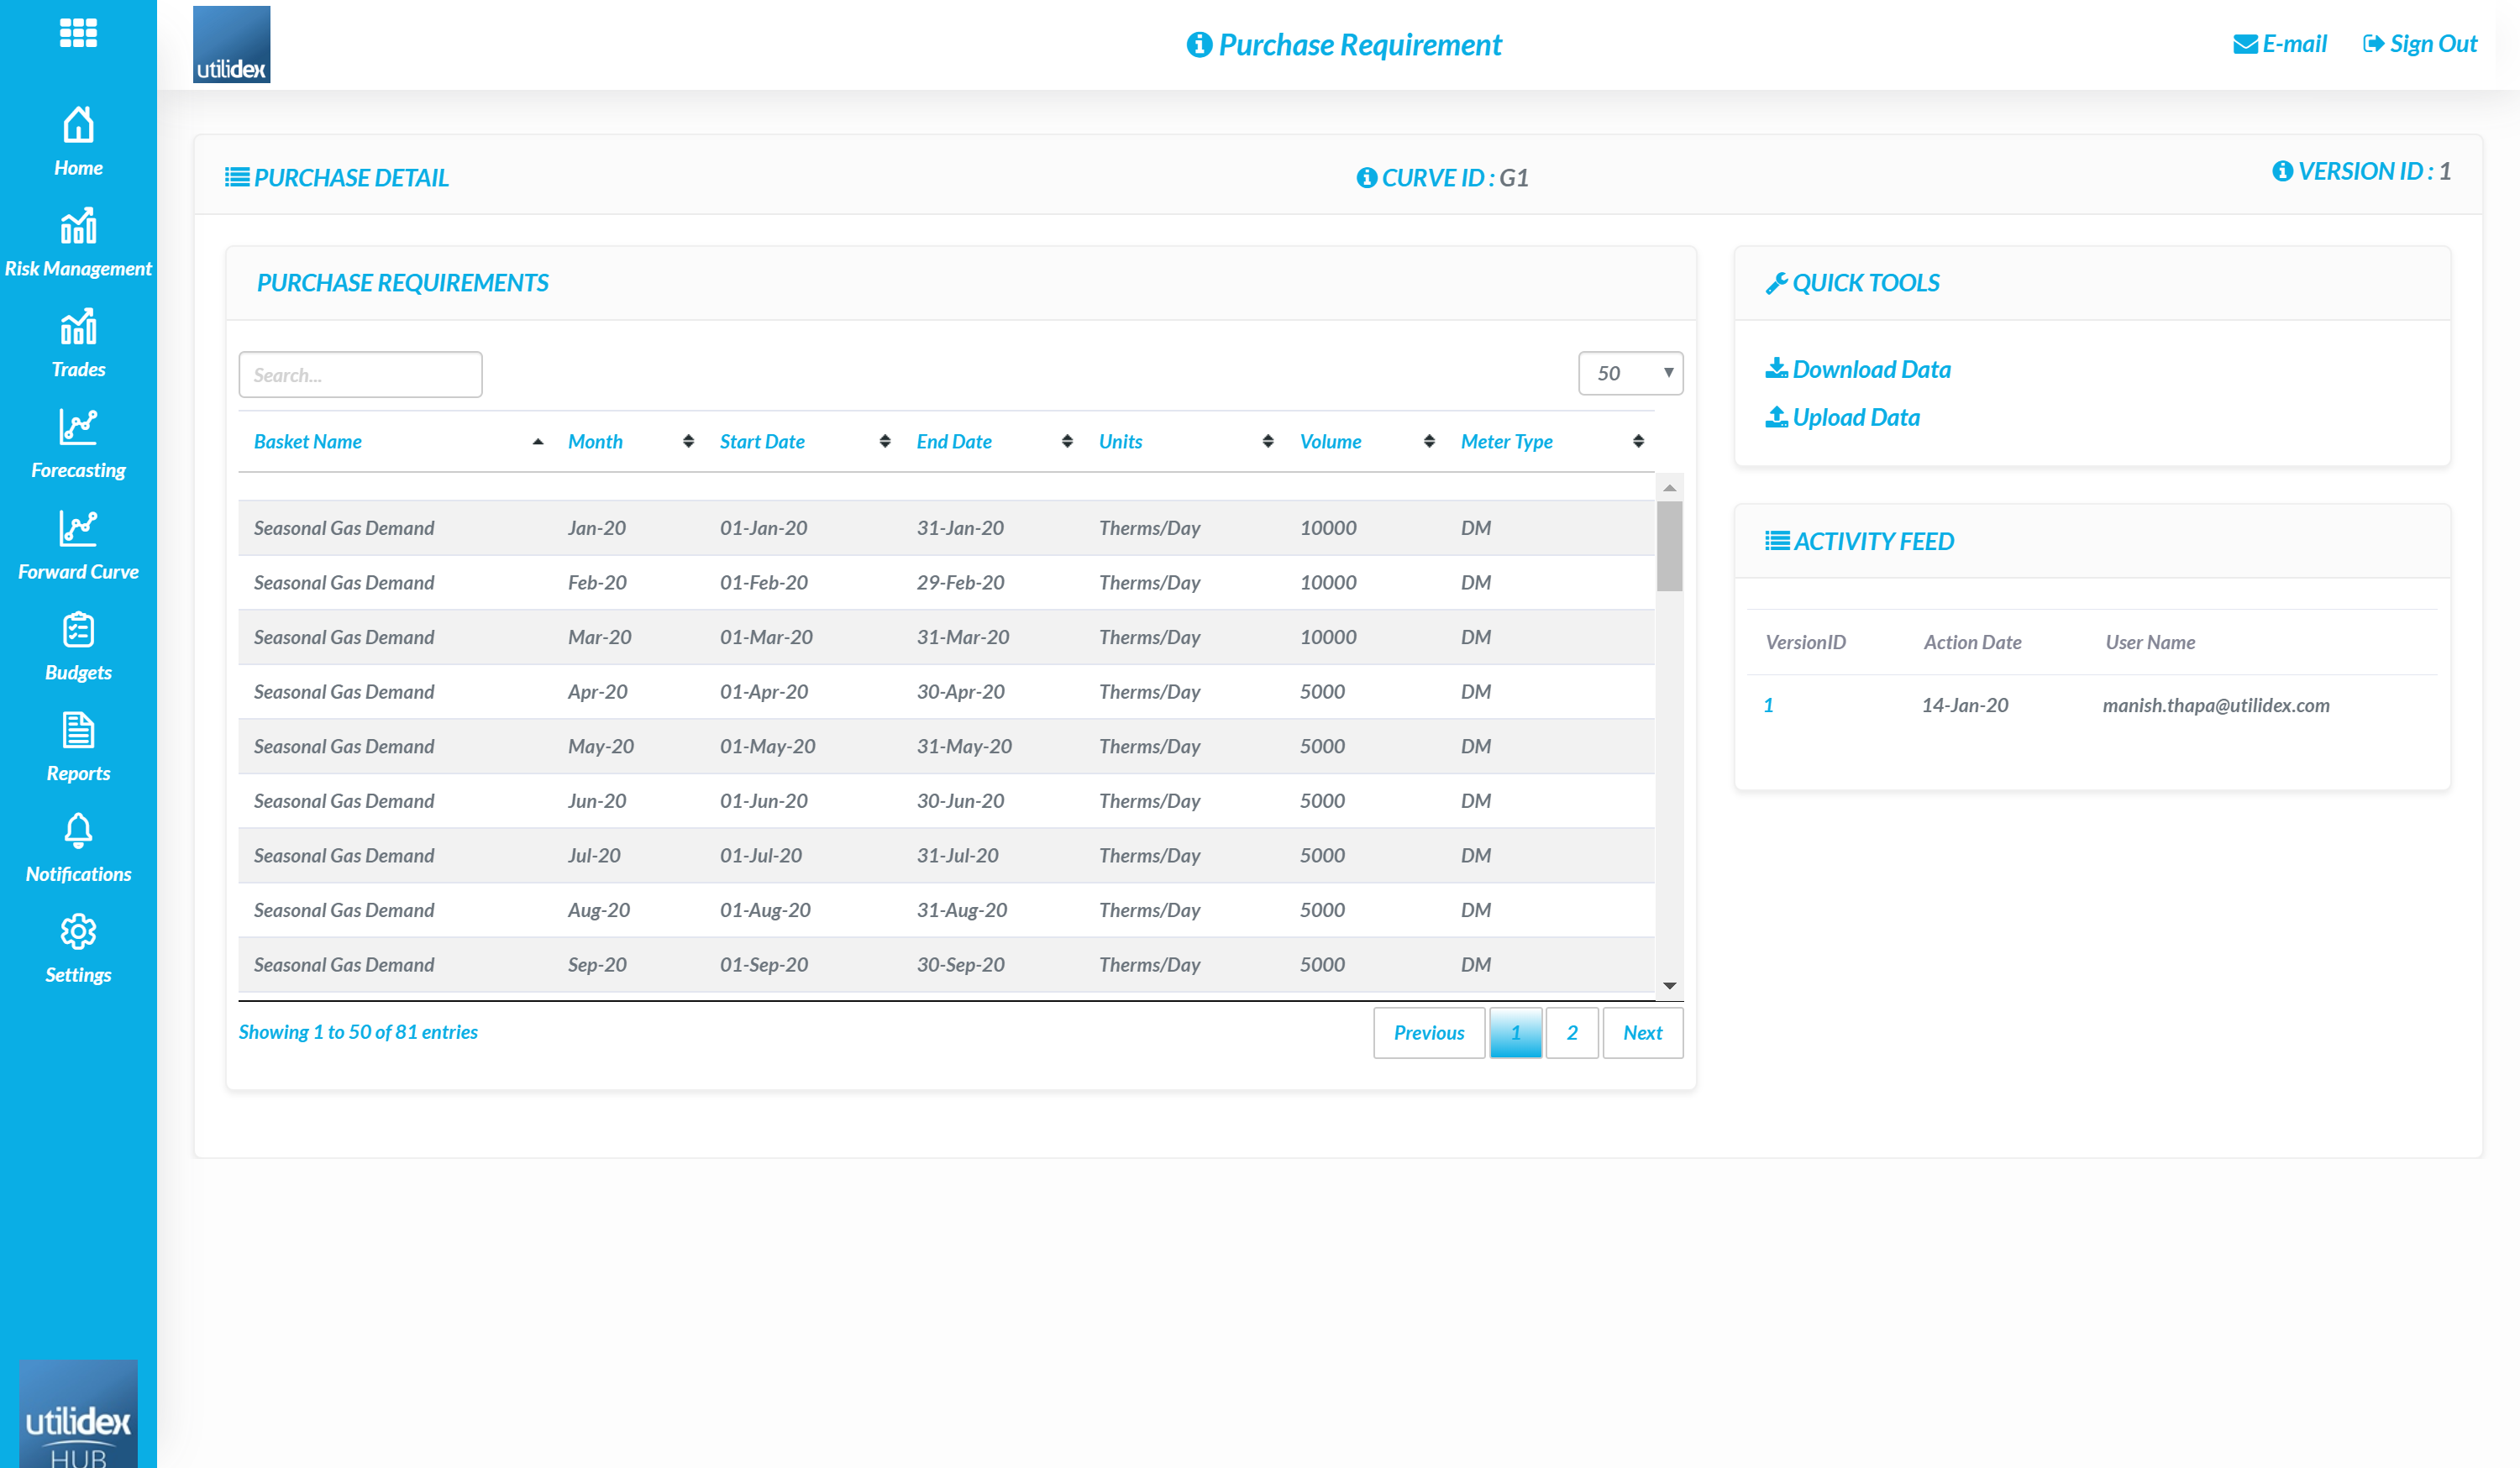
- Here, a user can download and re-upload new versions of the data
- Users can also view historical data versions by selecting the VersionID in the Activity Feed
Trades
UI Trade workflow
To enter a trade through the workflow, a user should follow the below steps:
- Trades, New Gas or Power Trade & OTC
- Complete the Trade Details, then the Trade Component screens

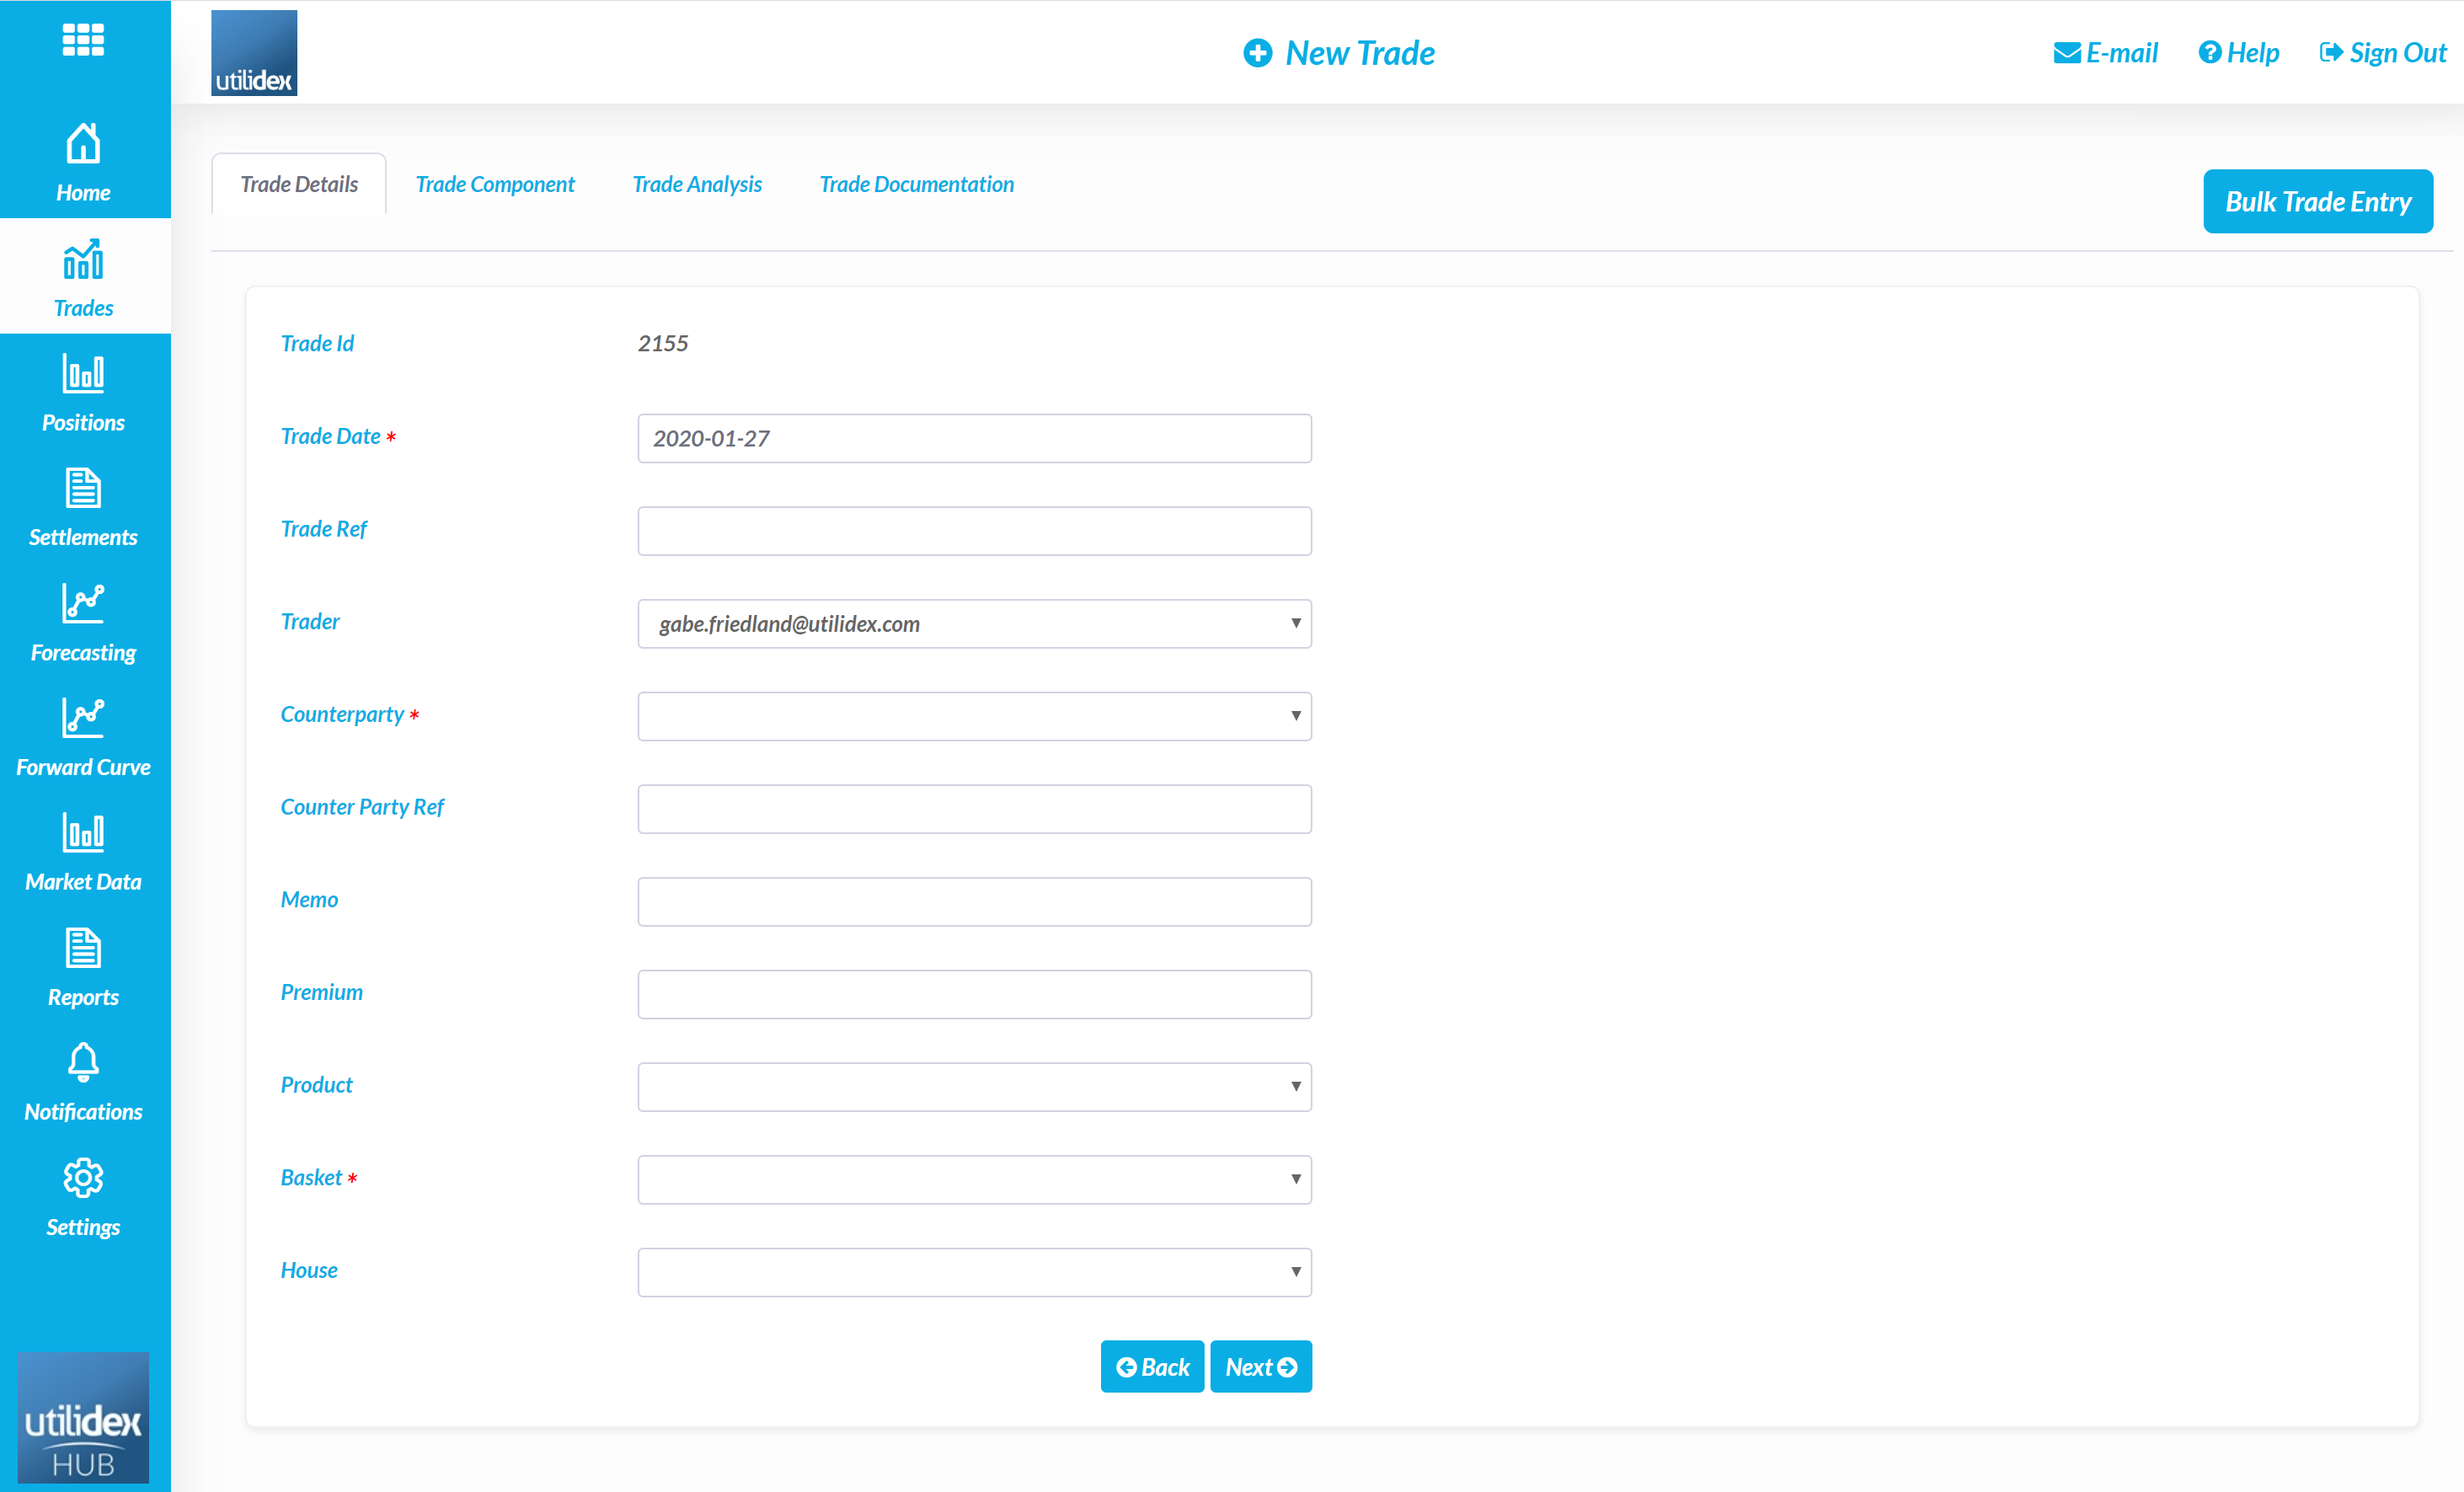
- The Utilidex system will assign a system ID to each trade, a user must then define the Trade Date and Trade Ref. Then the trader and counterparty must be selected from the drop downs, the available traders will be any users who have the permission to enter trades as per the User Management configurations.
- A user can assign a memo or premium to a trade, a user must also select the relevant product and basket which relate to the trade.
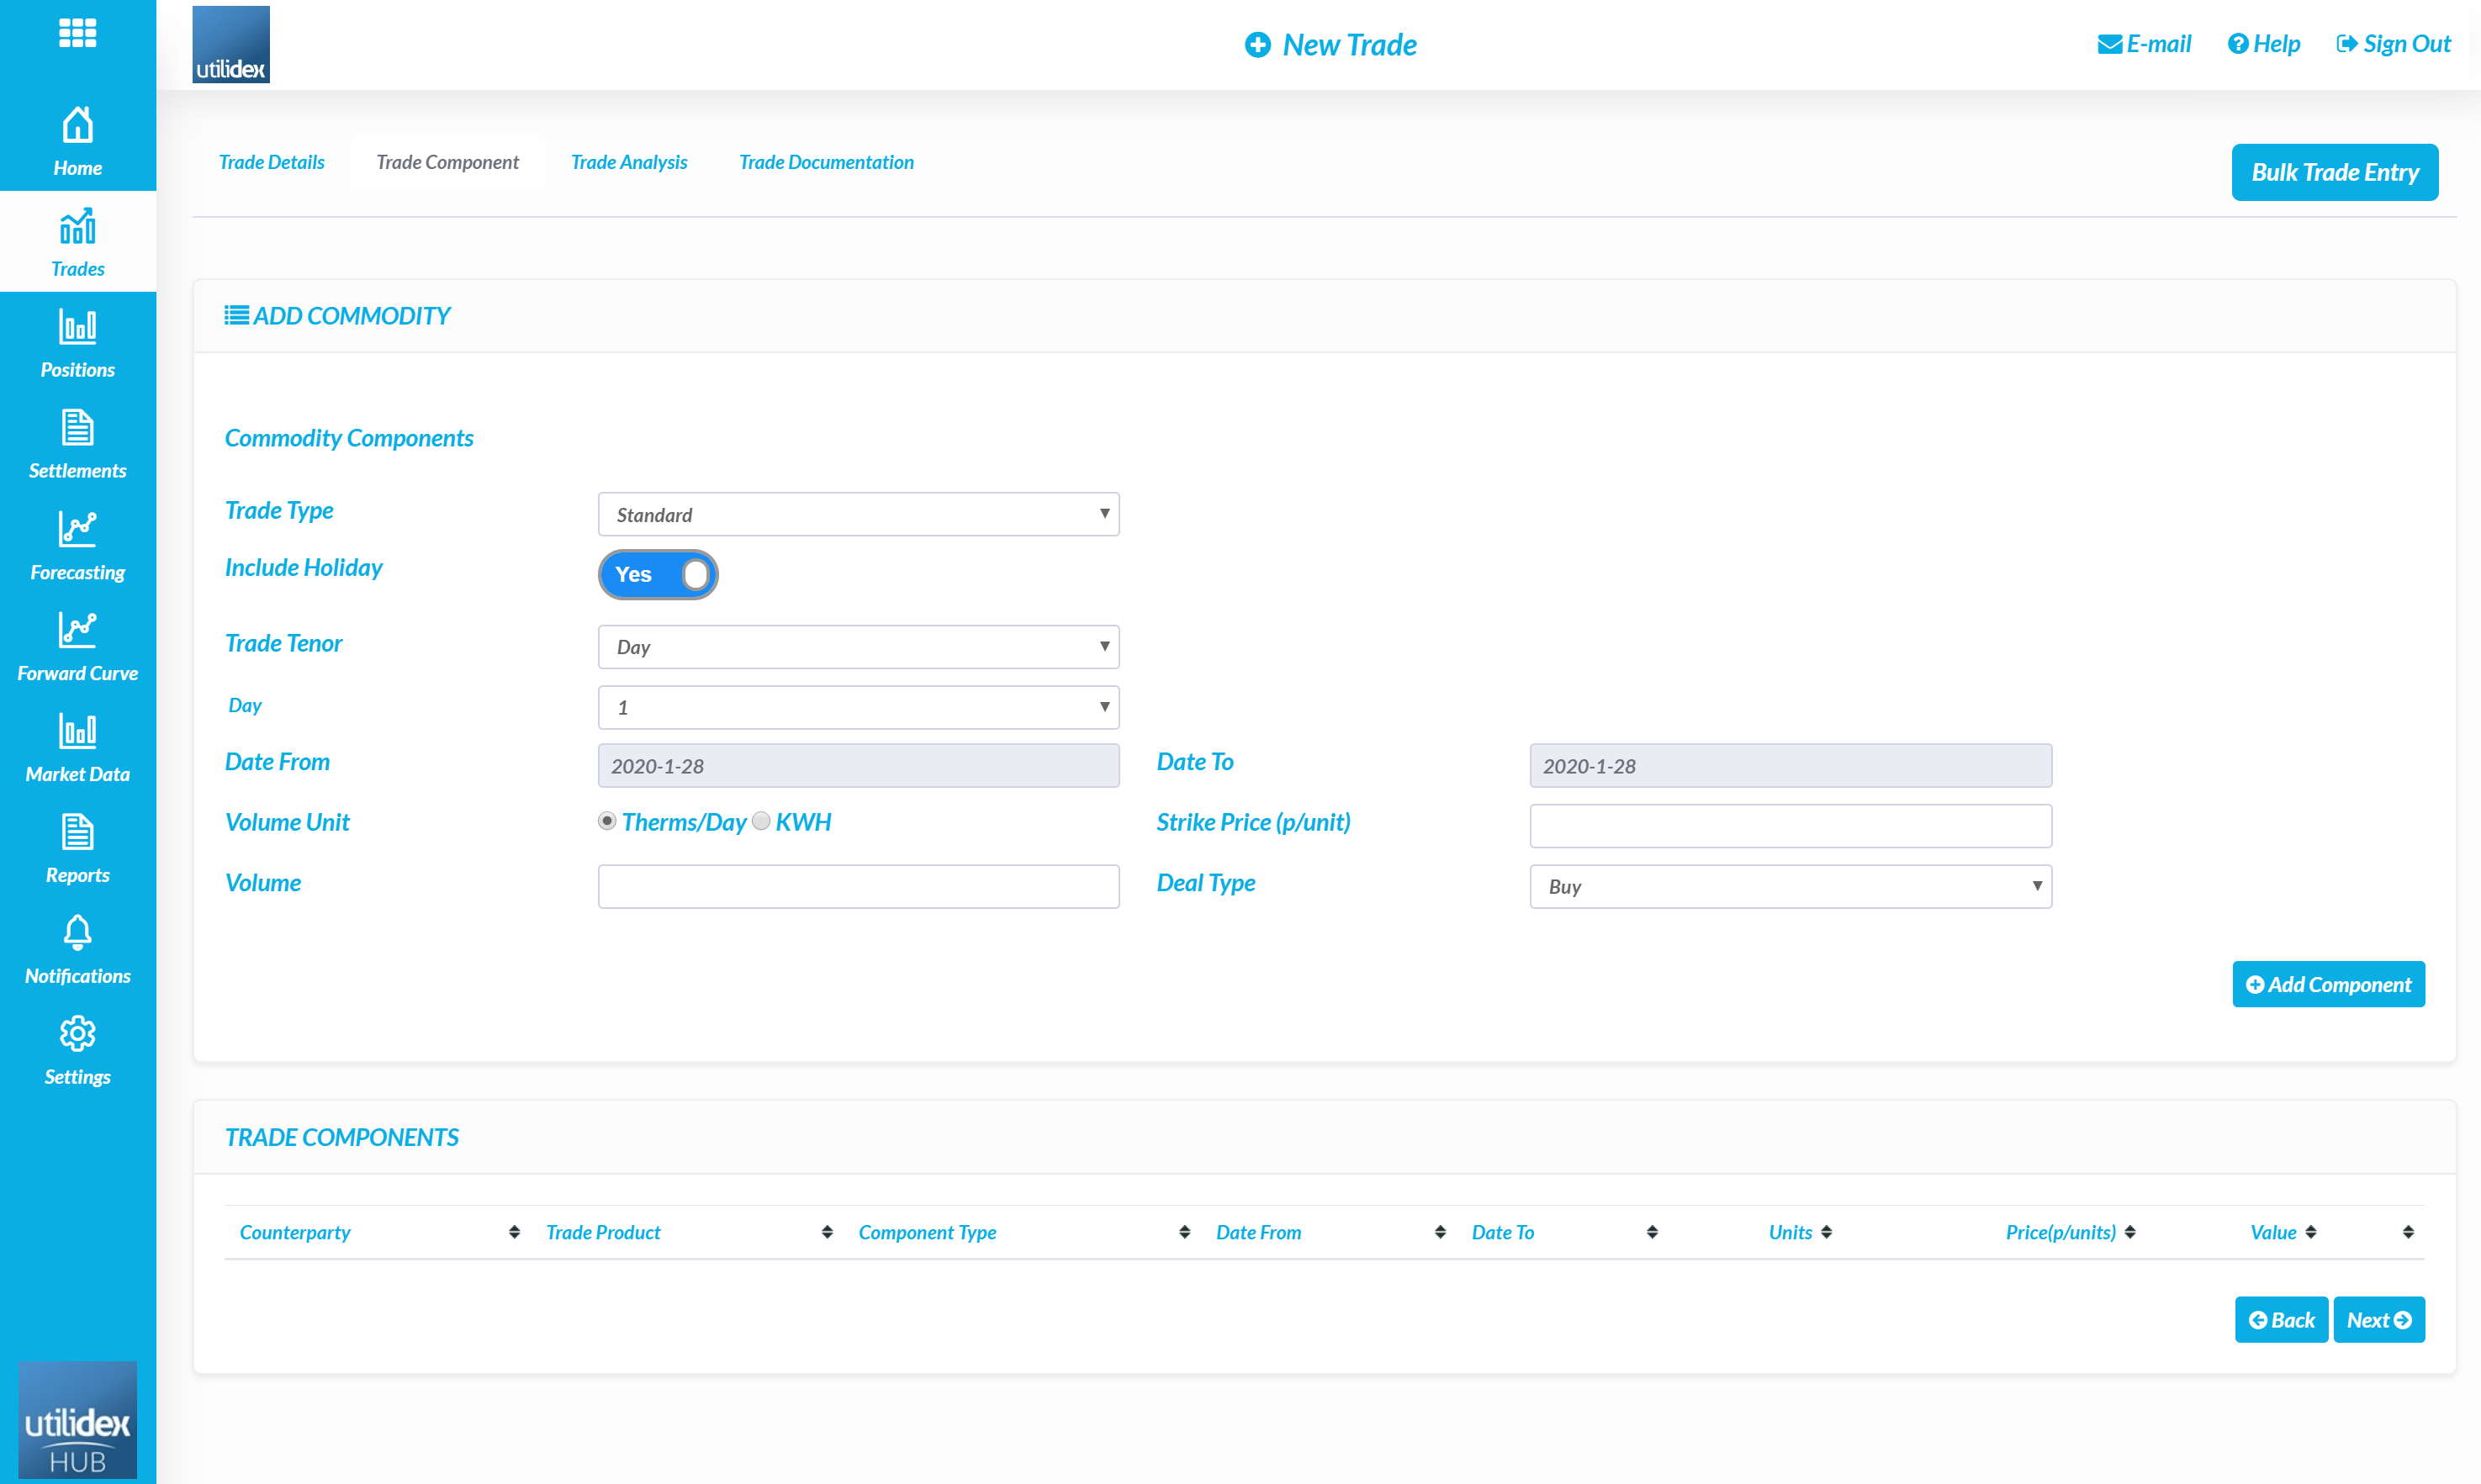
- A user must then define the details of the trade, including the tenor, volume, price, and deal type.
- When a user selects ‘Add Component’, the trade will appear below and calculate the value, users can enter multiple components as part of a single trade.
- When a user selects next, they will see the Trade Analysis Screen.
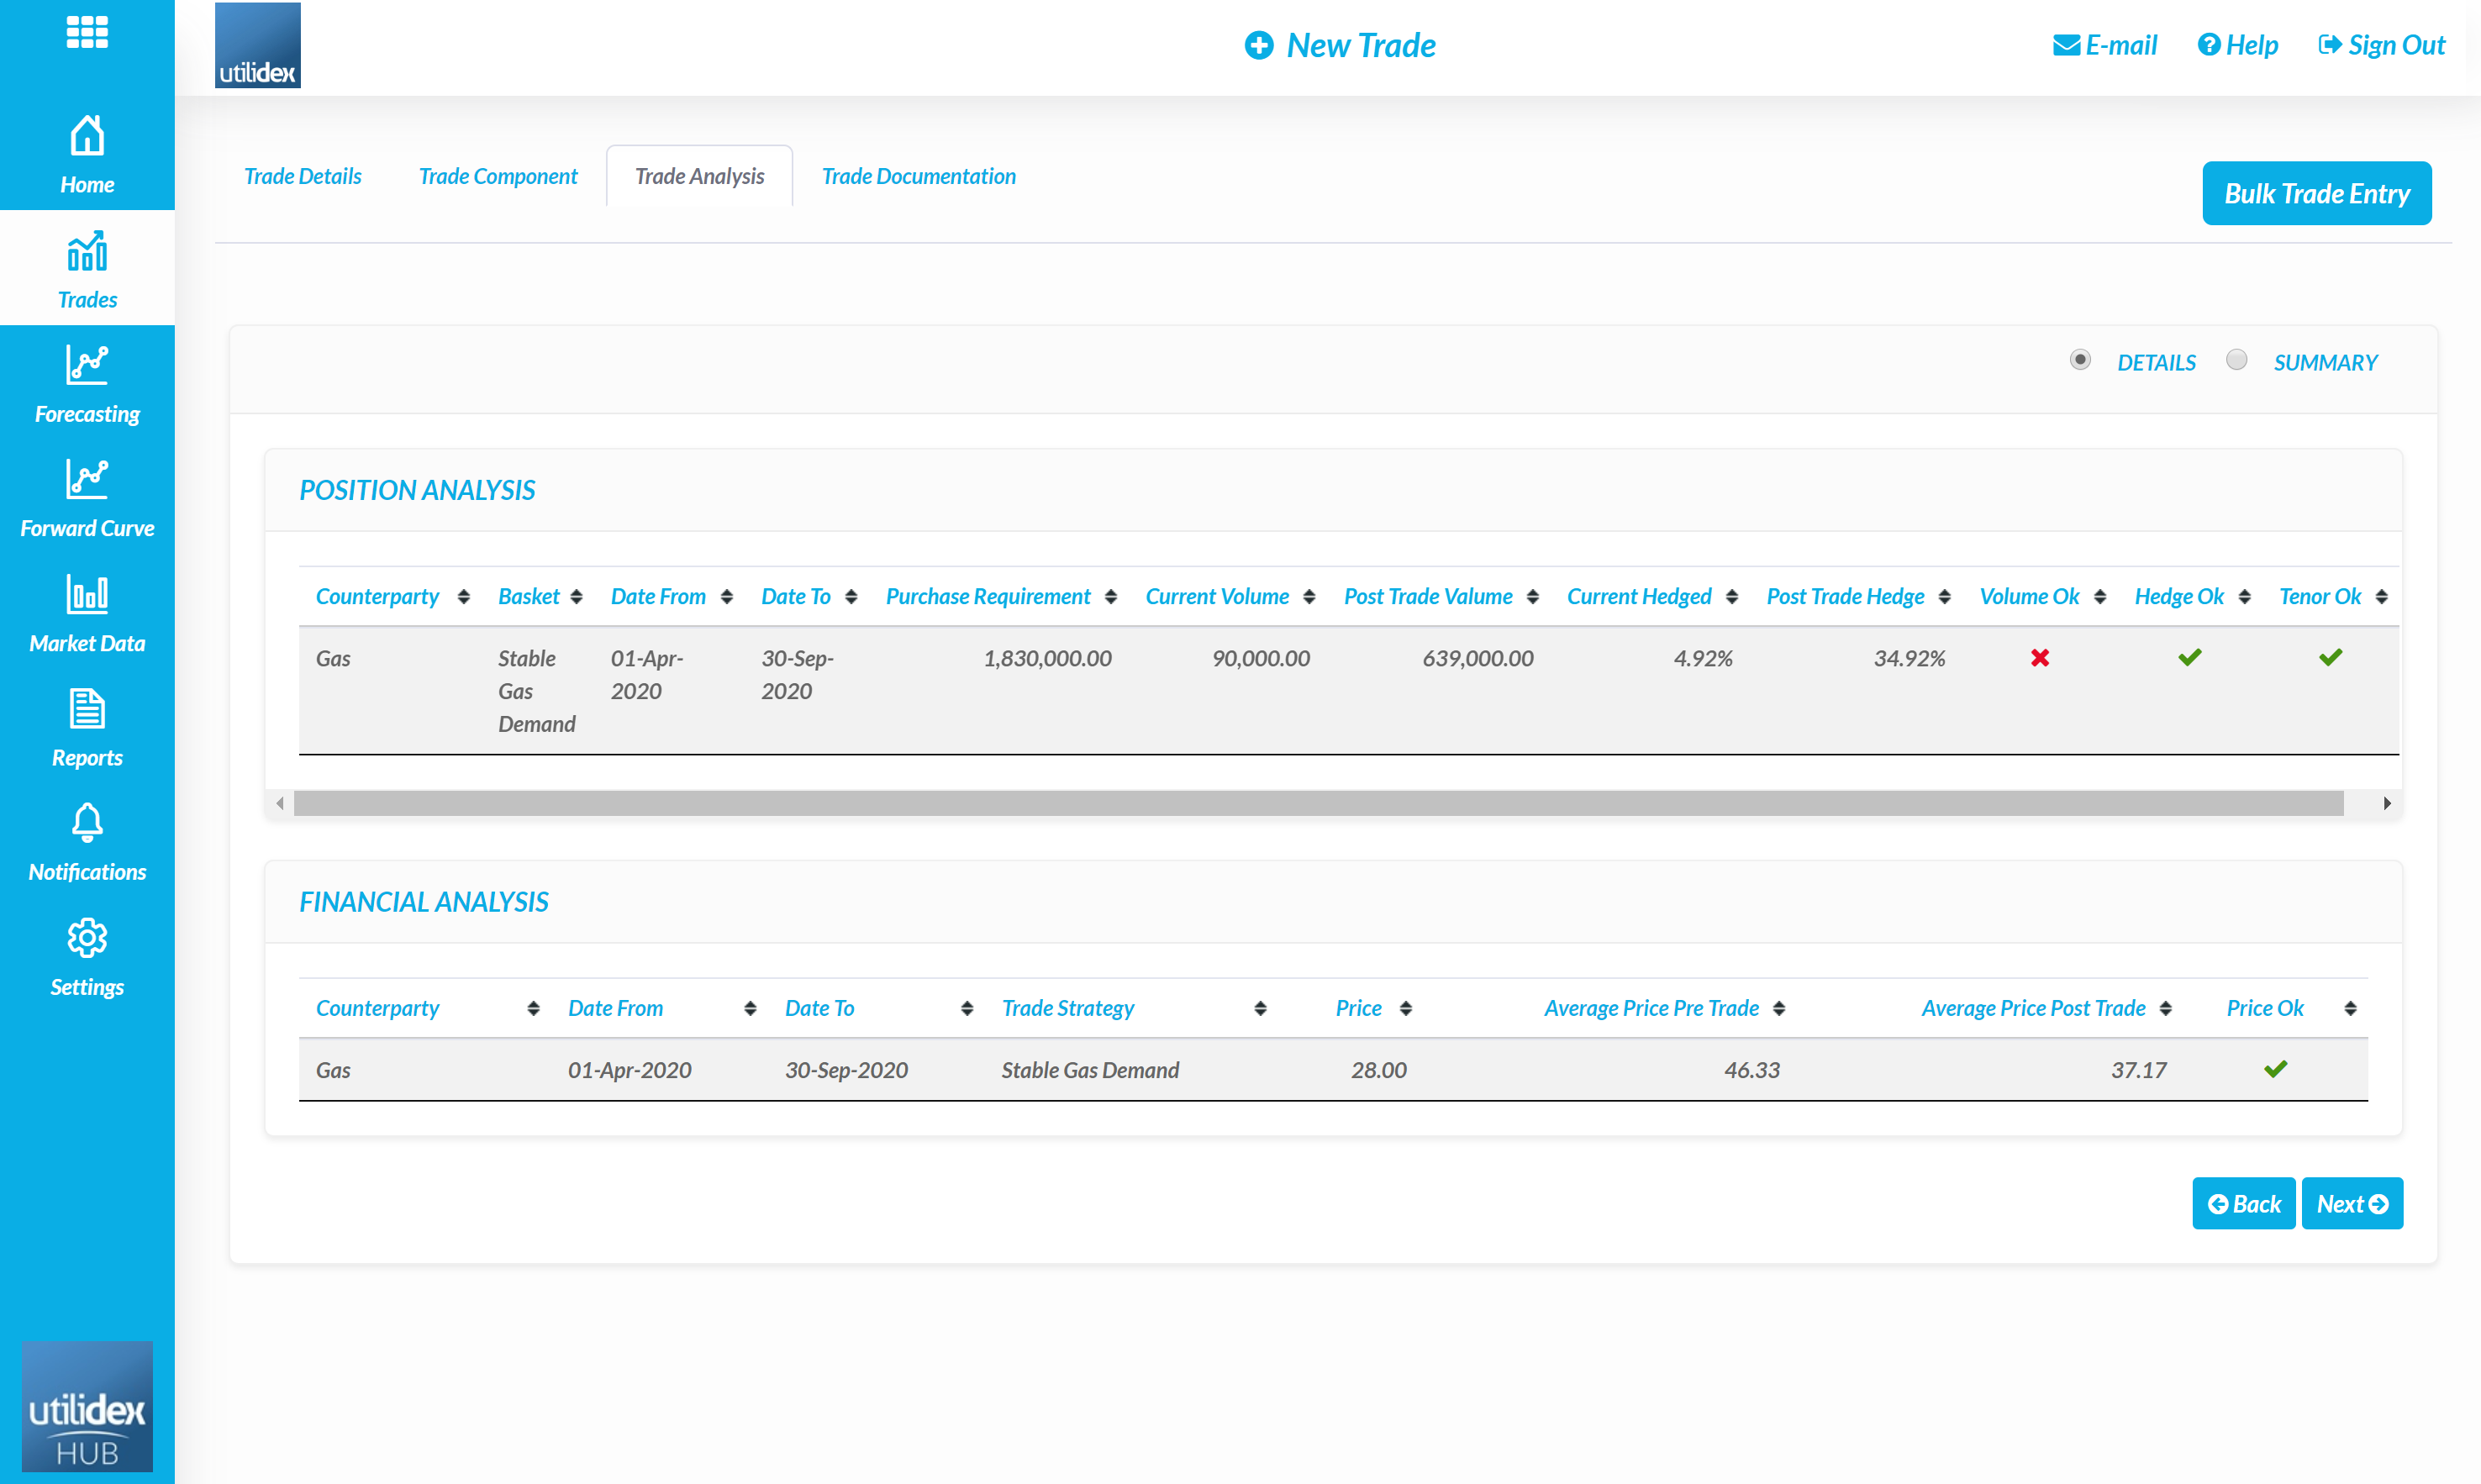
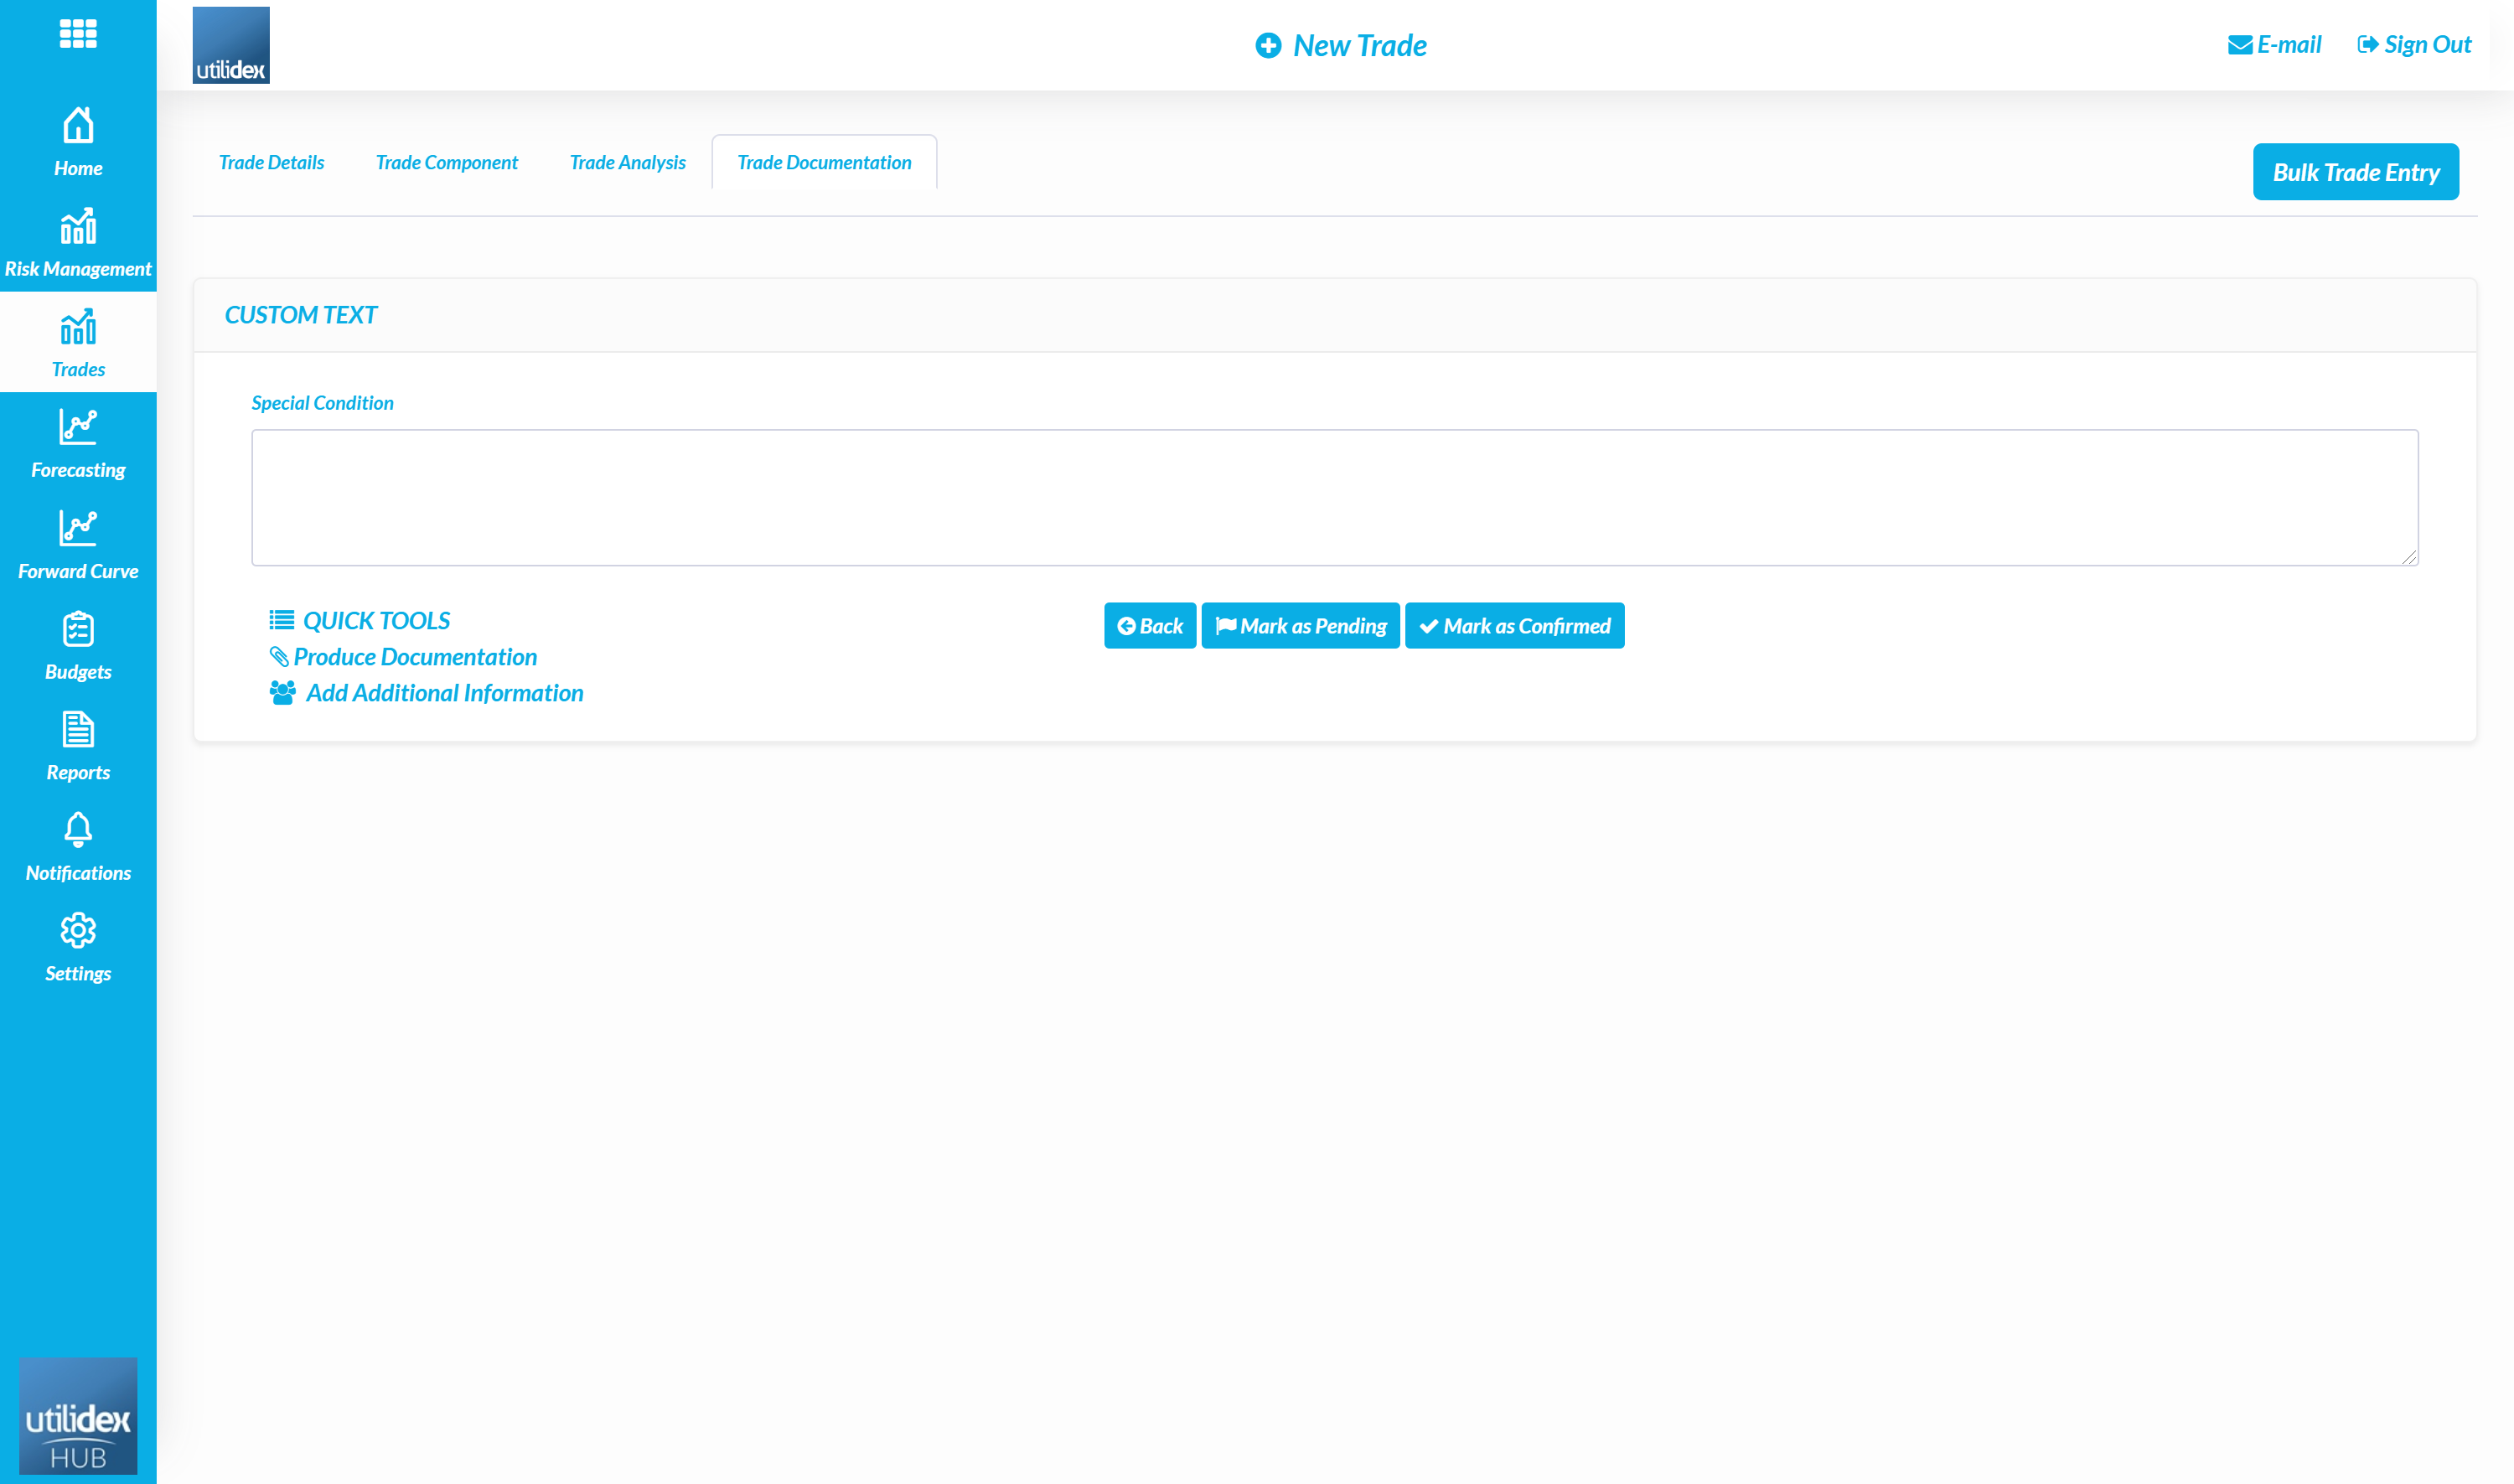
- The screen then displays analysis on how the trade impacts both the position and financial performance of the basket. A user can then select Next to add documentation and confirm the trade.
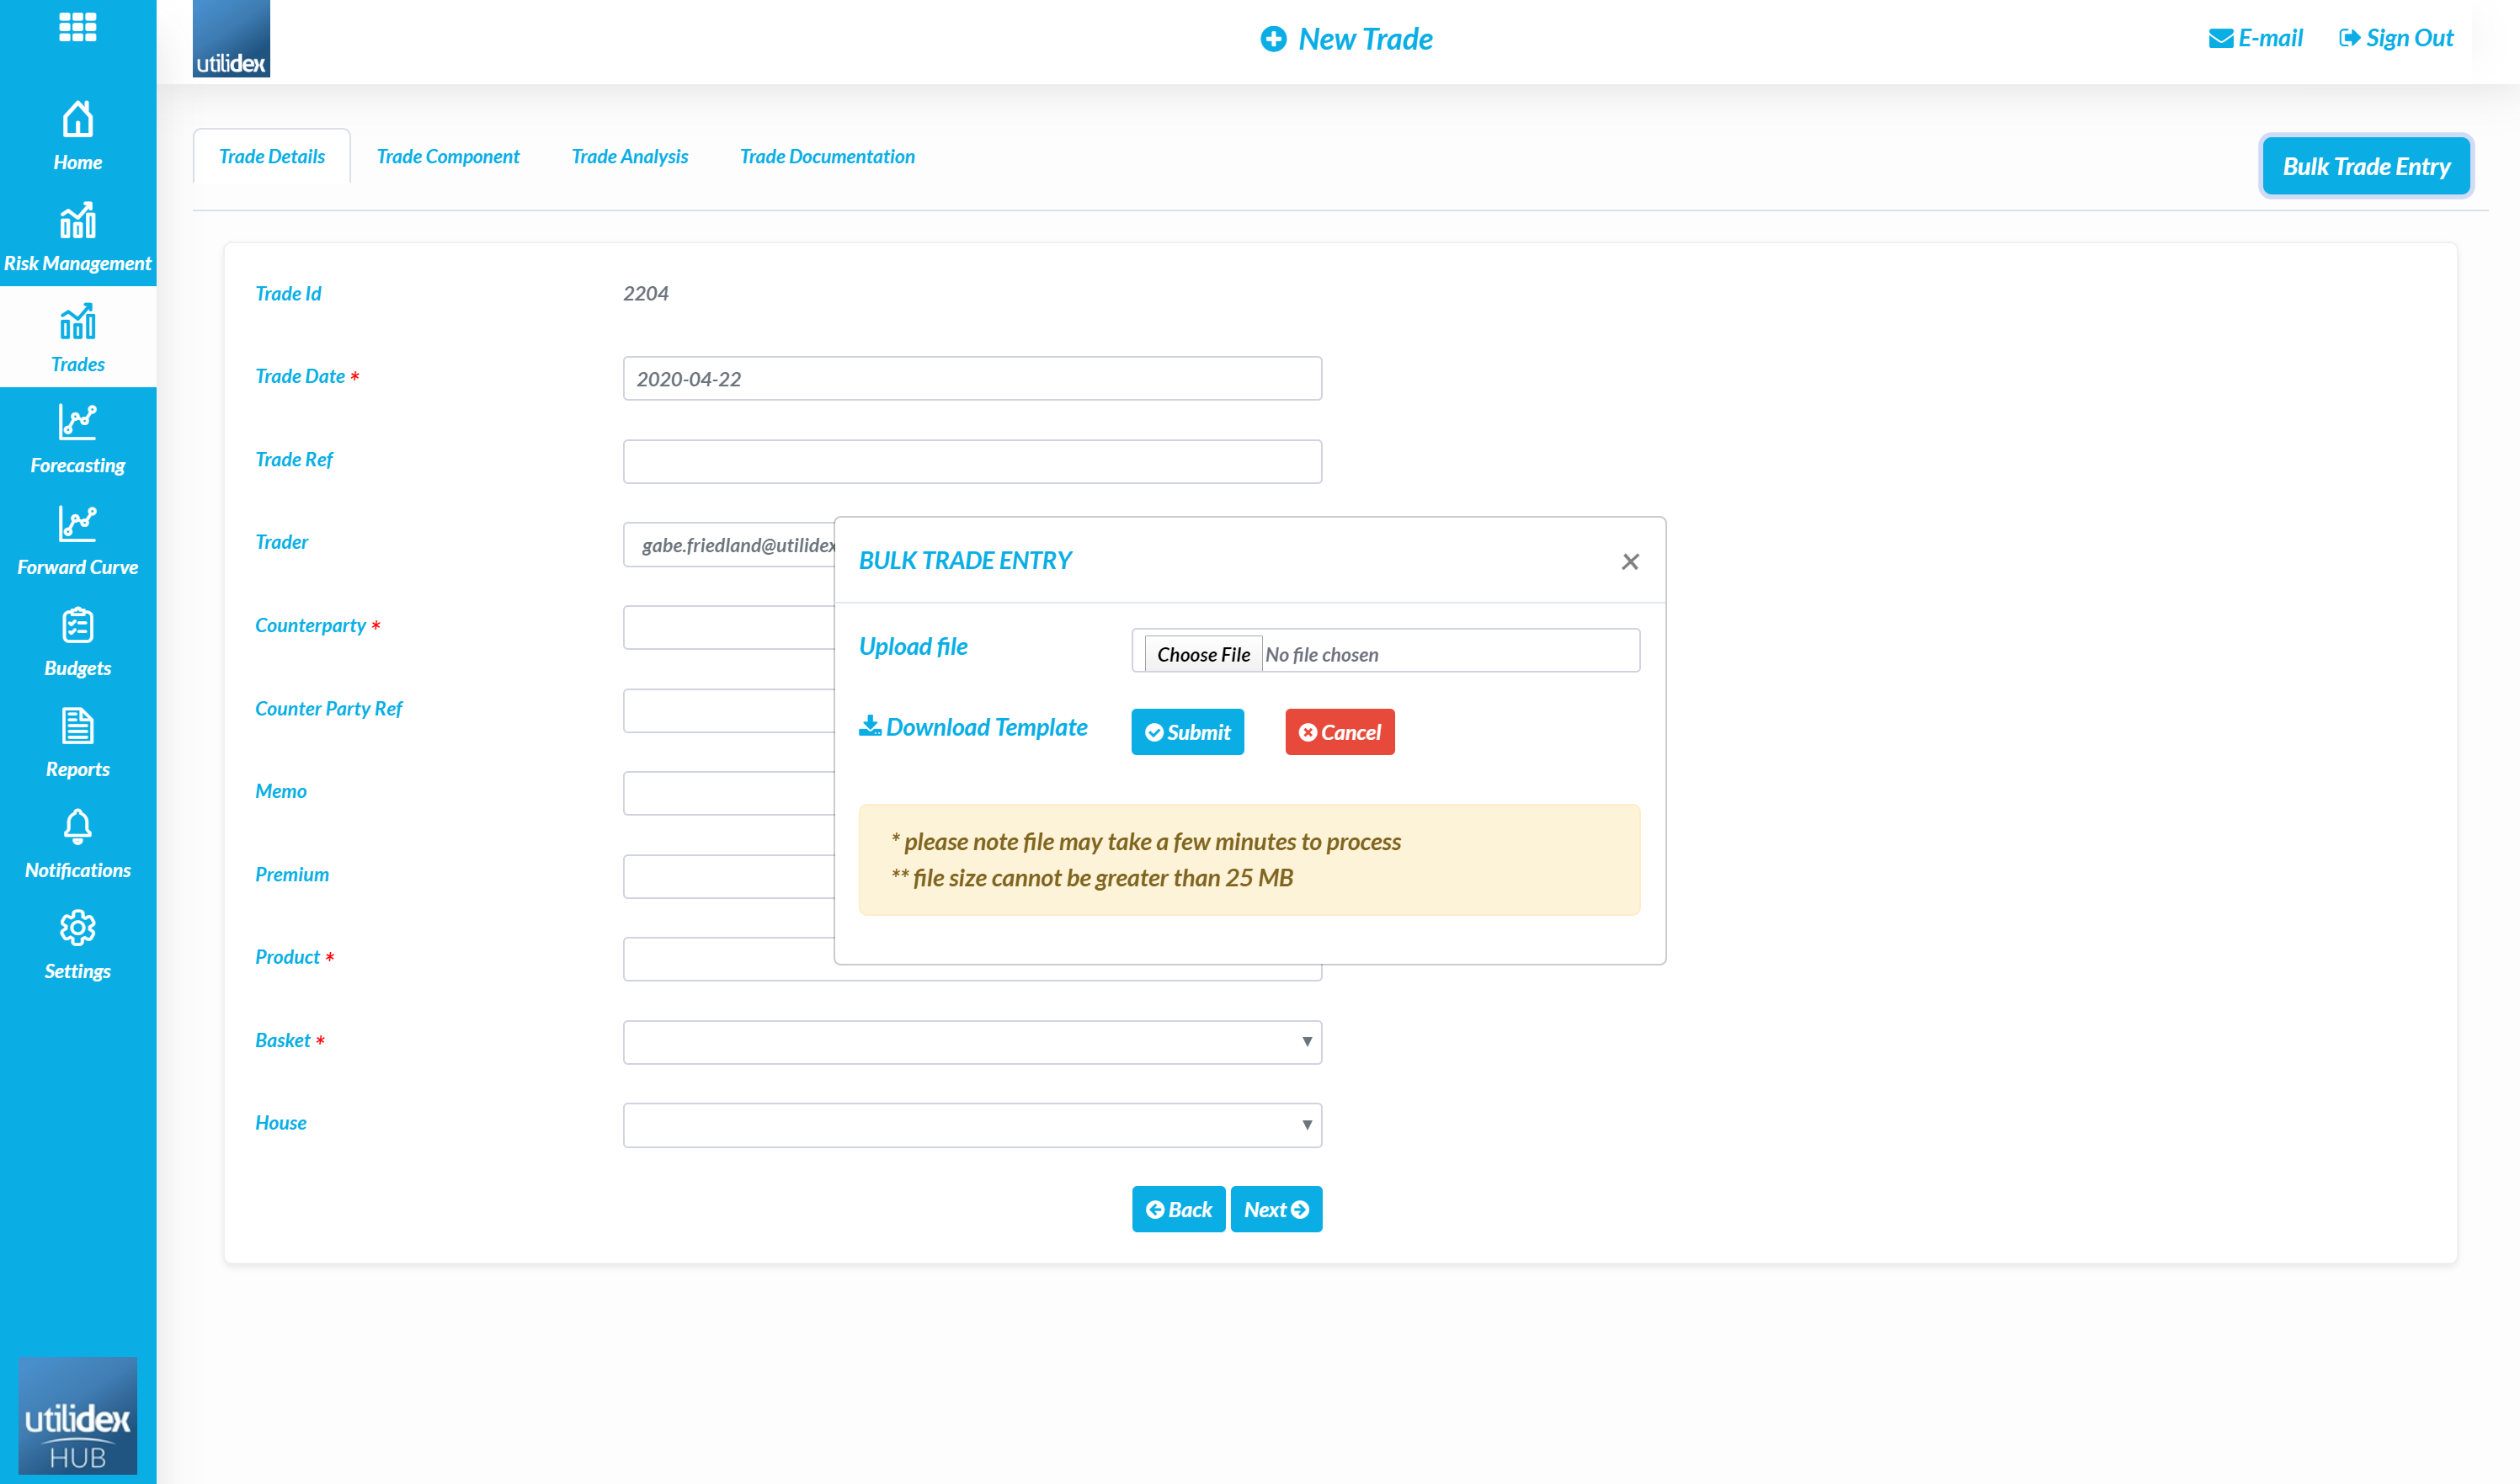
Bulk Trade Entry
Users can also add multiple trades to the system via a bulk upload tool in excel. To upload multiple trades, a user should follow the below steps:
- Trades, New Gas or Power Trade & OTC
- Select Bulk Trade Entry in the top-right corner
- Download the excel template and fill in all the mandatory fields (marked with an asterisk (*))
- Select Upload, please note – the system will run data validation checks to ensure the trades are mapped to the correct baskets, this means any typos will result in a failed trade file
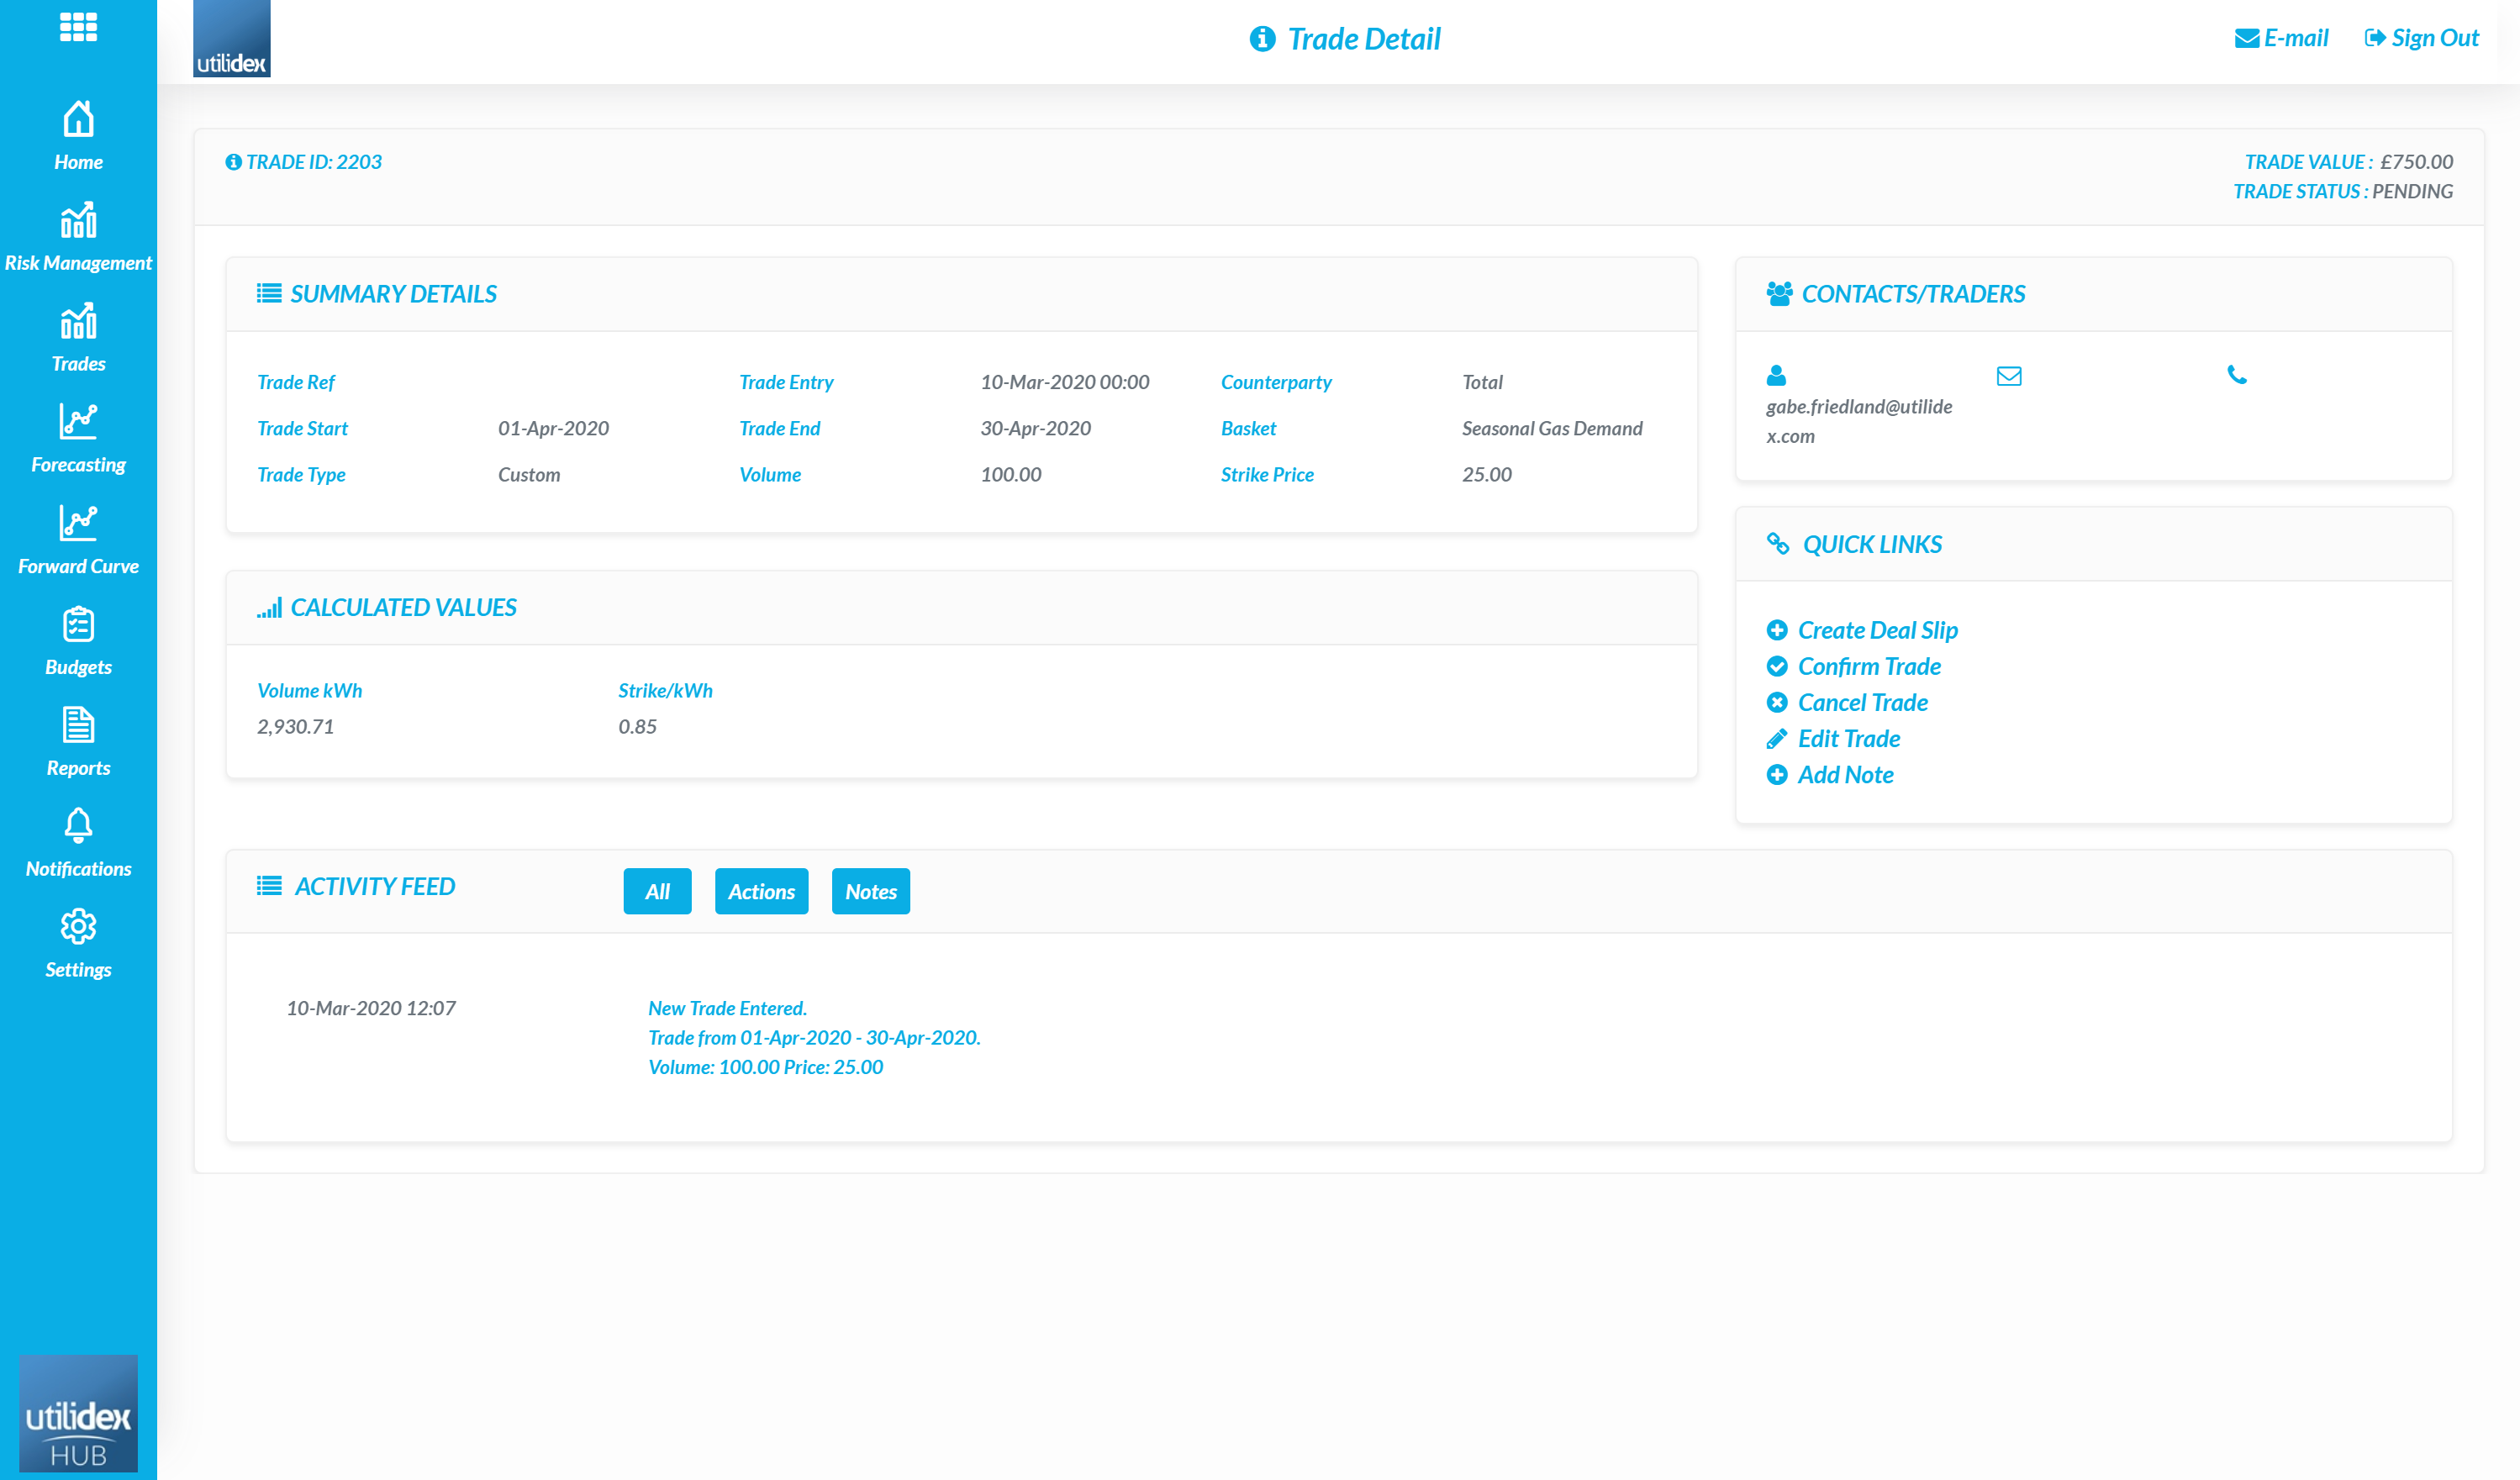
Searching Trades
Users can also search all historic trades in Trades, Search Gas or Power Trades
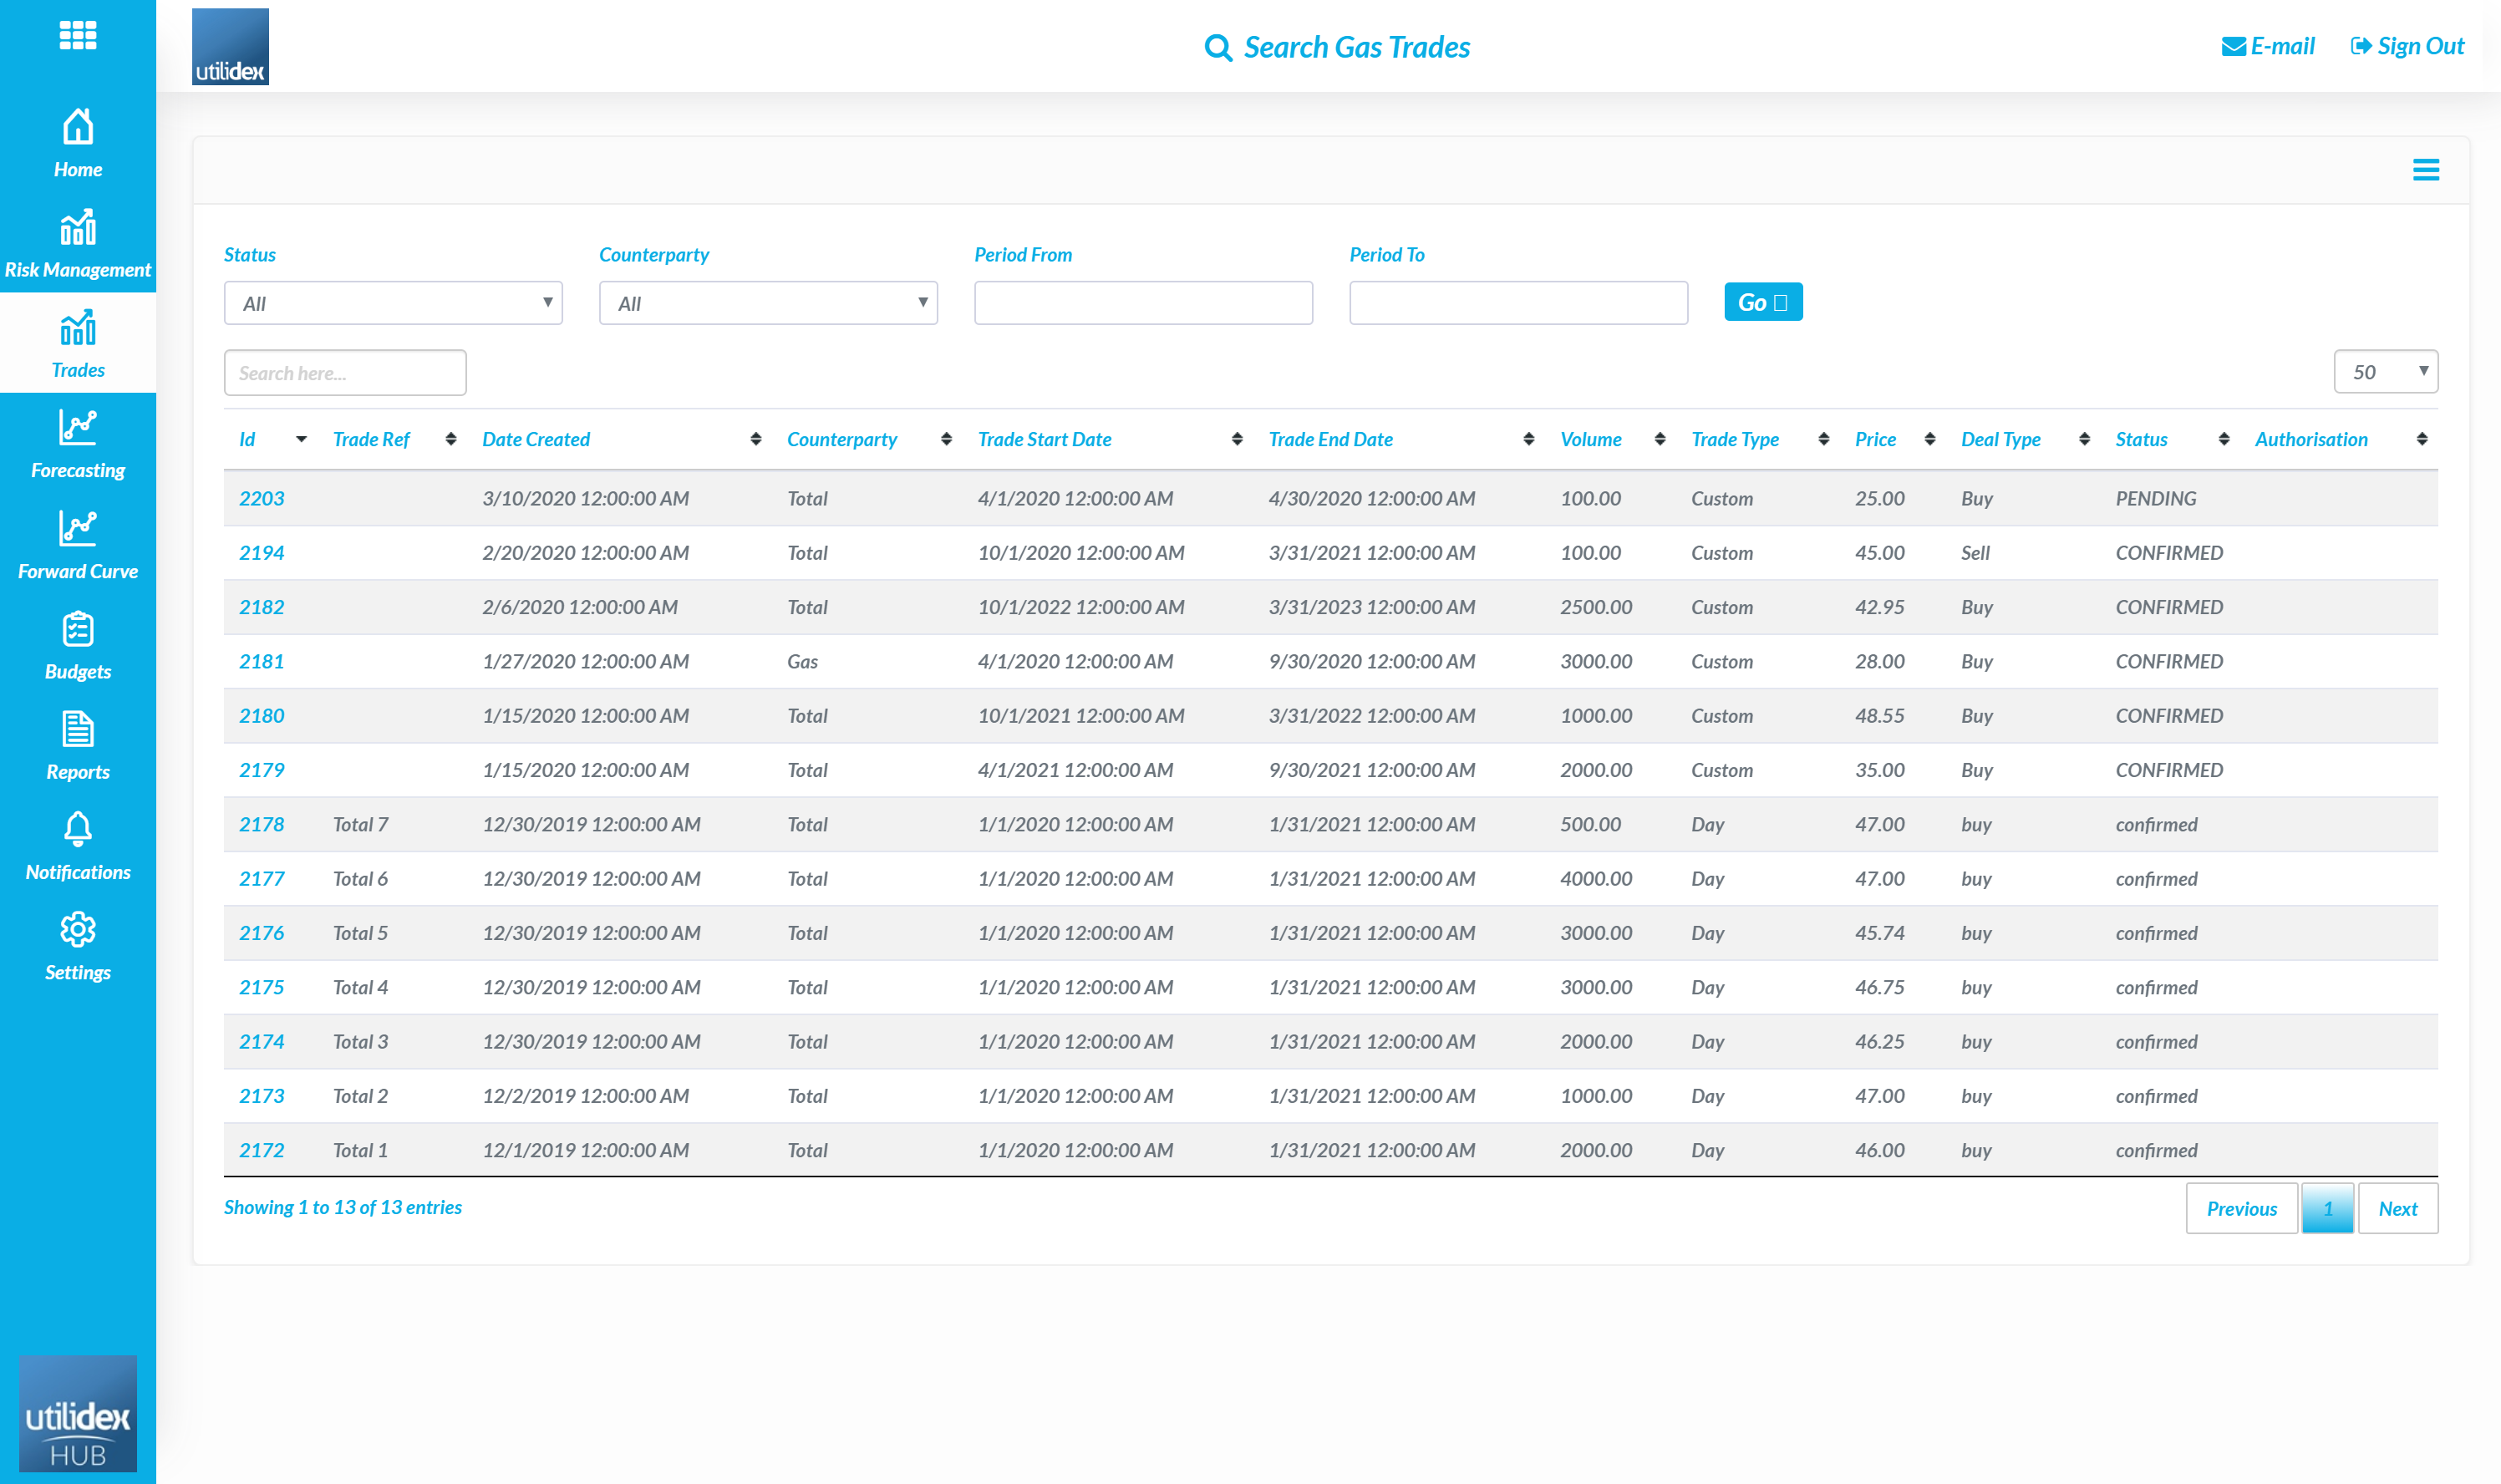
Here users can view each of their trades and by clicking on the trade ID on the left, view the full trade details
Price Curves
Users can either enter a forward curve using excel or by configuring an FTP location and using a third-party data source such as ICE. The process for configuring the FTP is bespoke to each customer so this section will focus solely on entering forward prices via excel. This is a process which can be automated if the correct licenses are in place for data sharing.
To configure Forward Prices users should follow the below steps:
- Forward Curve, Forward Curves
- Add Forward Curve

- Define a name for the curve, select the commodity, choose a data template, and download the template.
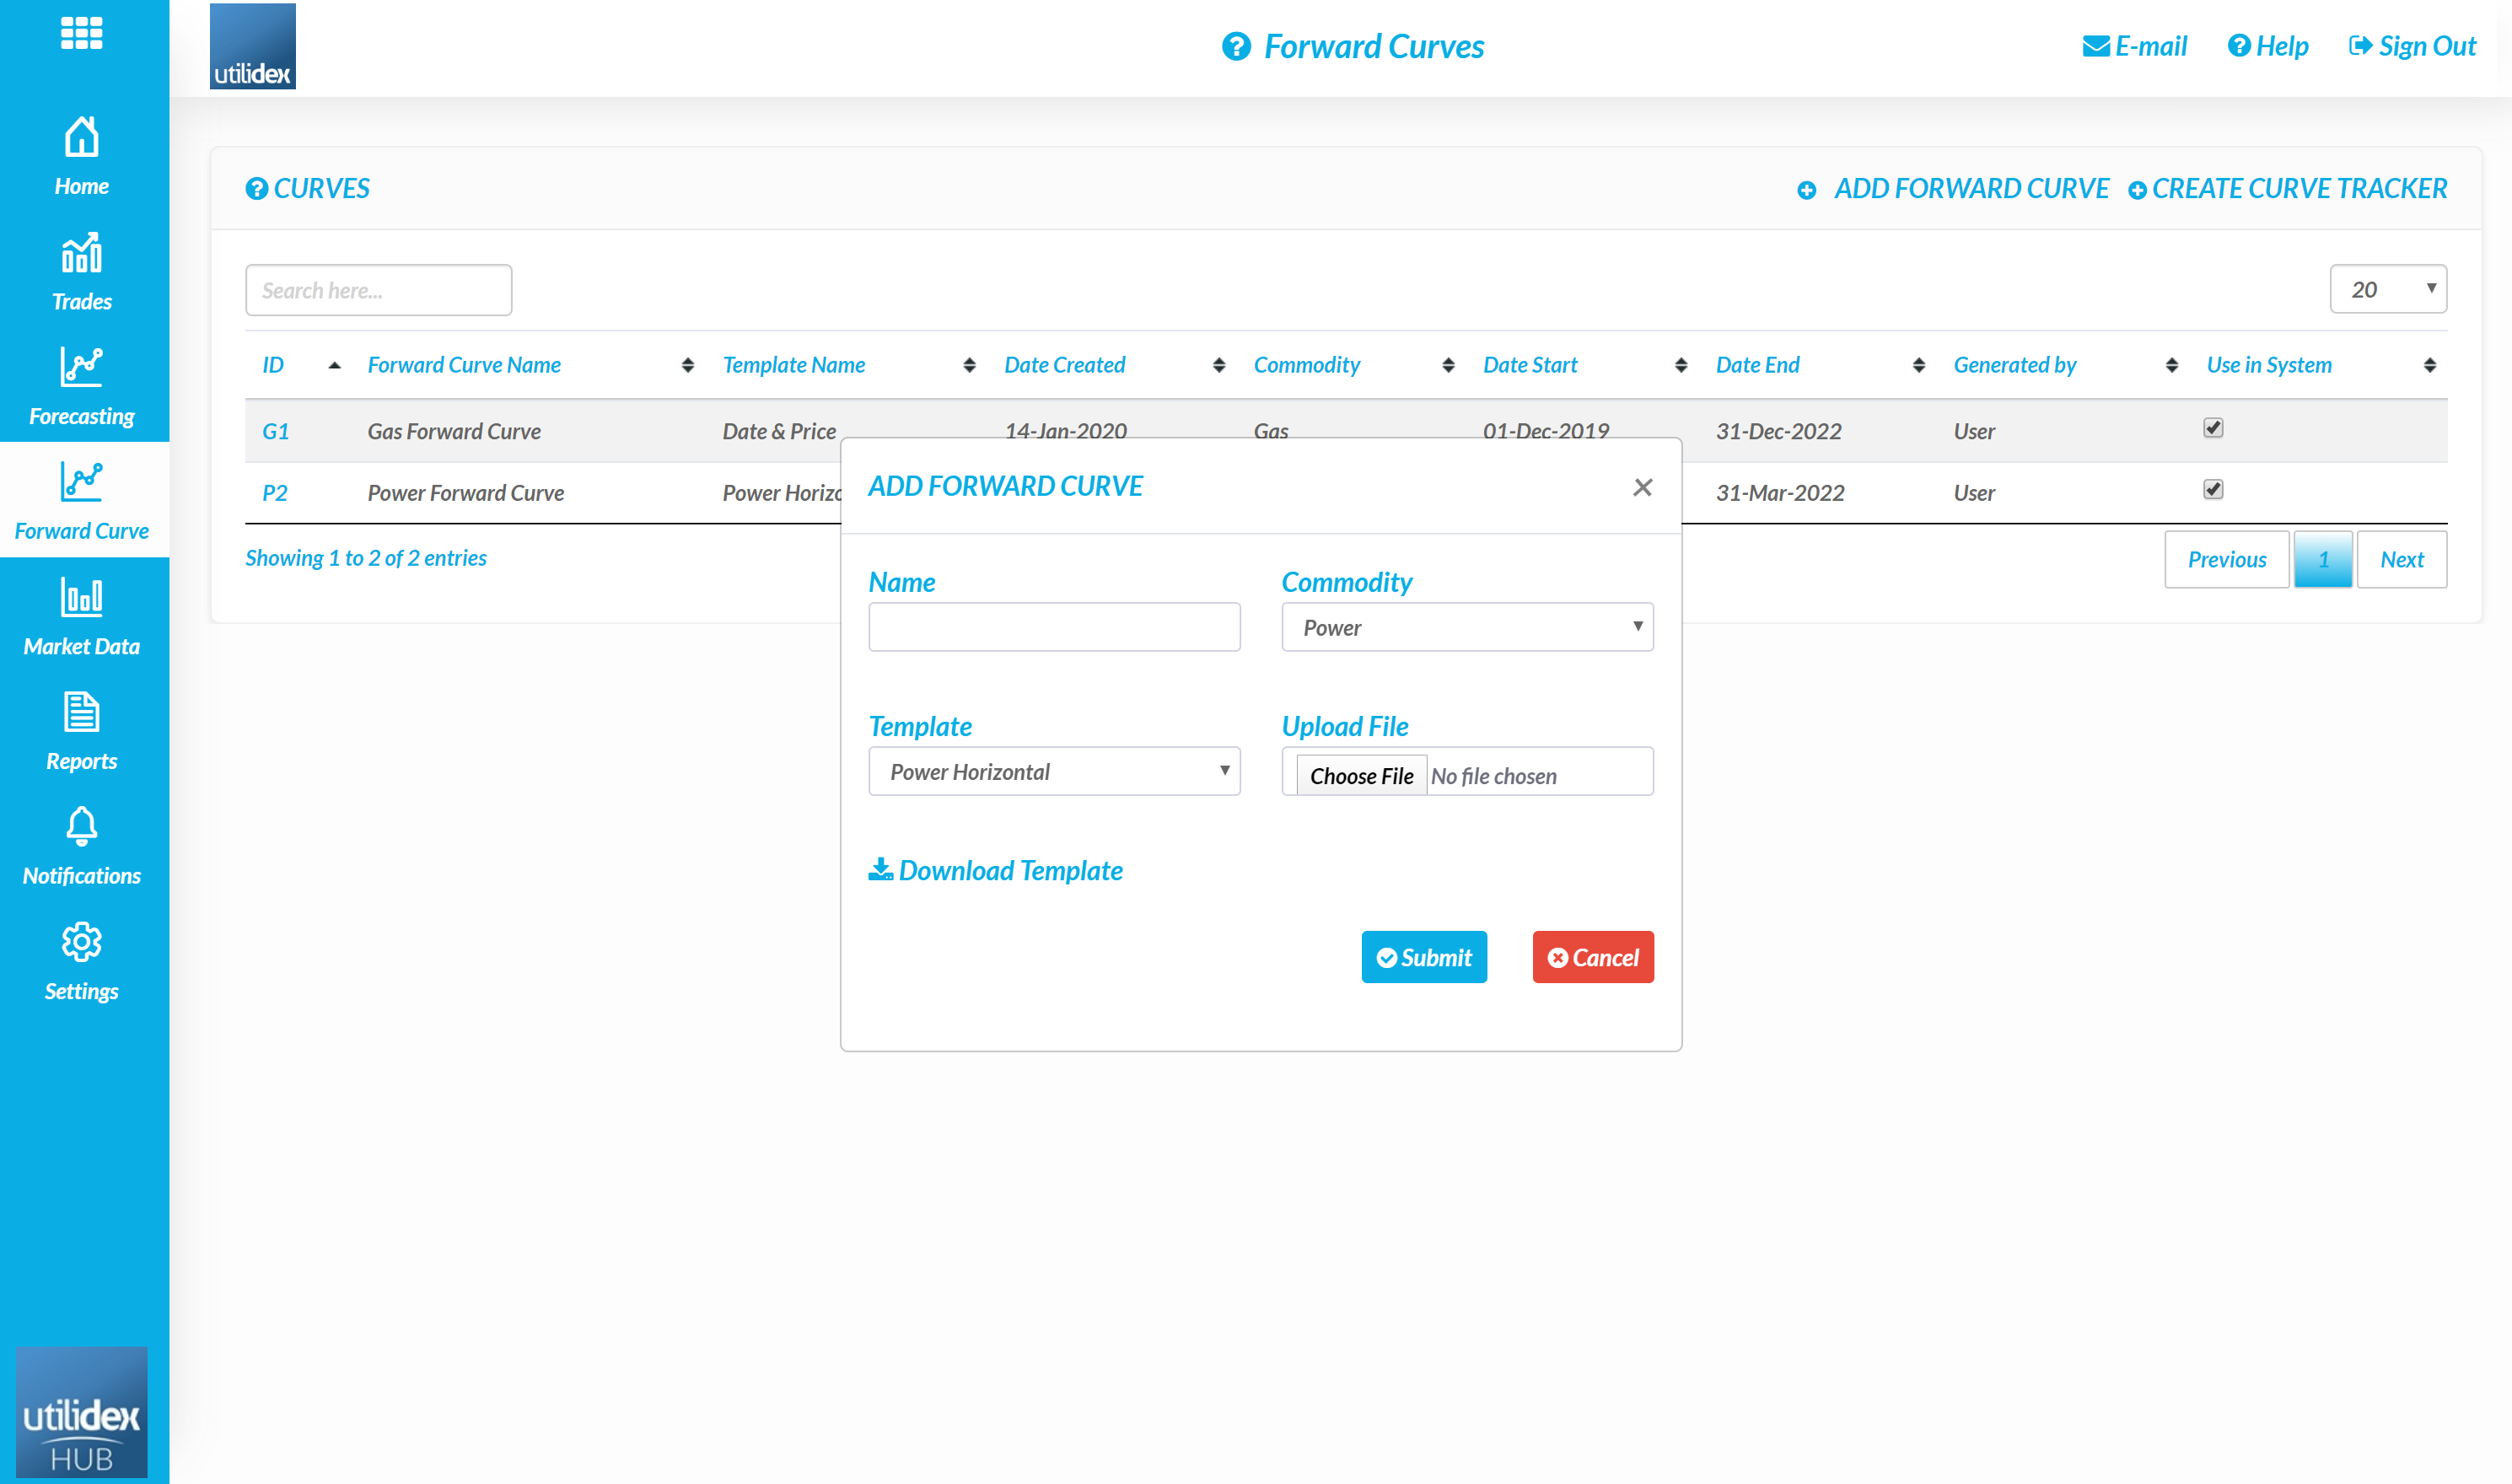
- A user can then upload the file and select submit.
- A user must select ‘Use in System’ on the right – only one curve can be selected per commodity. This curve is used to value the open positions.
- A user can then select the ID to view the details of the curve.
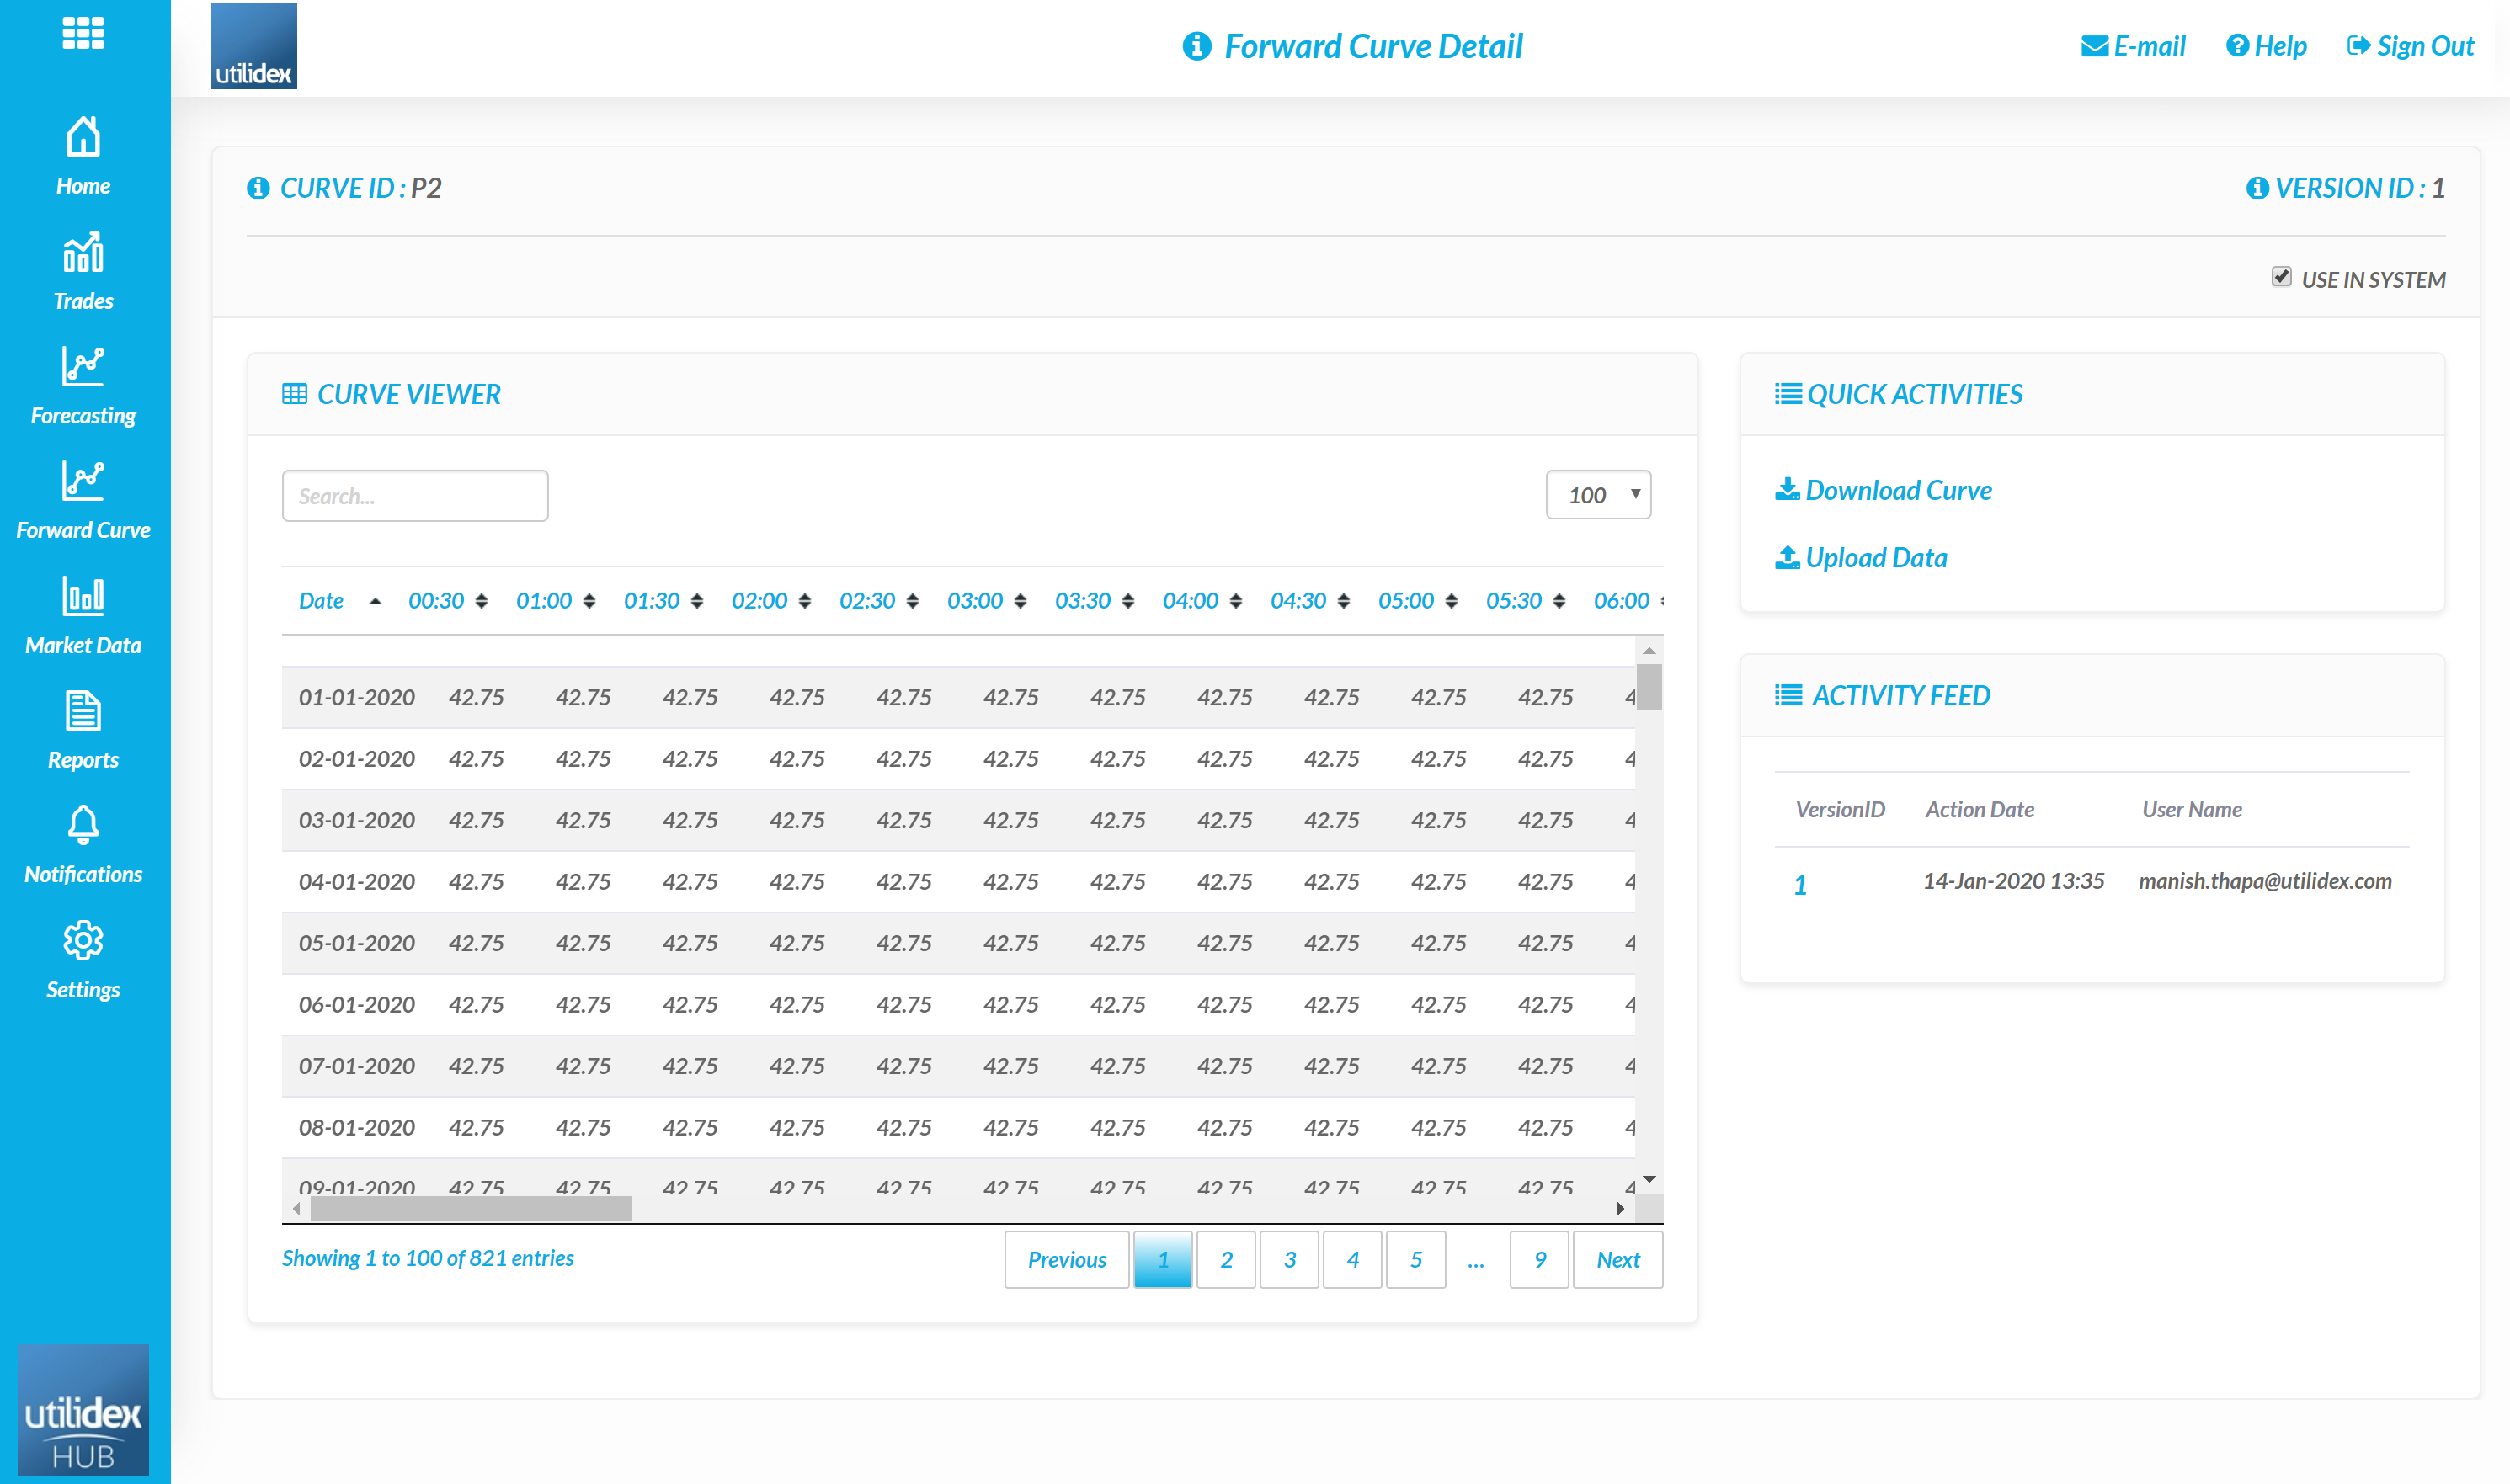
- A user can then download and re-upload the forward curve as needed. Users typically update the forward curve frequently to represent the moving prices within the market.