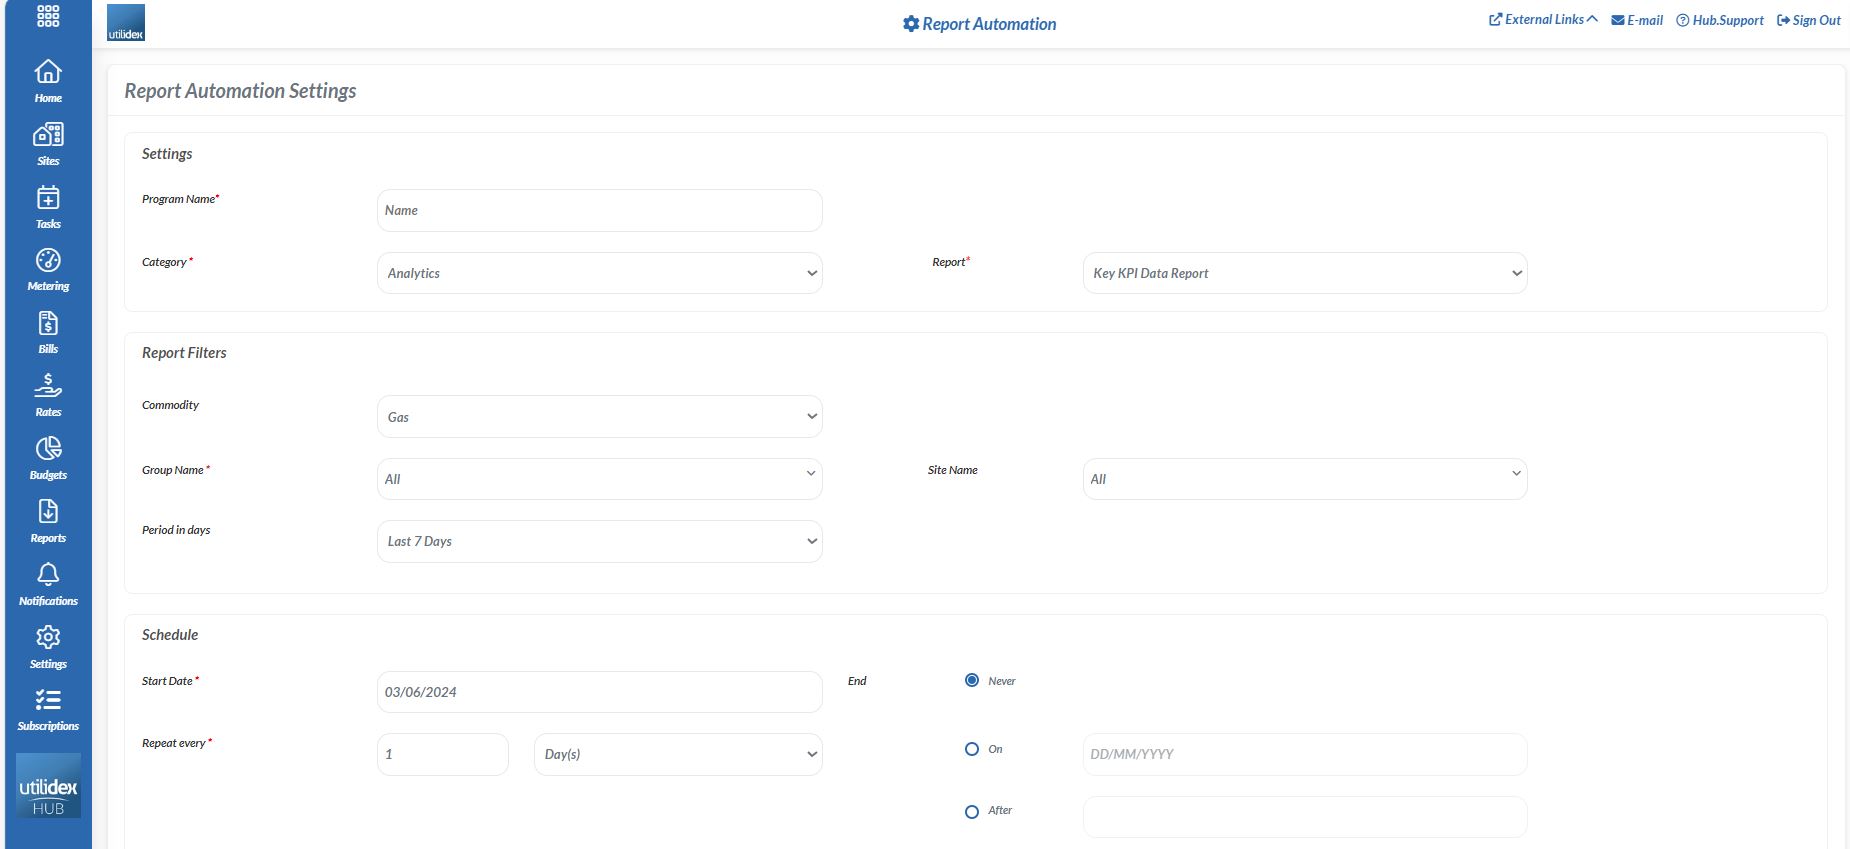
Users can choose to automate the creation of reports navigating to Reports >> Report Automation >> press ADD in the top right corner of the page. From here, users can choose the report you want to automate, schedule the timeline and frequency depending on when you would like to receive the report. Moreover, you can choose the email recipient(s) the report will be sent to with a customised subject line and email content. Once you are happy with your choice, press Save on the bottom right corner of the page.
The screen below shows the fields that need to be filled out to complete the automation process. Users can select multiply groups and sites they want the report to show for.

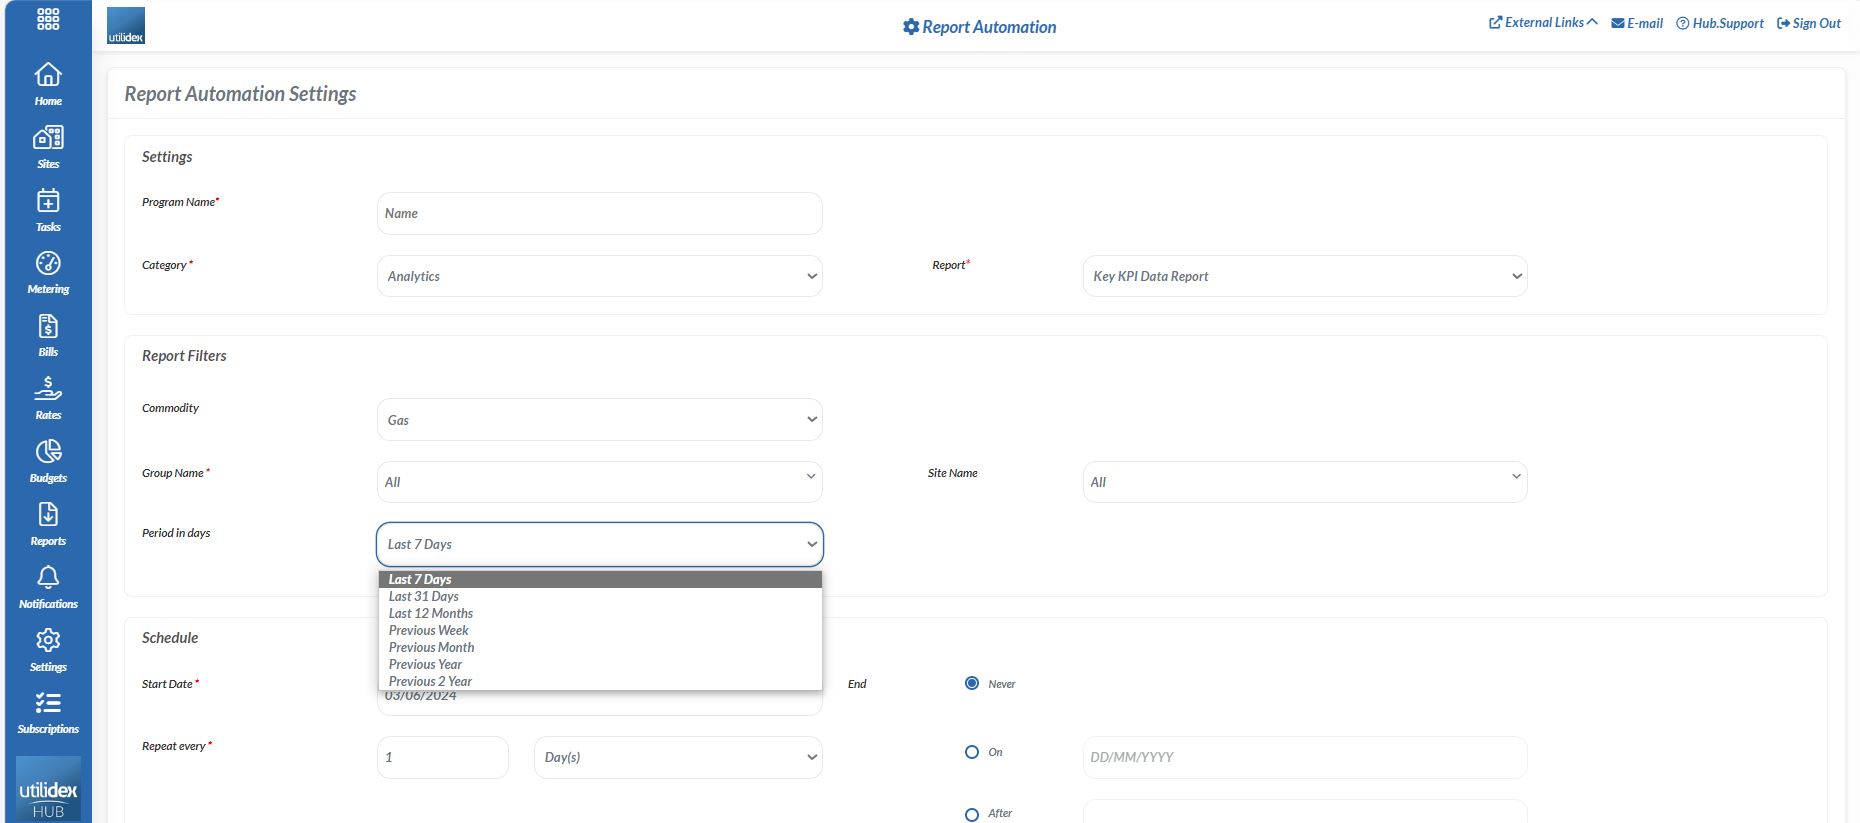
The reports can be requested for:
- Last 7 Days
- Last 31 Days
- Last 12 Months
- Previous Week
- Previous Month
- Previous Year
- Previous 2 Year

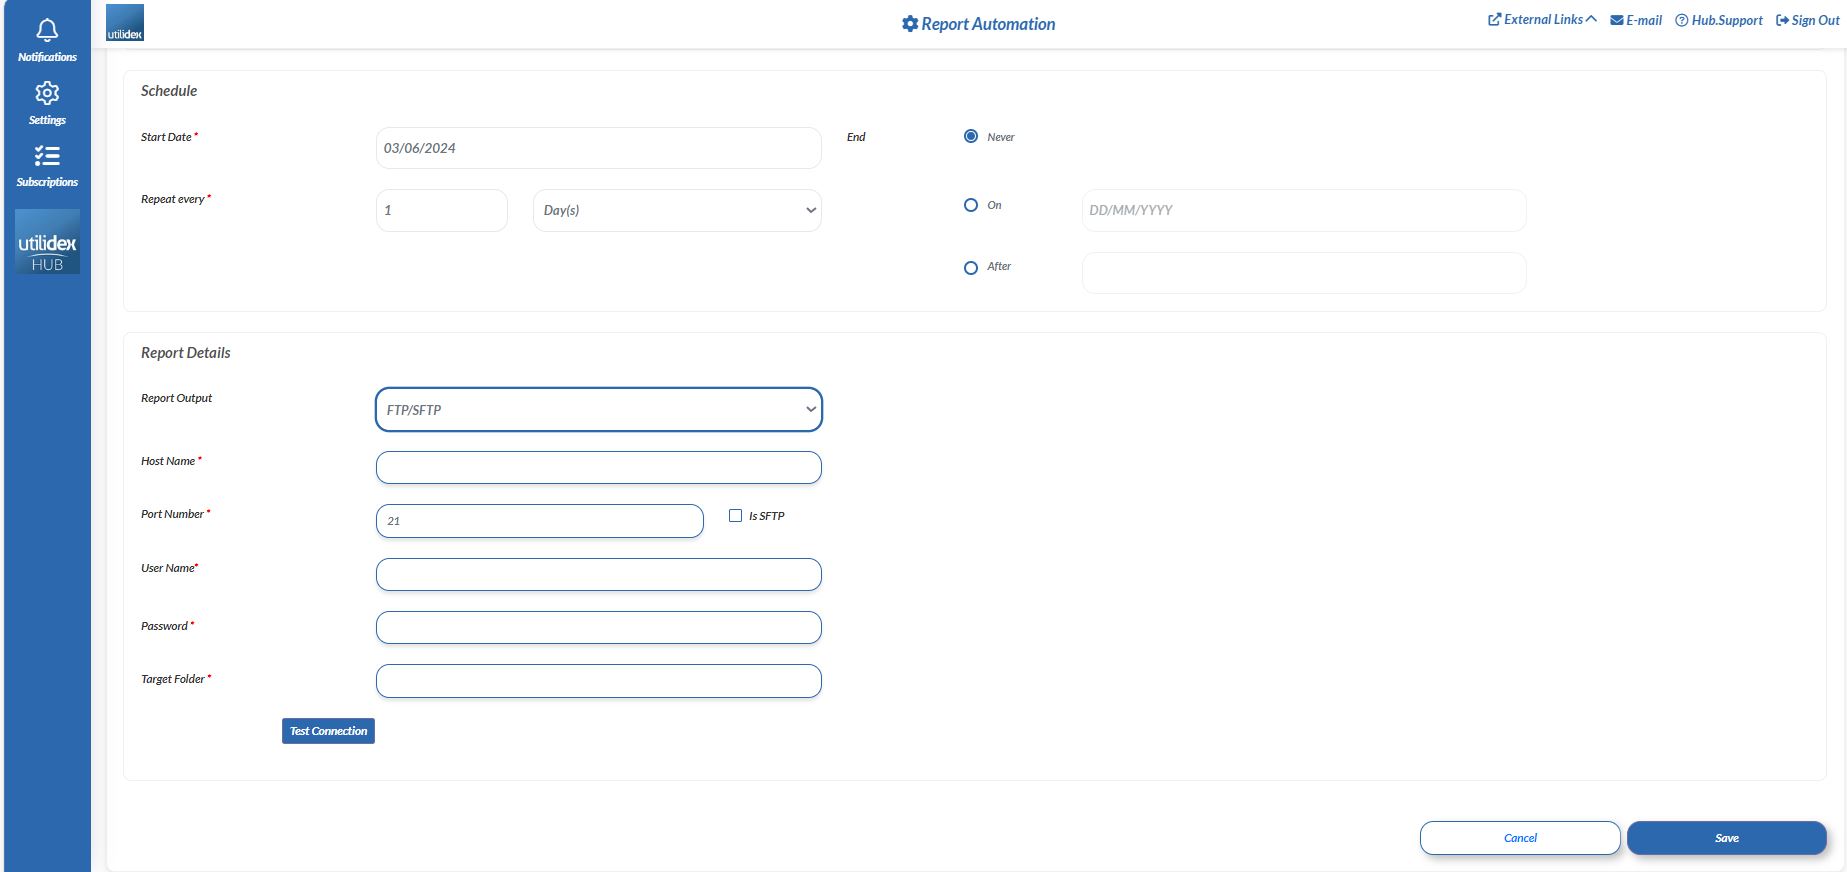
Also, users can set up the reports through SFTP/FTP connection. All the fields with the red asterisk are mandatory.
Please contact your Account Manager for support in testing this functionality.

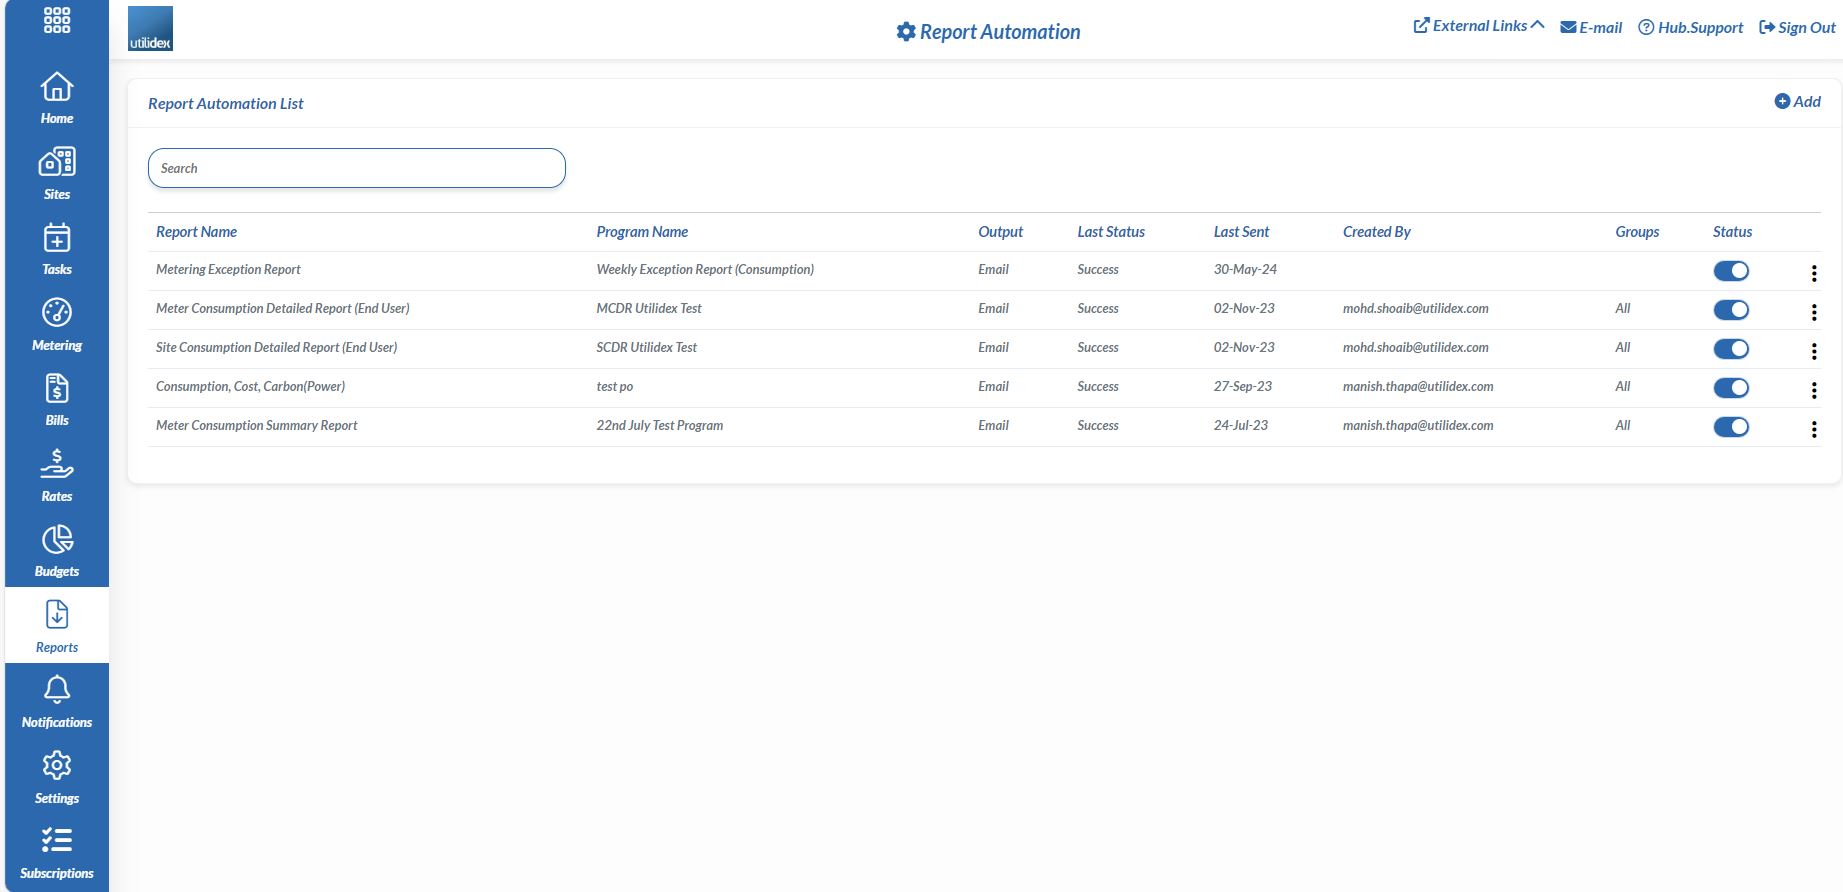
From the Report >> Automate Reports screen you can have a look at all the reports you have decided to automate, how they will be received (email/FTP/SFTP), the current status, and when the report was last sent.
You can decide to delete or edit any report by clicking on the three dots next to the status column. To de-activate these reports, click on the Status toggle.

