Uploading Data
To Upload the Purchase Requirements, users should follow the below 9 steps:
- Go to Forecasting >> Forecast Curves

- Select Create Forecast/Purchase Requirement
- Fill in the details in the below pop-up:
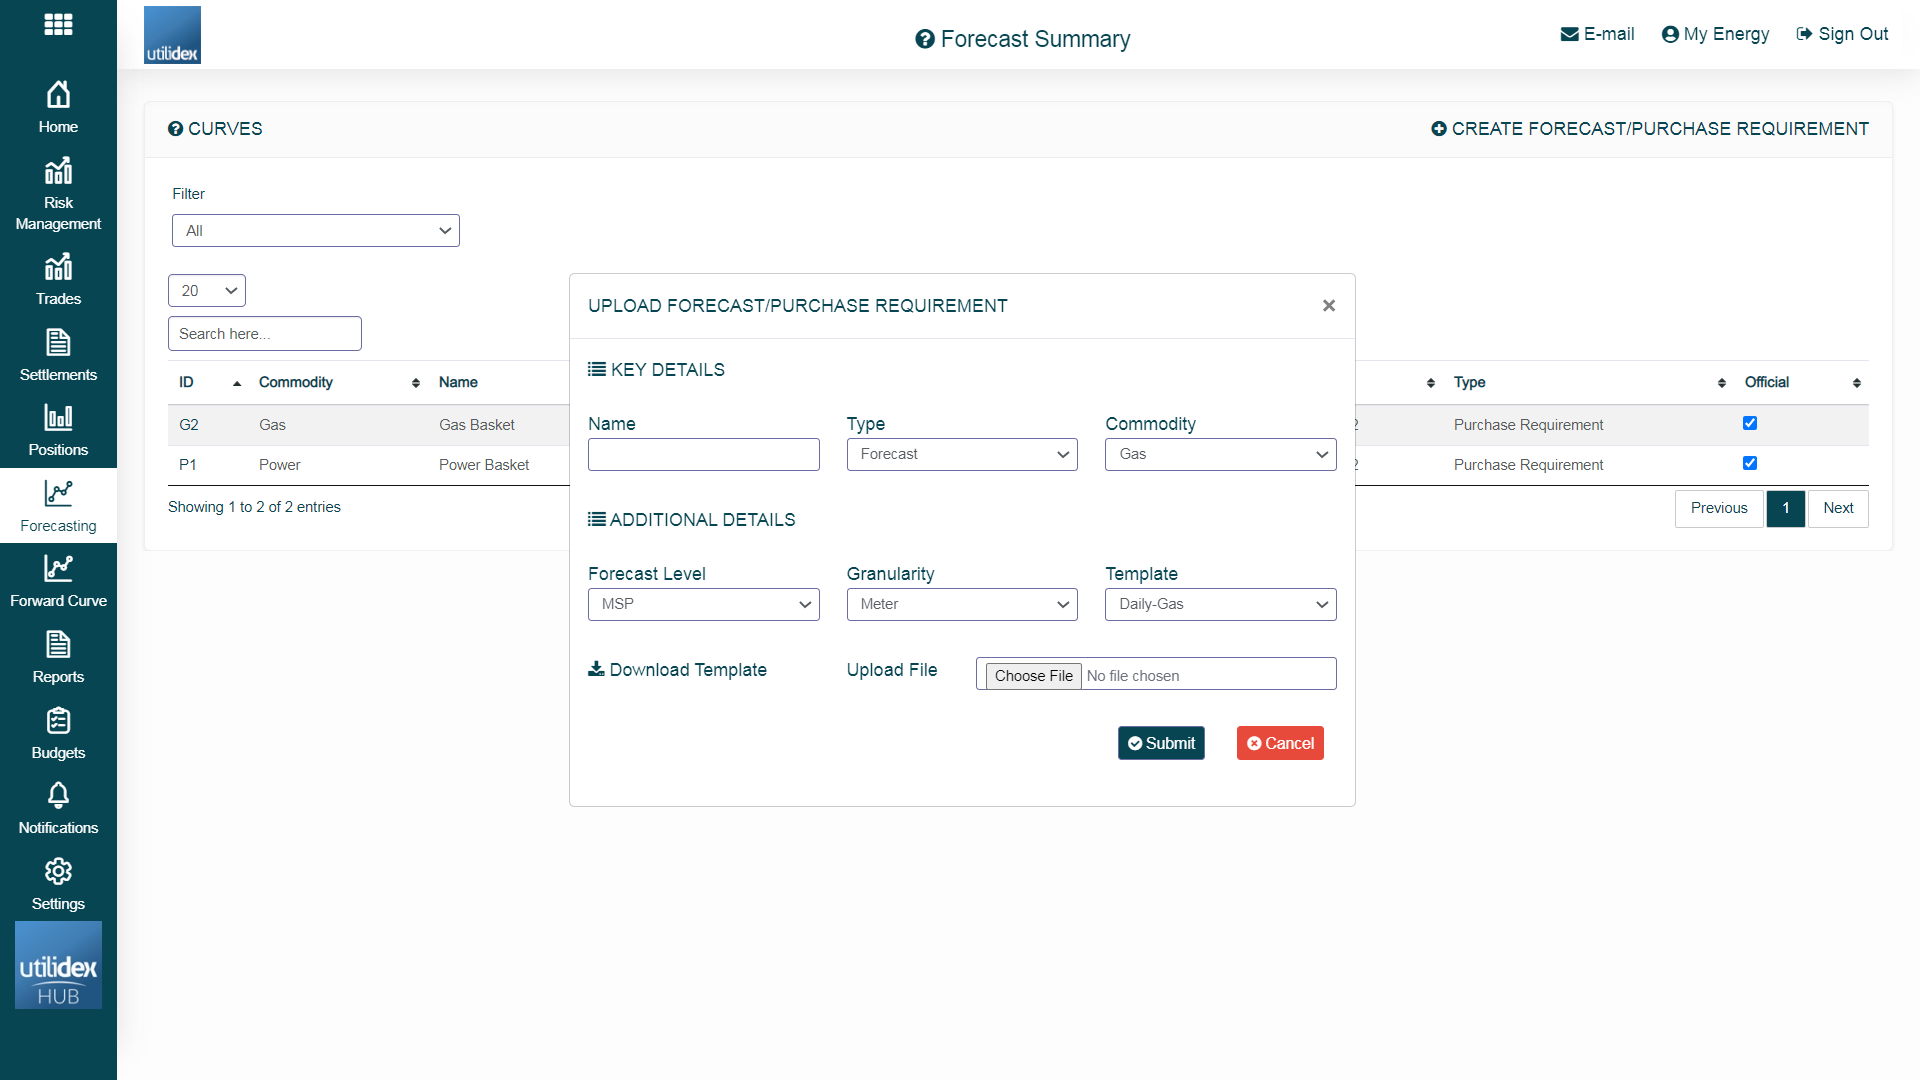
- Users can name each purchase requirement per basket (e.g. Official Gas Purchase Requirement)
- Users must then select the commodity
- In the market there are multiple levels at which forecasts are generated (e.g. Meter Supply Point, Grid Supply Point, or National Balancing Point). Users should select NBP as this is the most common volume for suppliers to provide when trading.
- Users can then download the template and upload once complete
- A user can then view the purchase requirement by selecting the ID
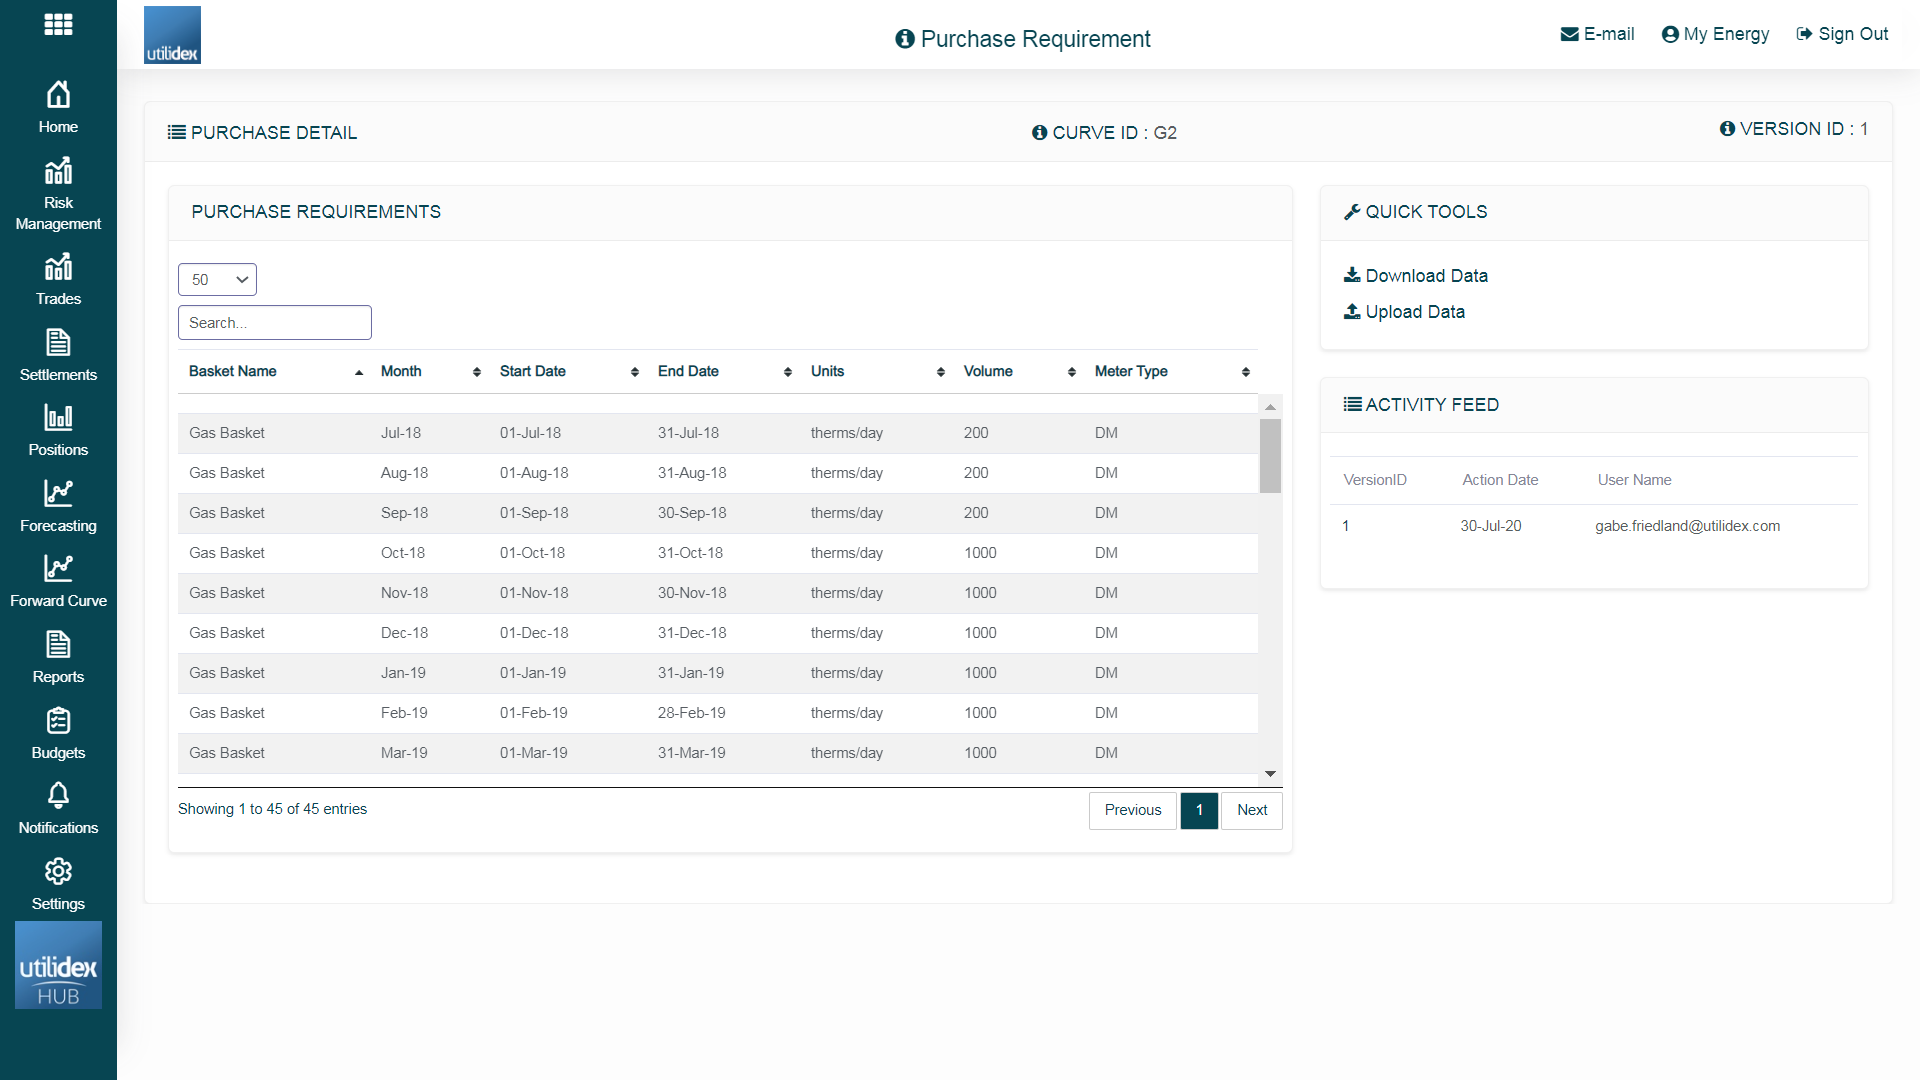
- Here, a user can download and re-upload new versions of the data
- Users can also view historical data versions by selecting the VersionID in the Activity Feed.
Data Templates
Gas
Below is a screen shot of the excel data template for gas:

Users must allocate a demand against each month for each basket, they can determine if the units are either Therms/Day or Therms. The file will fail to upload if the Basket does not match the pre-defined baskets configured within the settings, the system provides a file which details any issues within a file if the first upload is unsuccessful.
Users can also assign a meter type (e.g. non-daily metered or daily metered) which can be used for demand analytics.
Power
For power, users must fill in the below template:
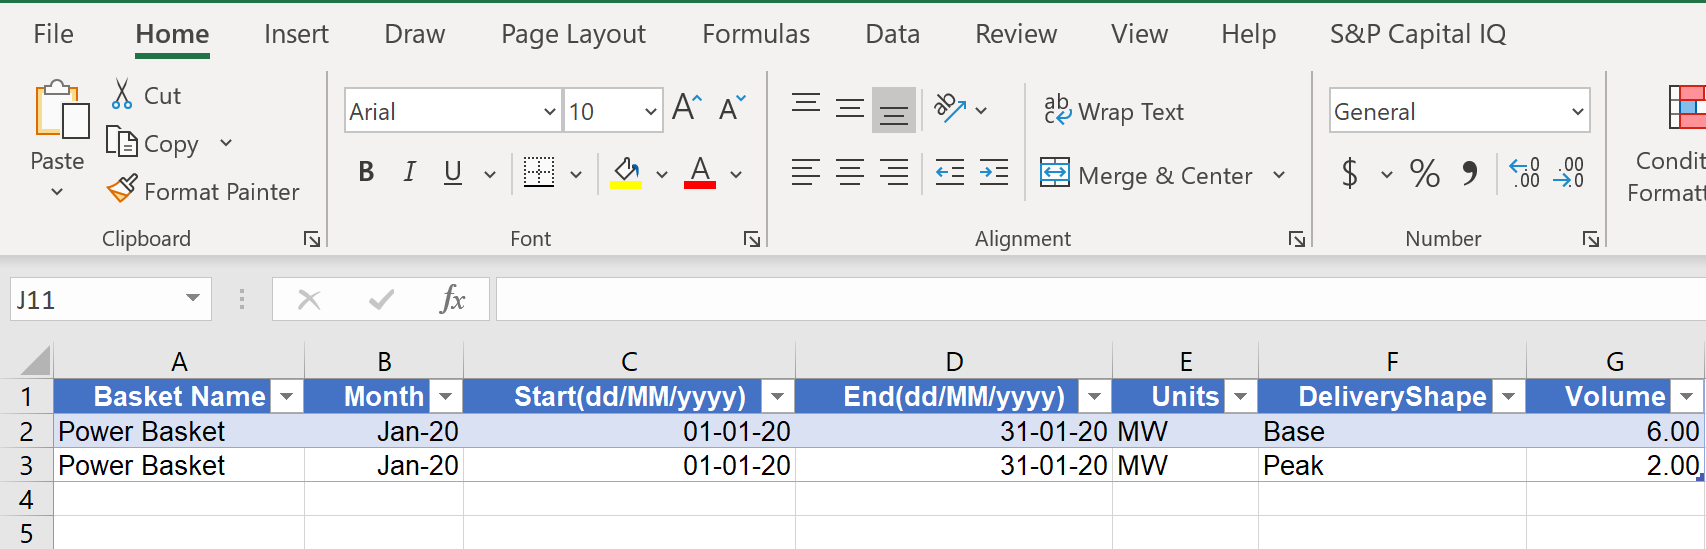
The core difference between power and gas is that for power users must assign a shape for each row in the data table. The Units must either be MW or MWh.
The file will fail to upload if the Basket does not match the pre-defined baskets configured within the settings, the system provides a file which details any issues within a file if the first upload is unsuccessful.