The Provider View is the latest feature update to the Energy.Hub platform. This feature introduces a new landing page and enhanced functionalities designed to streamline the management of notifications, user roles, and data insights for suppliers, energy insights teams, and flex management users. This guide provides a detailed step-by-step walkthrough of the key features.
1. Feature Overview
The Provider View update includes several key features:
• Notifications: Admins can create and manage announcements for different user roles.
• Landing Page: A personalized landing page upon login.
• User Management: Admins can create and manage user roles, permissions, and access levels.
2. Notifications
Accessing Notifications
• To access the notifications, navigate to Notifications > Notifications section in the main menu. This sub-section is only accessible to Admins
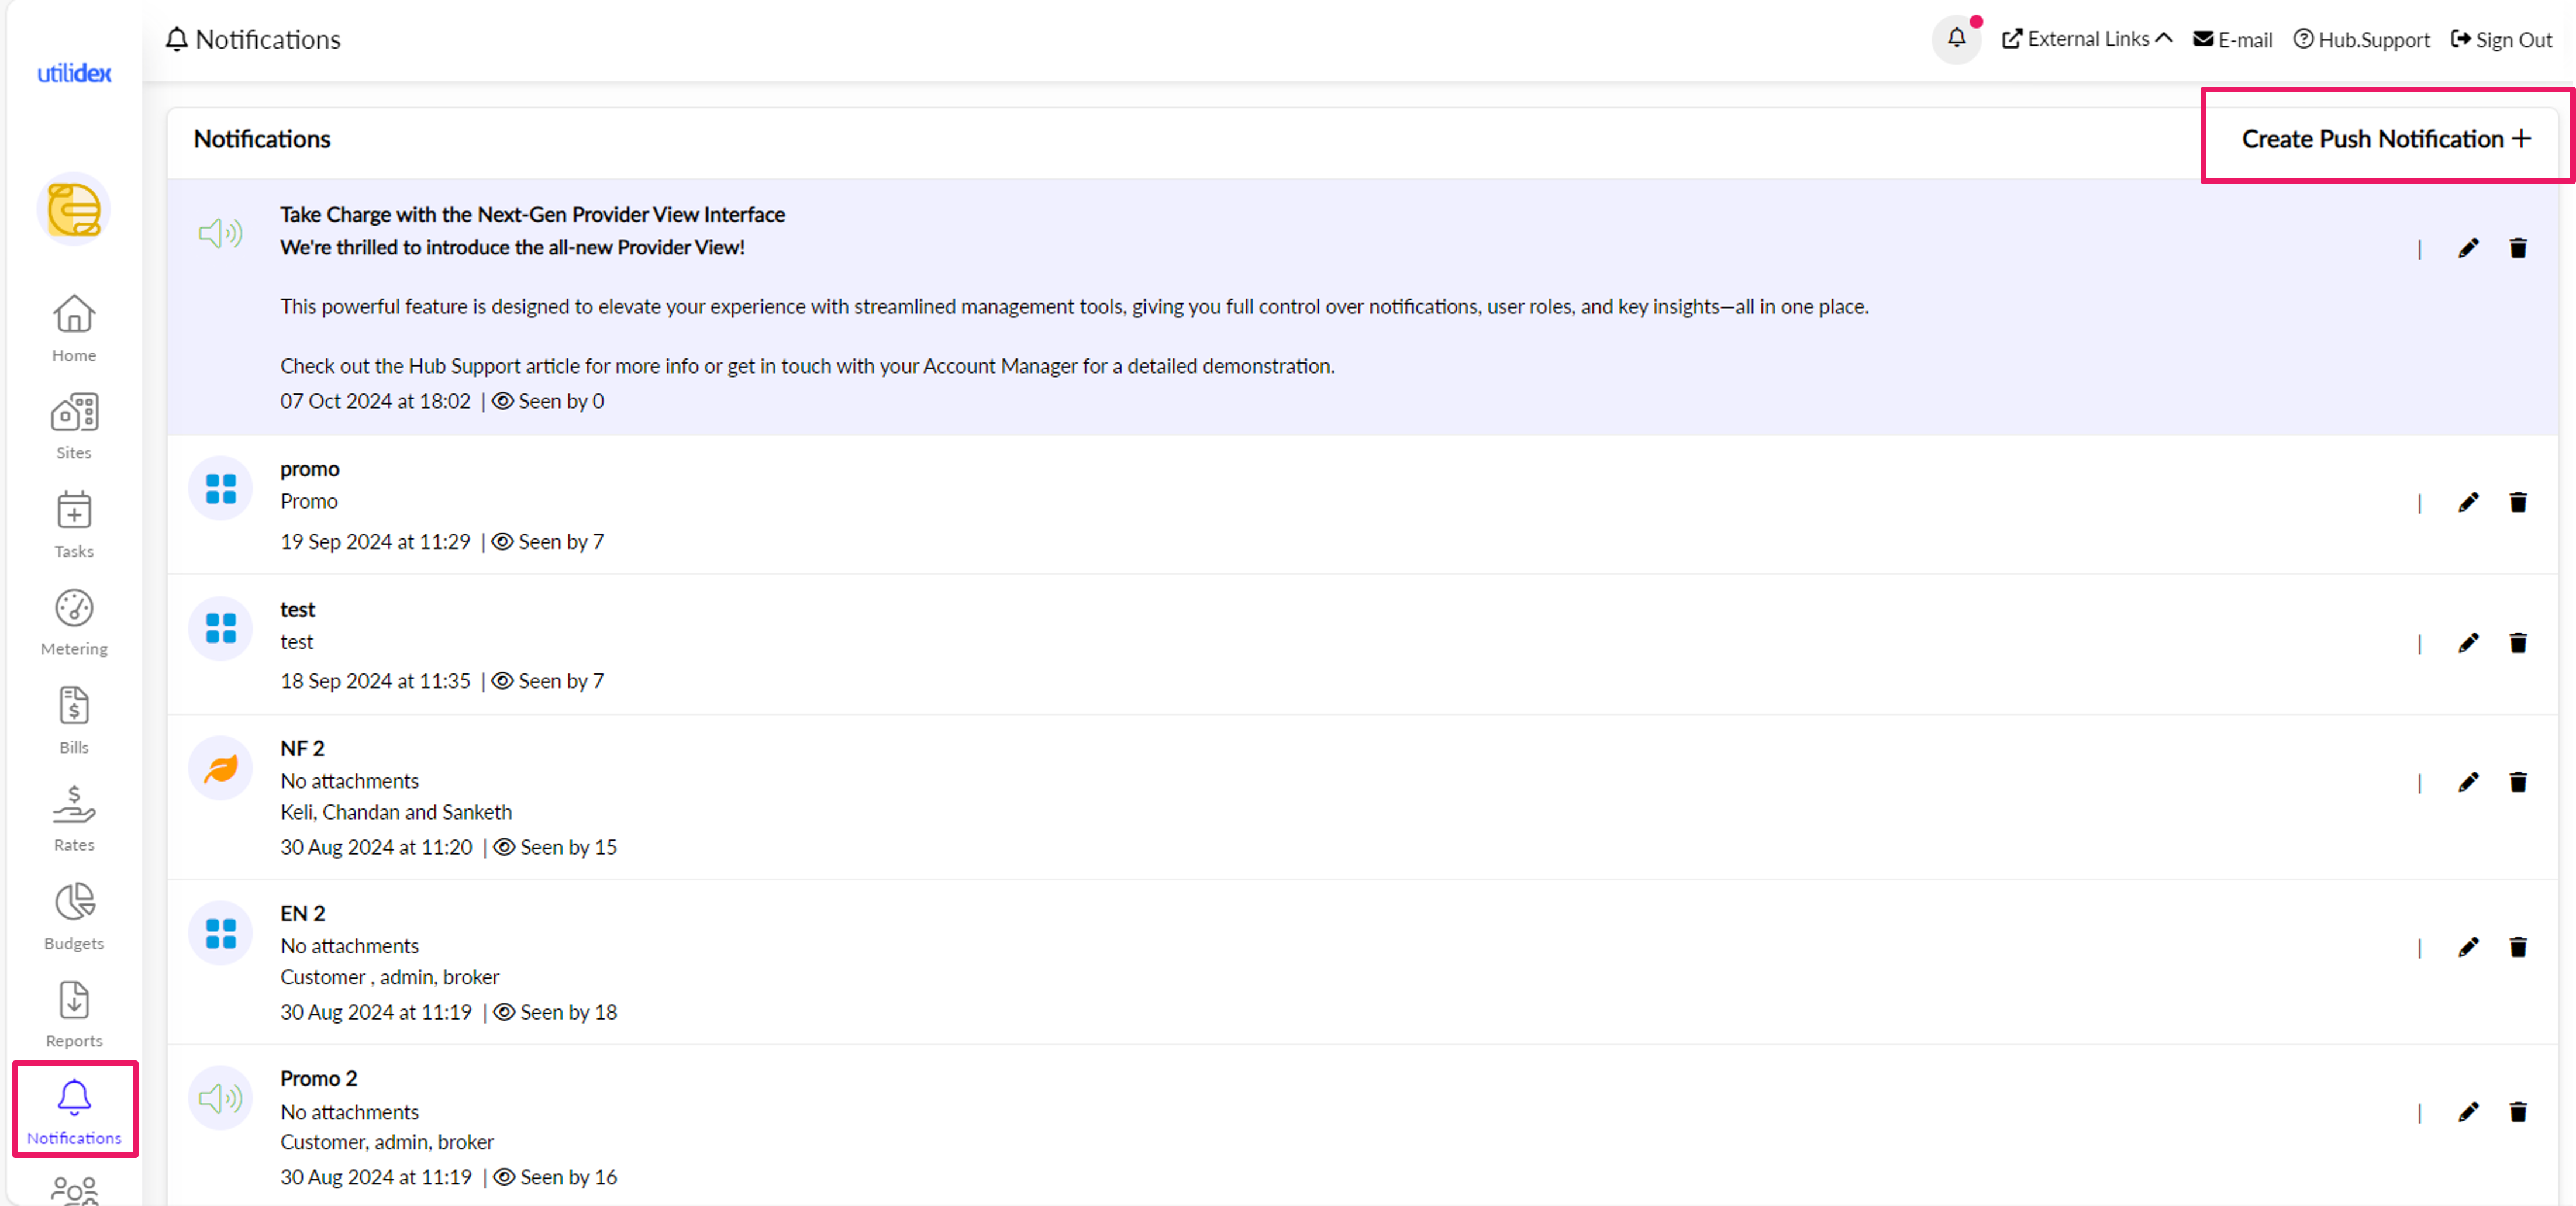
Viewing and Managing Notifications
- The Notifications page displays a list of all existing notifications with options to:
- Edit: Click the pencil icon.
- Delete: Click the trash can icon.
- For each notification, the following details are displayed:
- Title: Notification’s title.
- Message Body: Notification content (up to 400 characters).
- Date and Time: Date and time when the notification was created or last updated.
- Engagement: Number of users who have viewed the notification.
Creating Notifications
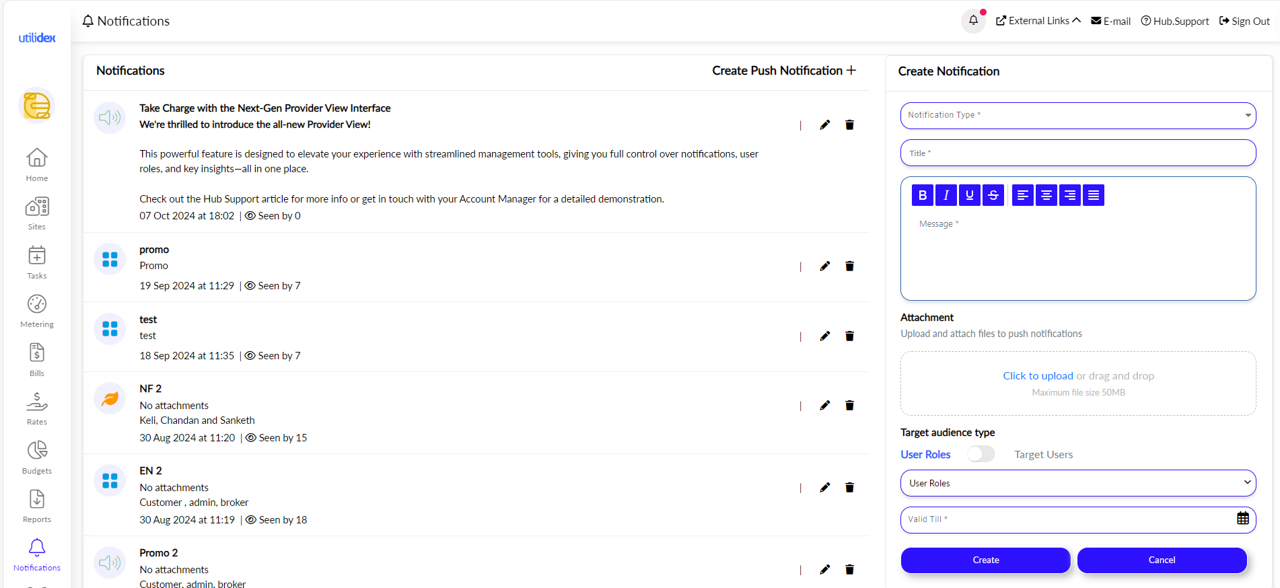
- Click the Create Notification button at the top right of the screen.
- Fill in the following fields:
- Notification Type: Choose from a dropdown (e.g., Promotion, Energy News, New Feature).
- Title: Enter the notification title.
- Message Body: Compose the message using rich text formatting (bold, italics, underline).
- Attachments: Upload files (up to 50MB, multiple files will be bundled into a zip file).
- Target Audience: Select whether the notification is for a specific role (e.g., Admin, Customer, Broker) or a specific user.
- Validity Period: Set how long the notification will be active (1, 2, 3, 6, 9, 12 months, or indefinitely).
Editing Notifications
- To edit a notification, click the pencil icon, update the content, and click Update. The notification will be updated with the latest information and marked as unread for users who haven’t seen the update.
Tips & Best Practices for Notifications
- Keep messages concise and to the point, sticking to the 400-character limit.
- Use categories like “Promotion” or “Energy News” to effectively organize your notifications.
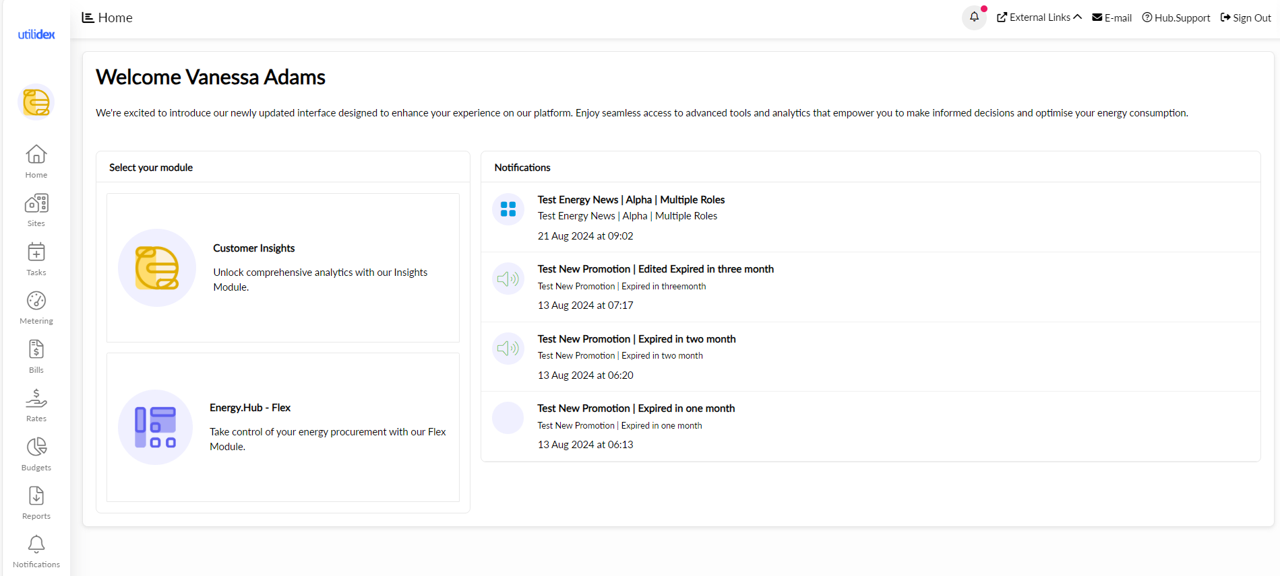
3. Landing Page
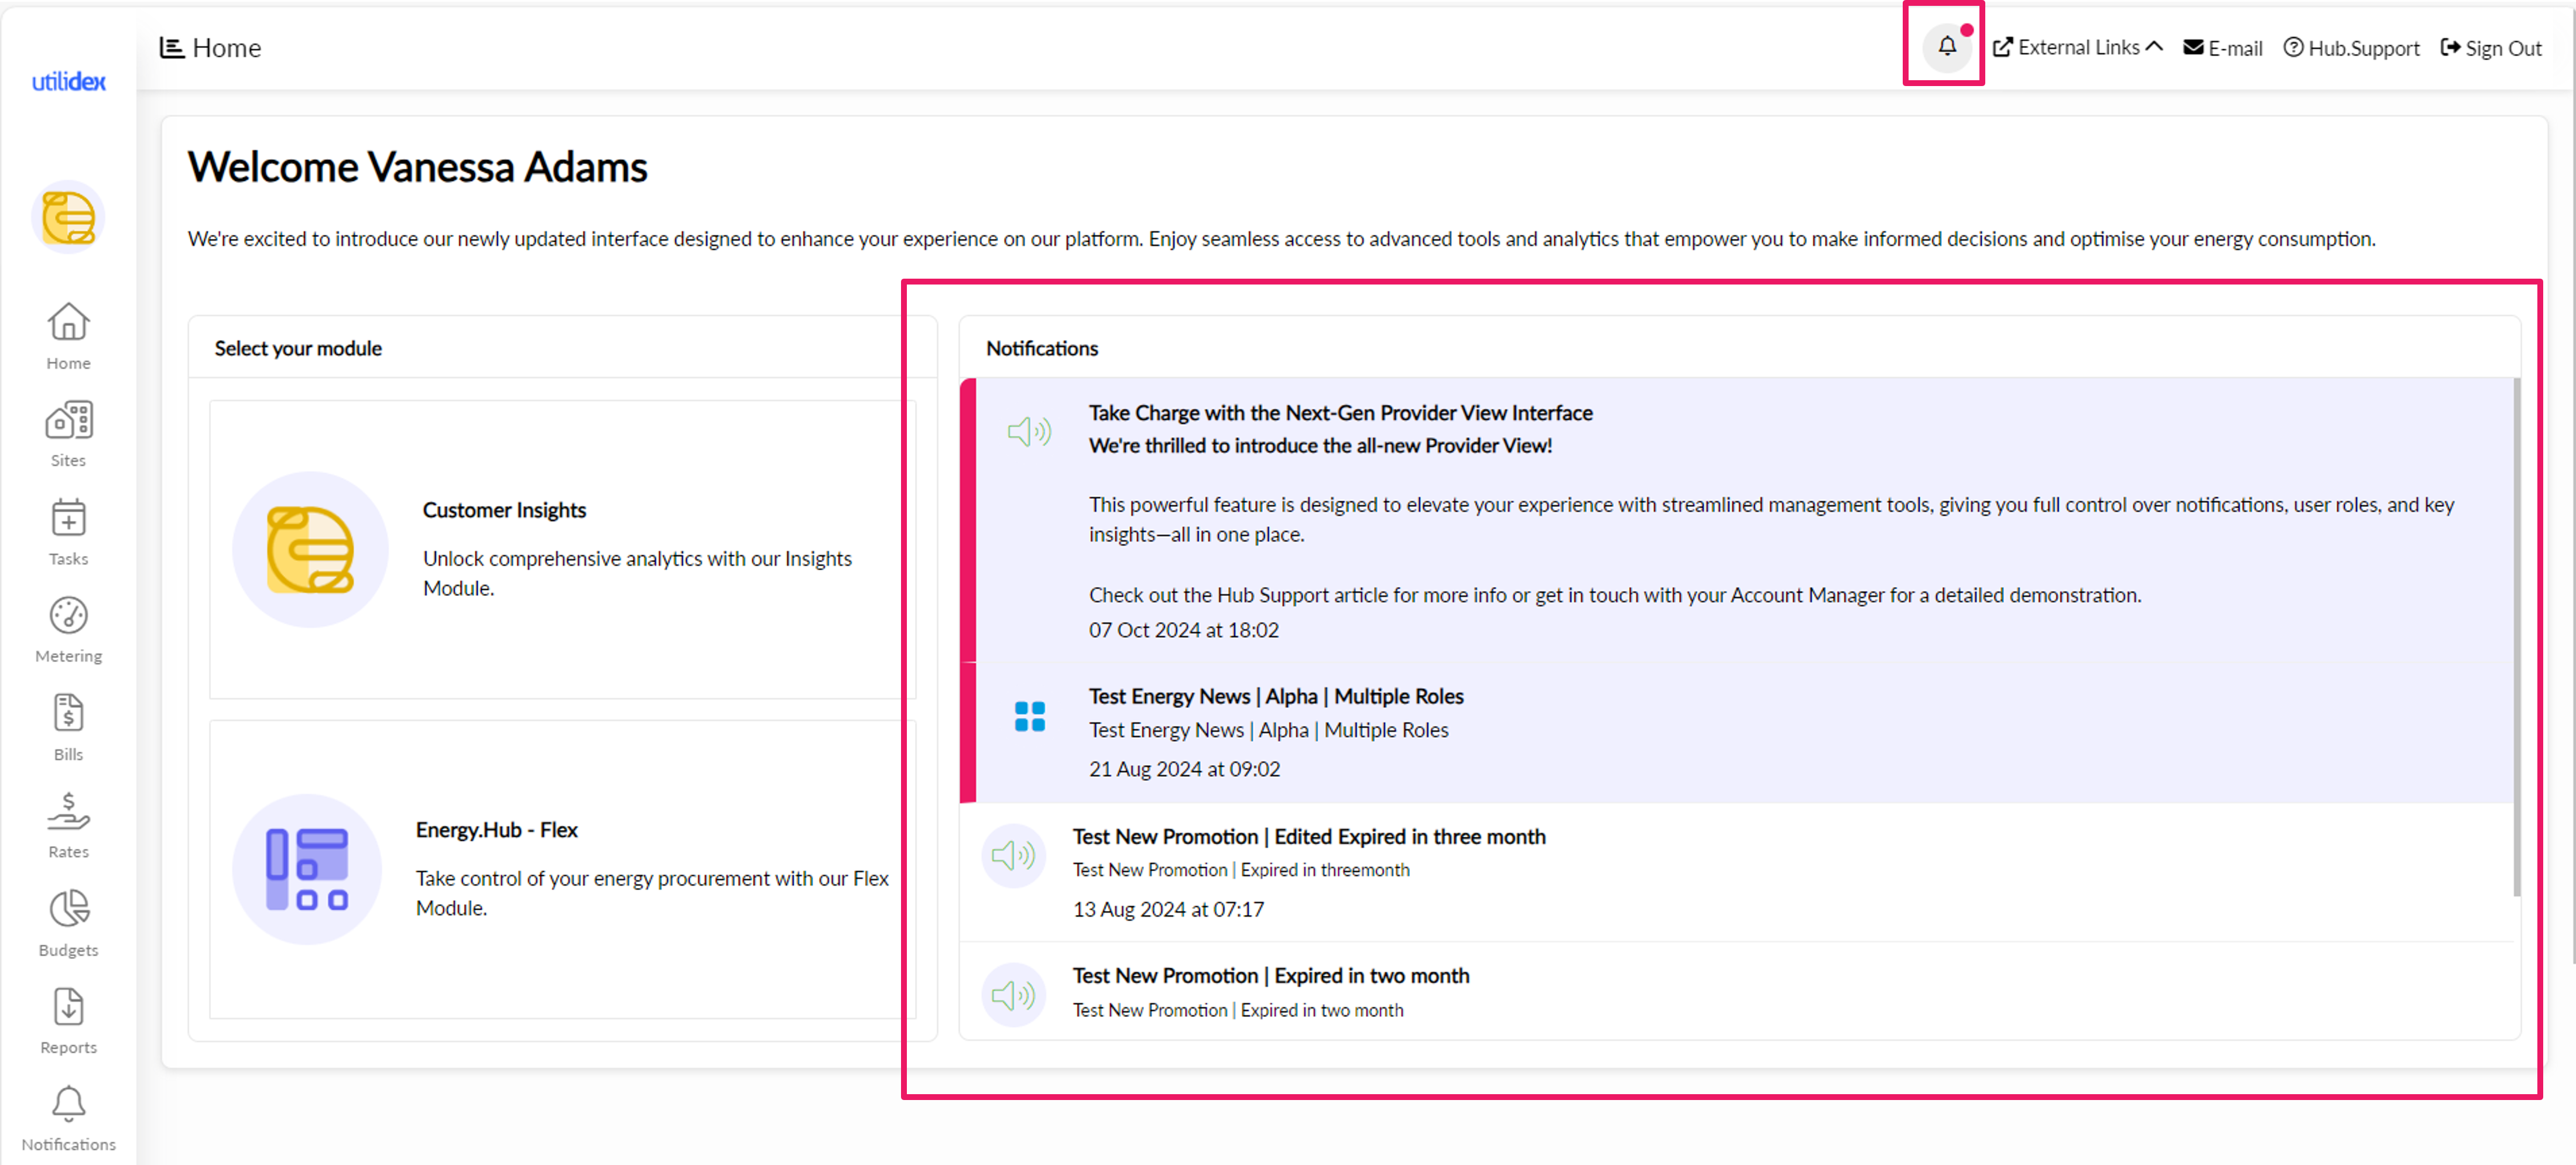
- The landing page is the new default screen users see when they log in. Just click your logo in the top right-hand corner to navigate to it. It displays:
- Unread Notifications: Notifications marked with a red band on the left. Hovering over a notification will change the colour temporarily to indicate it’s been seen.
- Welcome Message: A personalized greeting (e.g., “Welcome, [User’s Name].”).
- Module Selection: Users can switch between different modules (e.g., Customer Insights, Flex).
Switching Modules
- You can change modules by selecting from the available options in the Module Selection dropdown. This changes the left-hand menu but does not alter the core content of the landing page.
Tips & Best Practices for Landing Page
- Regularly check the notifications on the landing page for updates and announcements.
- Use the module selection to quickly navigate between different parts of the platform.
4. Accessing User Management
- Only Admin and Product Administrator roles can access the User Management feature under Settings in the main menu.
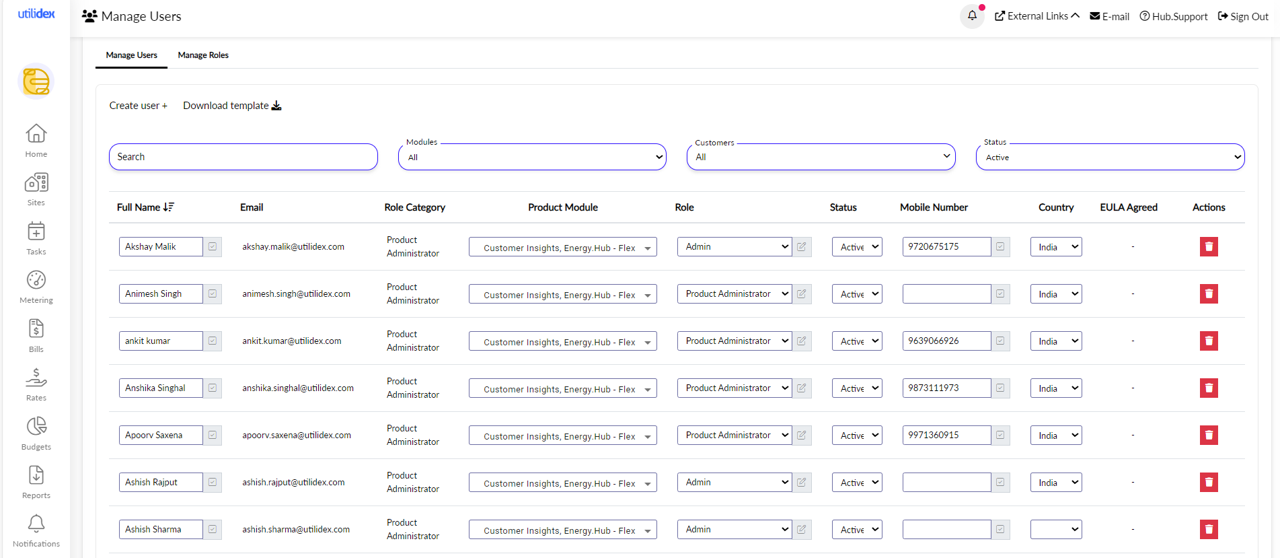
Managing Users
- Creating a User:
- Click the Create User button and fill in the user’s details such as full name, email, role, module(s), country, and phone number.
- Bulk User Upload:
- Download the user template by clicking Download Template, fill in the user data, and re-upload it. If errors are found, the system will display a message to correct them.
Searching and Filtering Users
- Users can be filtered by module (e.g., Customer Insights, Flex), customer names, and active/inactive status. The user list displays details like name, email, role, module, and status.
Managing Roles
- Adding New Roles: Admins can create new roles by clicking Add New Role and choosing a role category (e.g., Admin, Product Administrator). Once the role is created, assign it to a specific module.
- Editing Roles: Admins can control access to specific screens and features for each role by toggling the available options.
Permissions and Visibility
- Admins can control which modules a user has access to. Notifications are shared between the Insights and Flex modules, but users will only see notifications for the module they have access to.
Tips & Best Practices for User Management
- Use role-based access control to manage permissions and maintain security.
- Regularly review user roles and permissions to align with organizational needs.
Troubleshooting & Support
- Common Issues: If a notification does not appear for the intended audience, check the target role and user settings.
- Support: For further assistance, contact the support team at help@utilidex.com.
Glossary of Terms
- Admin: User with elevated privileges to manage notifications and user roles.
- Product Administrator: User responsible for overseeing specific modules.
- Module: Functional area within the platform (e.g., Customer Insights, Flex).
Conclusion
The Provider View offers admins and energy teams a centralized landing page for managing notifications and user roles. Use this guide to navigate and take full advantage of these new features to streamline your workflow and improve operational efficiency.