Upload Bills in the system
The Energy Hub allows you to upload/receive bills in the system in many different ways. These can either be sent directly by the supplier through an automated email and automatically processed by the system, or can be uploaded through the UI.
To manually upload the bills, please navigate to Bills > Data Manager > Import XLS/EDI. Here you will need to click on Configure Template in the top right corner of the screen and then choose any of the available standard templates for power, gas or water. You will need to populate this, and then re-upload through the same screen.
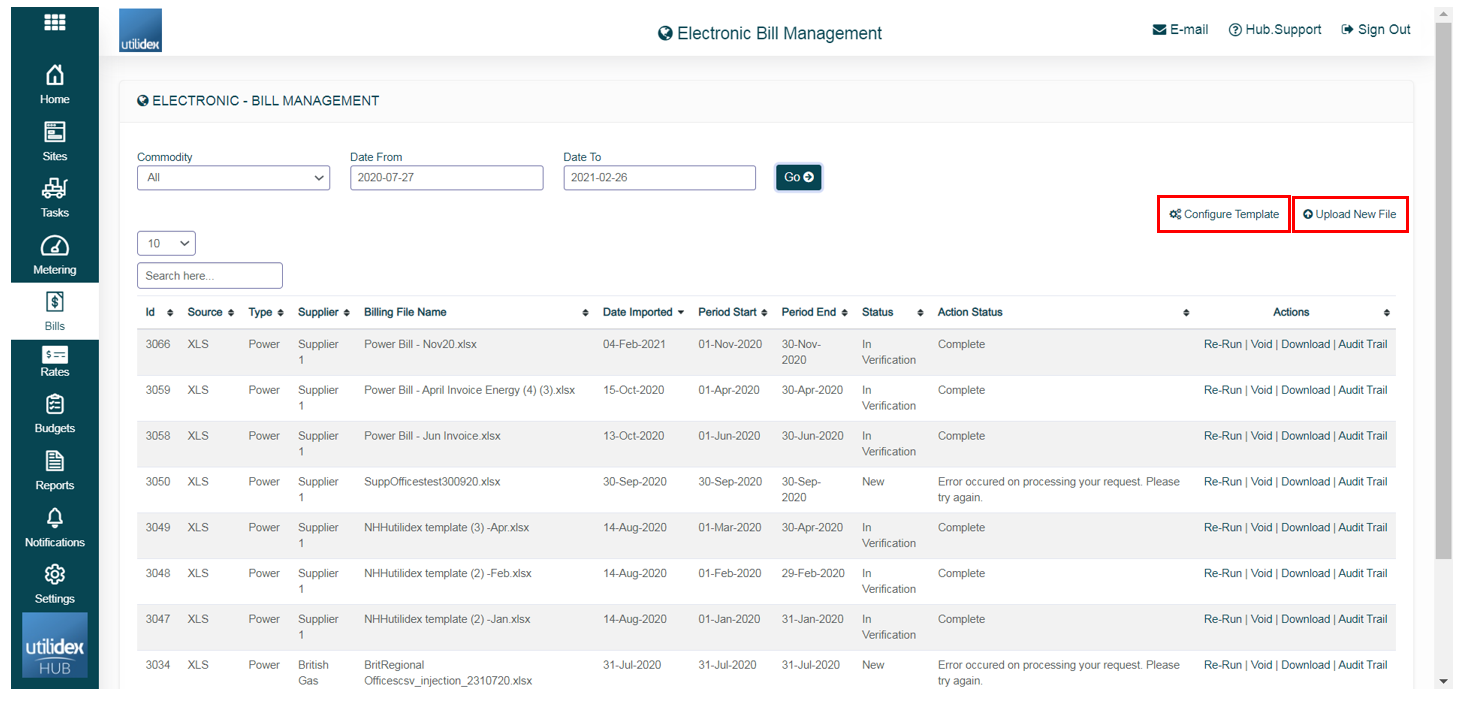
Please note, in this screen, you will also be able to review and download the original bills sent by the supplier or upload by the users.
Bill Validation
You are now ready to validate your bills. Note that when the EDI bill is processed, based on your validation settings, it will assign the invoices to the relevant buckets. The end goal for this process is to identify disputes of real value and raise them with the supplier as queries.
The Energy.Hub validation screen allows you to see information in summary or detail. As mentioned, invoices are allocated to specific buckets. Where there is an issue, you will be able to see it highlighted. Some users choose to have all invoices land in the In-Tray, the user will then have to move the invoices to the appropriate bucket based upon the suggested outcome highlighted by the Hub.
You can choose to view detailed information per invoice and delve into the details before moving any invoices to different buckets. This allows to separate issues you are aware of, from unexpected disputes of value.
Once your bills are uploaded successfully, navigate to Bills >> Validate Bills, here you will find the Billing File Management screen. This screen easily displays all bills that need to be validated and the total amount to dispute.
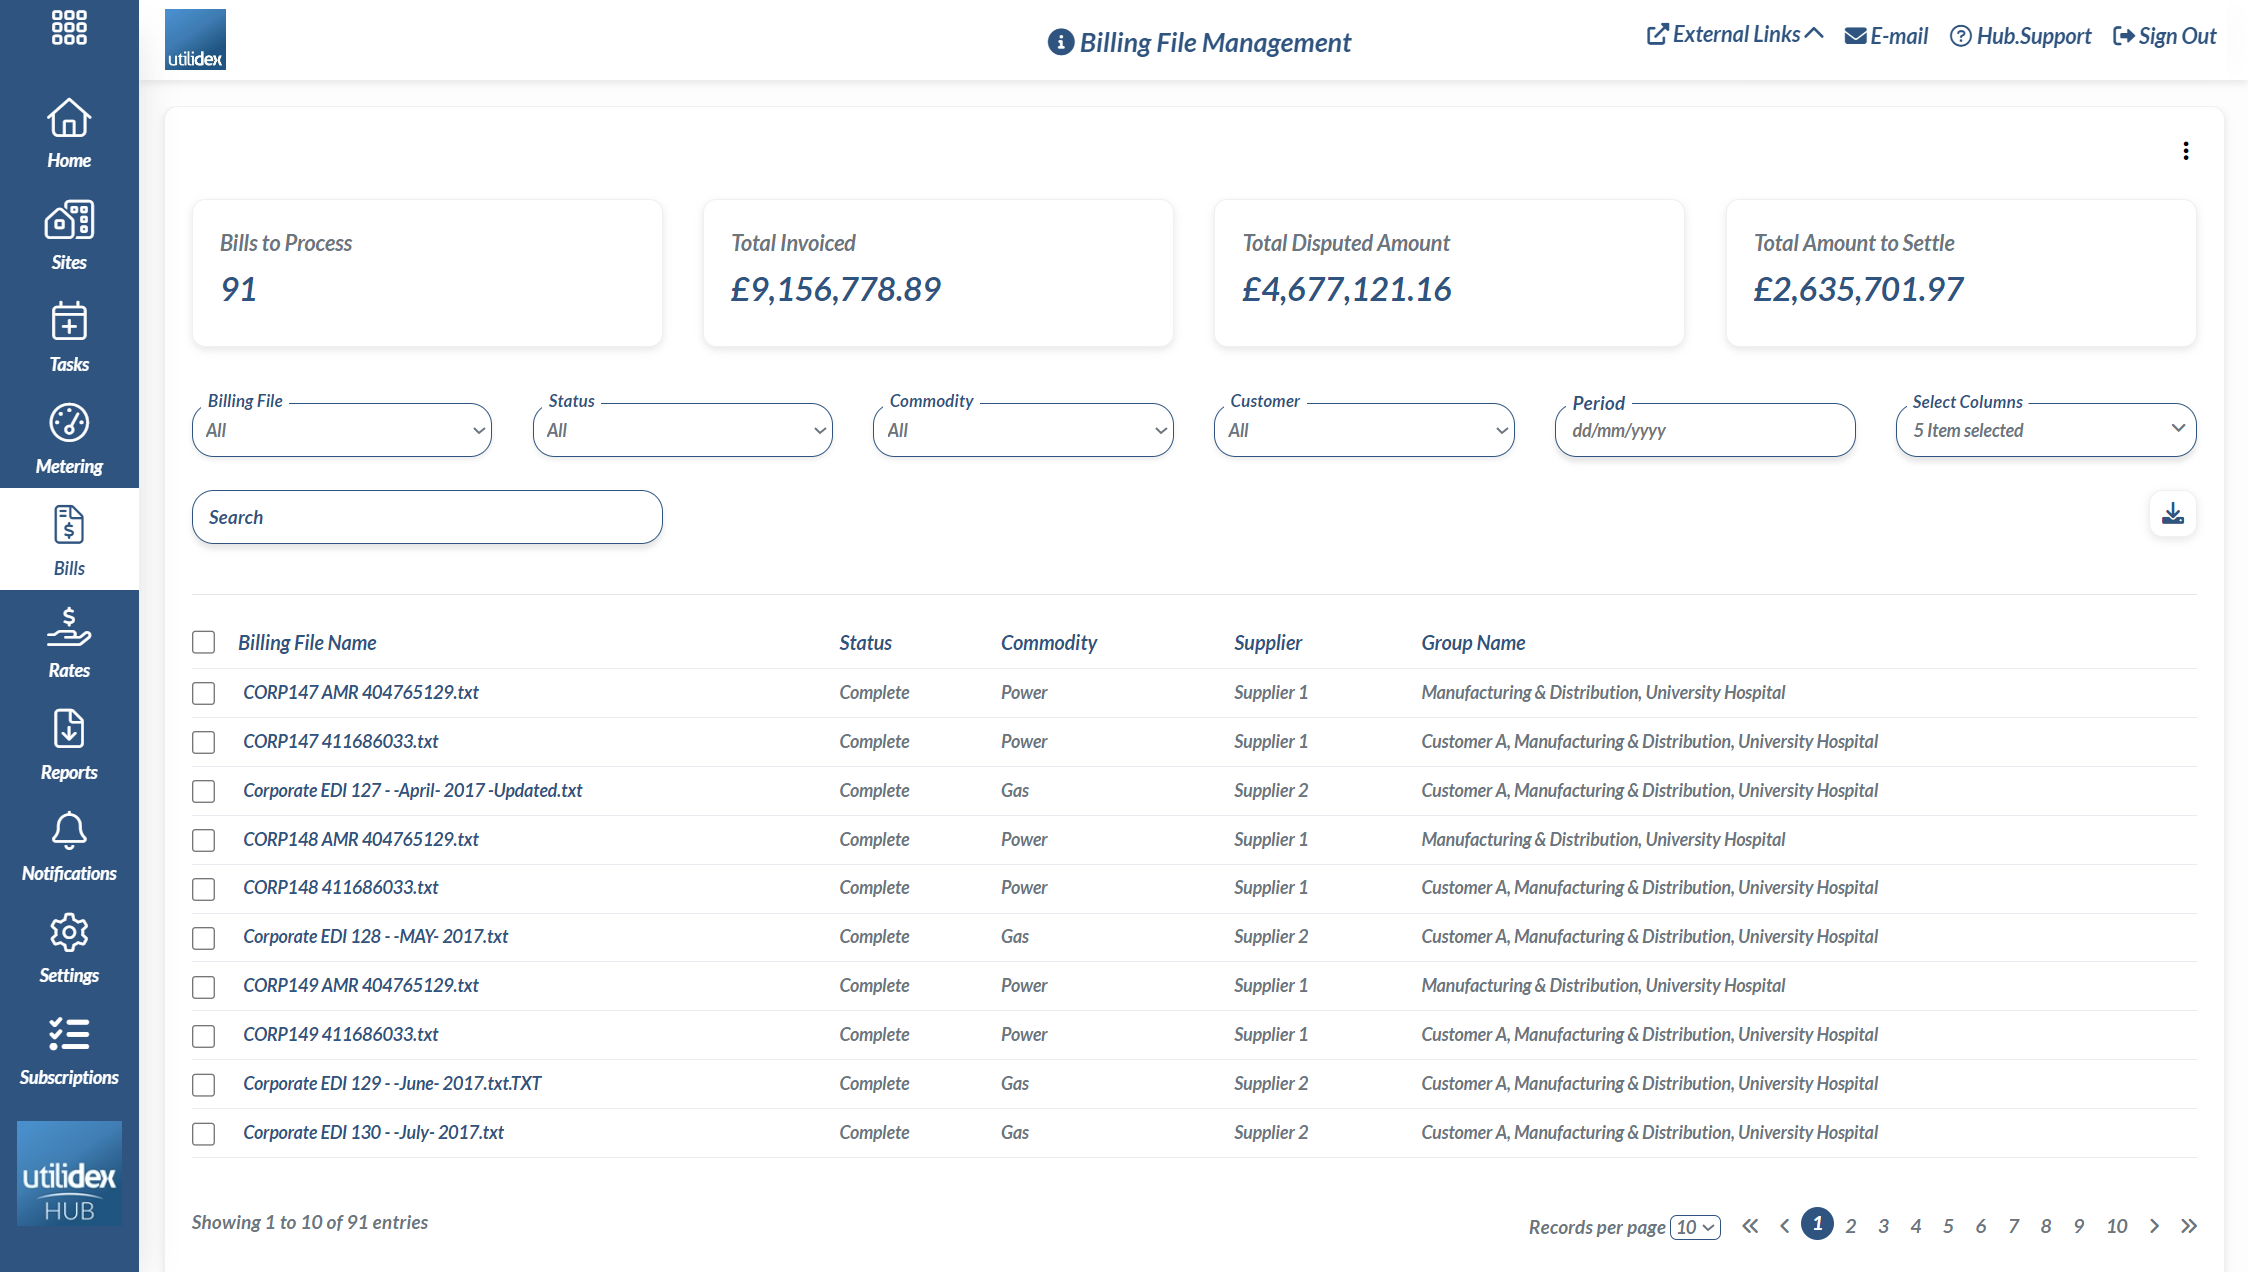
The KPIs on the top of the page display the following:
Bills to Process – All invoices to view dependent on your filtered criteria
Total Invoiced – Depending on what you have filtered by, this will show the total amount of the supplier invoices
Total Disputed Amount – Depending on what you have filtered by, this will show the total amount of disputed bills
Total Amount to Settle – Depending on what you have filtered by, this will show the total amount of bills that have passed validation checks
Validation Screens
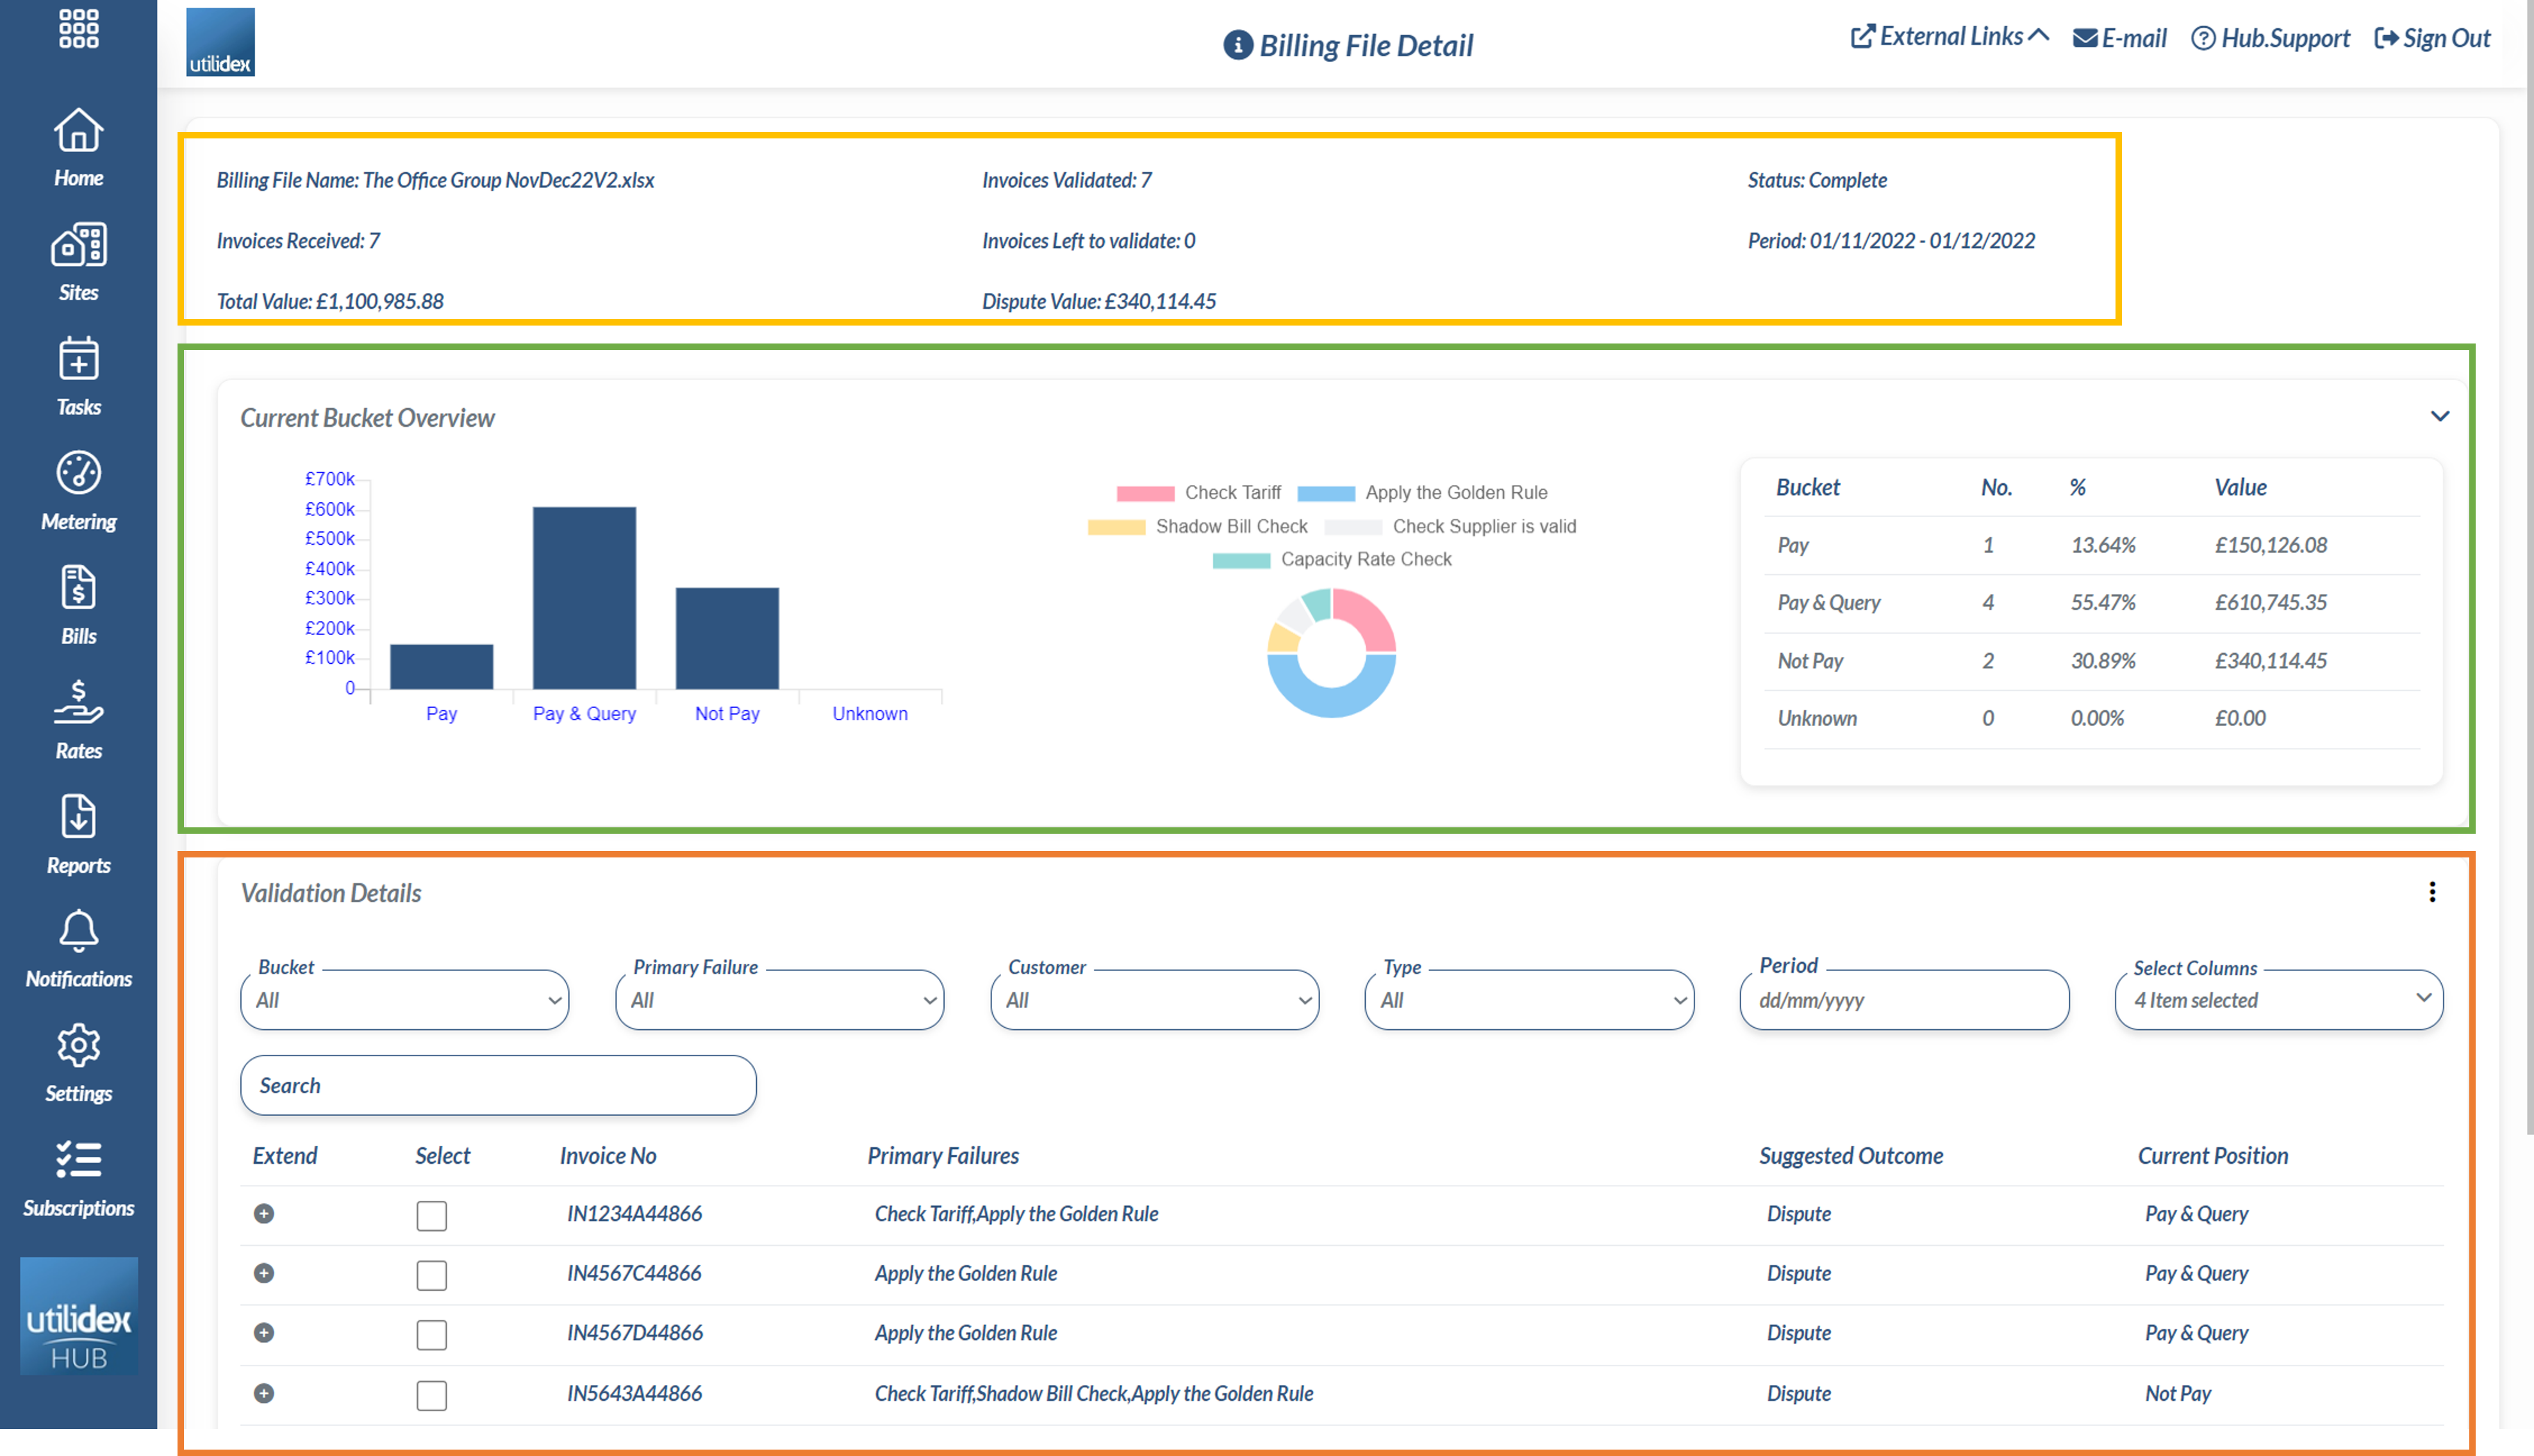
Below is your bill validation screen, once you have selected a bill. Navigate to Bills >> Validate Bills >> Select a Bill. This section introduces some new information, let’s try break it down.
For now, we will focus on 3 main areas of interest:
- General bill details
- Current bucket overview
- Validation details
We will also explain what a shadow bill is, before analysing in detail.
General Bill Details
In this area, the basic details for the bill opened are displayed. A quick glance that provides information on size of the bill, both in terms of invoices and value, as well as the period for which it refers to.
Current Bucket Overview
As previously mentioned, based on the validation settings you choose, the system will allocate each invoice to buckets. The purpose of this is to determine whether the amount in question/dispute is satisfactory before making the bill and queries visible to the supplier. Through this window you can see the total value in each bucket, how many invoices are in each bucket and the percentage breakdown of where the issues are.
Validation Details
Buckets are simply an additional way of breaking down the bill. This provides a closer look on the individual disputes for your entire bill. There are 5 buckets available for you to separate your bills, these are: Pay, Pay & Query, Not Pay (Query), Unknown and All. Please see Setting your Validation Settings for more details on how these buckets are determined.
Depending on the validation checks failed, the primary and secondary failure reasons will appear. This allows you to choose which disputes you want to further investigate. For instance, you may only want to investigate checks regarding tariffs and rates. You will have the ability to filter bucket, primary failure reasons, customer/group, debits/credit, period and with the flexibility to add additional columns to view the information you want to see and delve into the details of only the invoices that need further checking.
What is a Shadow Bill?
A shadow bill is the Hub’s version of what a bill should look like based on the site, meter and pricing data set in the system. As previously established, there can be errors to the supplier’s calculation of your bill. By generating a shadow bill based on expectations and comparing with the actual bill, the Energy.Hub allows for a highly detailed breakdown of all elements of a bill.
